Whiting Kathleen Jasperson - Cabin Fever
Here you can read online Whiting Kathleen Jasperson - Cabin Fever full text of the book (entire story) in english for free. Download pdf and epub, get meaning, cover and reviews about this ebook. year: 2015, publisher: C&T Publishing, genre: Home and family. Description of the work, (preface) as well as reviews are available. Best literature library LitArk.com created for fans of good reading and offers a wide selection of genres:
Romance novel
Science fiction
Adventure
Detective
Science
History
Home and family
Prose
Art
Politics
Computer
Non-fiction
Religion
Business
Children
Humor
Choose a favorite category and find really read worthwhile books. Enjoy immersion in the world of imagination, feel the emotions of the characters or learn something new for yourself, make an fascinating discovery.
- Book:Cabin Fever
- Author:
- Publisher:C&T Publishing
- Genre:
- Year:2015
- Rating:5 / 5
- Favourites:Add to favourites
- Your mark:
Cabin Fever: summary, description and annotation
We offer to read an annotation, description, summary or preface (depends on what the author of the book "Cabin Fever" wrote himself). If you haven't found the necessary information about the book — write in the comments, we will try to find it.
Whiting Kathleen Jasperson: author's other books
Who wrote Cabin Fever? Find out the surname, the name of the author of the book and a list of all author's works by series.


Cabin Fever — read online for free the complete book (whole text) full work
Below is the text of the book, divided by pages. System saving the place of the last page read, allows you to conveniently read the book "Cabin Fever" online for free, without having to search again every time where you left off. Put a bookmark, and you can go to the page where you finished reading at any time.
Font size:
Interval:
Bookmark:
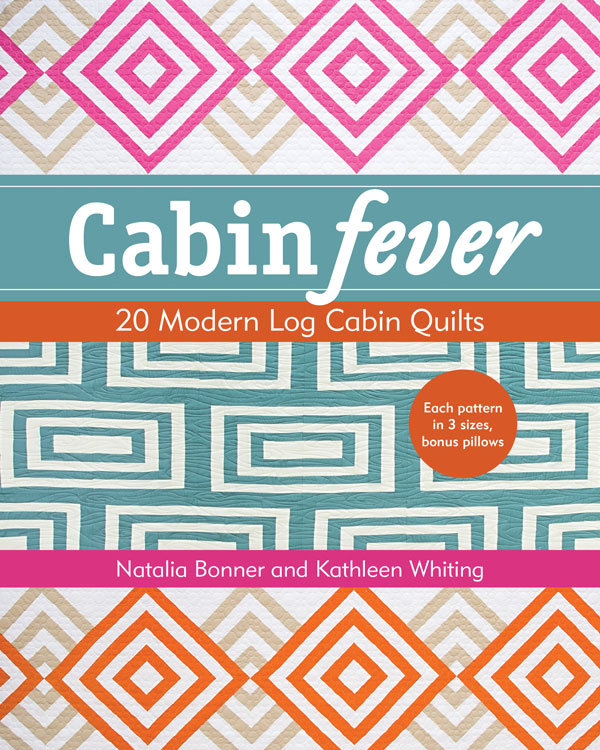
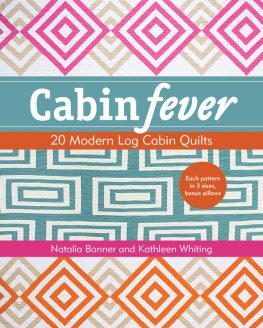
Publisher: Amy Marson Creative Director: Gailen Runge Art Director: Kristy Zacharias Editors: S. Michele Fry and Karla Menaugh Technical Editors: Nan Powell and Sadhana Wray Cover/Book Designer: April Mostek Production Coordinator: Freesia Pearson Blizard Production Editor: Joanna Burgarino Illustrators: Zinnia Heinzmann and Rue Flaherty Photo Assistant: Mary Peyton Peppo Styled photography by Nissa Brehmer and instructional photography by Diane Pedersen, unless otherwise noted Published by Stash Books, an imprint of C&T Publishing, Inc., P.O. Box 1456, Lafayette, CA 94549 Dedication This is for you, our online and local quilting friends and family! Your kind words and support keep us designing and creating beautiful quilts. You give us the desire to work at what we both love. Acknowledgments Brad and John, thanks for letting us do what we love. Special thanks to Moda Fabrics, Art Gallery Fabrics, FreeSpirit Fabrics, Birch Fabrics, and Michael Miller Fabrics, and to your talented fabric designers.
The fabrics you have provided for this book are beautiful and have helped us to create these wonderful quilts. Thank you, Ilene Peterson and Emmy Jasperson. Your help in piecing the quilts in this book was more appreciated than youll ever know. Thank you, C&T Publishing / Stash Books. You have believed in us, and you have made the process great and the ride easy. Introduction  Log Cabin quilts are the most recognized quilts in history.
Just as architecture has changed from the log cabin to the modern home of today, so has quilting. Yet while weve gone from hand quilting to advanced technology, the basics of construction of a Log Cabin block have stayed the same. You start with a strong foundation, or the center block in the Log Cabin block, and then add logs, or strips, to the foundation. Today, colors, size, and shape have changed our home construction as well as our quiltmaking. Early Log Cabin blocks were hand stitched and made on a foundation. The center block was red, which represented the hearth of the home.
The logs, or strips, were then placed in a sequence around the center block. Generally the logs were light and dark fabrics, which represented the sunny and shaded sides of a home. The logs were sometimes made from old clothing. These logs could be added as clothing wore out. The foundation they were sewn onto became the inside of the quilt. Battings were not used.
The quilt tops were tied to a backing to add additional warmth. It is believed that they were tied because the different weights of fabric would have made hand quilting impossible. Today our homes have become more efficient, lighter, and varied in shape and form. And they are stocked with more technology-based items, which makes our day-to-day living a bit easier and brighter. Log Cabin quilts today are made with wonderful fabrics with bold colors and amazing machines with incredible technology. Why not varied shapes and formations, too? We combined these with a little imagination to get twenty quilts that we believe will appeal to the quilters of today.
The quilts have three size options using 12 12 blockscoverlet, throw, and baby. Think of what type of Log Cabin quilt you want to add to your modern home. Then gather your fabrics, notions, and machine, and you will be ready to begin. Sewing basics Snowball Corners Refer to the project instructions for the size of the squares. Lightly draw a diagonal line from a corner to the opposite corner on the wrong side of a smaller square. Place the small square on the corner of a larger square, lining up the outer edges as shown. Sew on the diagonal line from corner to opposite corner on the smaller square.
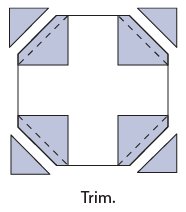
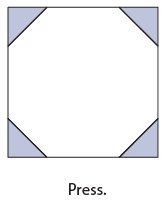
Repeat on all 4 corners. Trim beyond stitching. Press triangles toward the corner. 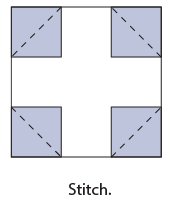
 Half-Square Triangles No-Waste Method Refer to the project instructions for the size of the squares. This method starts with squares that are 7/8 bigger than the desired finished size. It makes 2 blocks at a time. Suppose you want a finished 3 half-square triangle.
Using this method, you would cut 2 squares 37/8 37/8 and follow these steps. With right sides together, pair 2 squares. Lightly draw a diagonal line from a corner to the opposite corner on the wrong side of the top square. Sew a scant seam on each side of the line (Figure A).  Cut on the drawn line (Figure B).
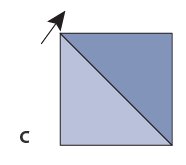
 Strip Piecing Strip piecing is a way to sew multiple units quickly. Strip Piecing Strip piecing is a way to sew multiple units quickly.
Refer to the project instructions for size information. Cut strips into sections as indicated in the pattern. For example, many of the patterns in this book start with sewing two squares together. To make multiple units of these two-patch blocks, follow these steps: Cut the strips as directed in the pattern. Place the strips right sides together and sew a seam along a long side. Press the seam toward the darker fabric.
Cut the strips into two-patch sections as directed in the pattern. 
 Finishing the Quilt Backing Plan on making the backing a minimum of 8 longer and wider than the quilt top. Piece, if necessary. Trim the selvages before you piece to the desired size. To economize, piece the back from any leftover quilting fabrics or blocks in your collection. Batting The type of batting to use is a personal decision; consult your local quilt shop.
Cut batting approximately 8 longer and wider than the quilt top. Note that your batting choice will affect how much quilting is necessary for the quilt. Check the manufacturers instructions to see how far apart the quilting lines can be. Layering If you are taking your quilt to a longarm quilter, you dont need to layer or baste it. Spread the backing wrong side up and tape the edges down with masking tape. (If you are working on carpet you can use T-pins to secure the backing to the carpet.) Center the batting on top, smoothing out any folds.
Place the quilt top right side up on top of the batting and backing, making sure it is centered. Basting Basting keeps the quilt sandwich layers from shifting while you are quilting. If you plan to machine quilt on your domestic machine, pin baste the quilt layers together with safety pins placed about 34 apart. Begin pin basting in the center and move toward the edges, first in vertical and then in horizontal rows. Try not to pin directly on the intended quilting lines. If you plan to hand quilt, baste the layers together with thread using a long needle and light-colored thread.
Next pageFont size:
Interval:
Bookmark:
Similar books «Cabin Fever»
Look at similar books to Cabin Fever. We have selected literature similar in name and meaning in the hope of providing readers with more options to find new, interesting, not yet read works.
Discussion, reviews of the book Cabin Fever and just readers' own opinions. Leave your comments, write what you think about the work, its meaning or the main characters. Specify what exactly you liked and what you didn't like, and why you think so.