Publisher: Amy Barrett-Daffin
Creative Director: Gailen Runge
Acquisitions Editor: Roxane Cerda
Managing/Developmental Editor: Liz Aneloski
Technical Editor: Helen Frost
Cover/Book Designer: Kerry Graham
Production Coordinator: Tim Manibusan
Production Editor: Jennifer Warren
Illustrator: Kirstie L. Pettersen
Photo Assistant: Gregory Ligman
Gallery photography by Brian Haggard; subjects photography by Estefany Gonzalez of C&T Publishing, Inc.
Published by C&T Publishing, Inc., P.O. Box 1456, Lafayette, CA 94549
Foreword
People have always had an interest in the flowers and plants seen in botanical illustrations and the preserved botanical specimens that have been collected since 1512 A.D. While I was in Florence recently, I stayed in a flat with 400-year-old frescoes on the walls. In the hallway to the bedroom were amazing botanicals pressed under glass. I loved the lacy, ethereal look of the plants with their angel-like delicacy. I was so taken by them that I photographed each one individually, knowing that I would return home to embroider them and create my own collection. See the fire screen in the gallery for my version of one of the botanical designs from Florence.
I have provided you with instructions to make the projects as I did; however, I created this pattern pack with the idea that you might use the transfers for your own projects, as well. See the gallery for other ideas.
Brians Notes

Fabric and Iron-On Prep
My preferred method is to stabilize the fabric area that will be embroidered with Pellons SF101 Shape-Flex fusible interfacing, which allows me to work without a hoop. If you prefer working with an embroidery hoop, you dont need to stabilize your fabric. I also prefer to serge or overcast stitch around the edges of the fabric to prevent it from warping or fraying.
This pattern pack includes iron-on transfer sheets to make it easy to transfer the designs onto your fabric. Choose and cut out one of the patterns from the iron-on sheet, leaving a (6 mm) border around the pattern. Note that the patterns appear in reverse of what they will be on your fabric.
The patterns for the Japanese ribbon stitch and the lazy daisy stitch are shown with simple lines and dots instead of an outline of the stitch to make those stitch patterns easier to cover with thread.
With your fabric right side up, press to remove any wrinkles. Place the transfer on the fabric, right sides together. Press using a dry iron on high heat; do not glide your iron across the fabric, as this can cause the transfer to blur. Be sure you have selected the right setting on your iron for the fabric you are using so you dont scorch it. Once you have pressed the entire transfer, carefully lift the iron off the paper, but do not lift the paper off the fabric yet.
When the transfer and fabric are cool enough to handle, hold the transfer in place and lift the edges and corners to ensure that the pattern successfully transferred onto your fabric. If it has not, carefully lay the transfer back down and press again for a few more seconds. If you continue to have difficulty transferring the pattern to your fabric, use some steam.
Do not apply the iron to the transferred design without the transfer sheet in place, as the heat will cause the transfer to fade. Once the embroidery is complete, you may wish to press the pattern to fade the ink that may show. The transfer ink will also fade with washing.
Brians Designed Variegation (BDV)
I have been asked many times how I get such a natural look when I stitch flowers and foliage. I was a florist for 22 years and became intimately familiar with the colors of flowers and foliage. I always strive to get a more naturally organic look. Now Im going to share my secret!
Keep the following in mind as you make your thread choices when stitching each flower, foliage, and stem:
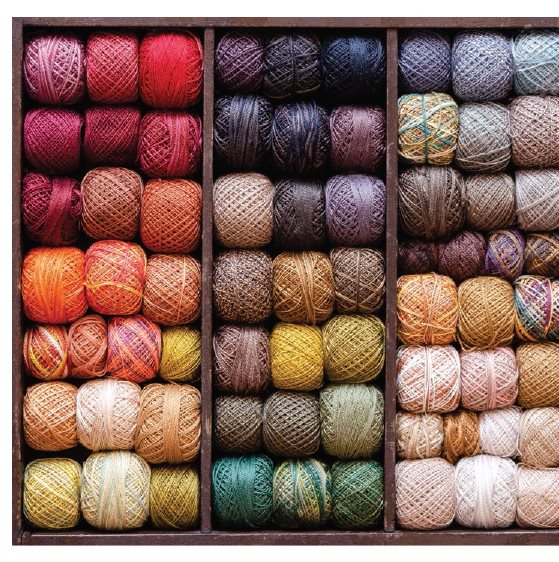
Solid-color thread provides a consistent, saturated color.
Variegated thread is a consistent pattern of saturated colors.
Hand-dyed threads provide blended colors that soften the transition from color to color, like a watercolor painting.
Brians Designed Variegation (BDV) is the technique I use to make the most of these types of threads. For example, when I start at the top of any stem or branch, I tend to start with a lighter shade for new growth, changing to a medium shade as I progress; then I use the darkest shade to represent the oldest growth. In other words, I am using thread intentionally to represent the natural flower and to simulate the natural color variations of living plants.
Once I tie off a particular color of thread, I purposefully pick up another shade of the same color. If this seems haphazard, you will be surprised to find that the colors blend very naturally once you see the overall picture you have created.
Stitching the Botanical
Designs and Insects
Astilbe
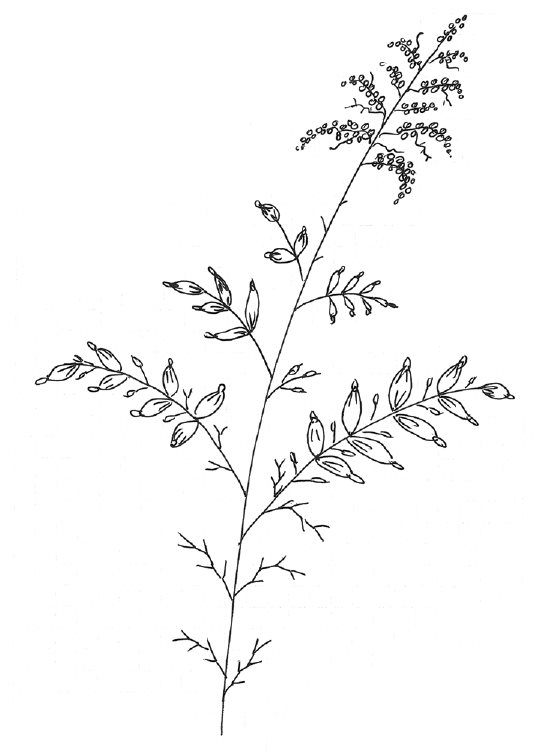
This beautiful blossom is also known as goats beard.
Starting at the tip, create the main stem with an elongated featherstitch, alternating from side to side. Create the shorter stems in the same way, from the tip to the main stem.
To create the foliage, use the Japanese ribbon stitch. Begin at the tip of the frond with #7 silk ribbon (you may also want to try #4, which would create a smaller-scale frond) and work toward the base, making sure you duplicate the angles that are implied by the lines and dots on the simplified pattern. Be sure to work from left to right (right-handers) or right to left (left-handers) on each pair of fronds to ensure consistent frond size and angle.
Create the new shoots with a single lazy daisy stitch on the tip of the featherstitches.
Finish with French knots, making progressively larger sizes by adding more wraps around the needle and using BDV.
Fiddle Fern
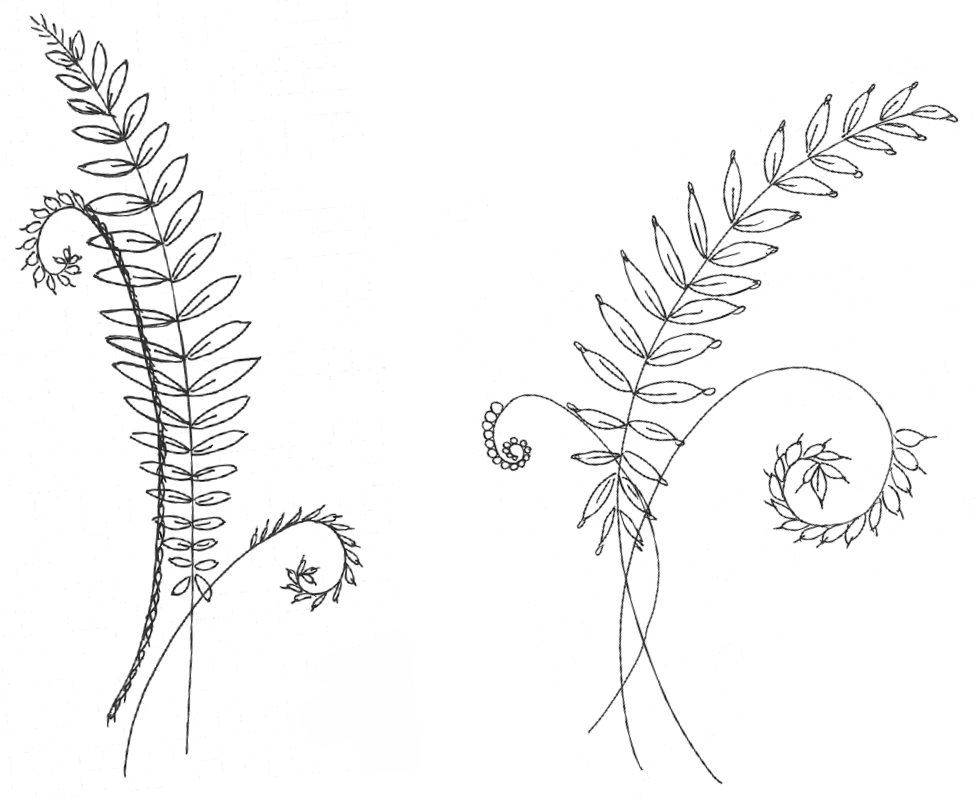
Did you know that the furled fronds of a young fiddle fern are harvested and eaten as a vegetable?
This is one of my favorite ferns, especially stitched with silk ribbon. You will approach this stitching a little differently, since you will not stitch the stem first. Use the Japanese ribbon stitch and #7 silk ribbon (you may also want to try #4, which would create a smaller-scale frond). Begin at the tip of the fern and work toward the base, making sure you duplicate the angles that are implied by the lines and dots on the simplified pattern. Also be sure to work consistently from left to right (right-handers) or right to left (left-handers) on each pair of fronds to ensure a consistent frond size and angle.
Use the backstitch for the stem; work from the tip to the base of the stem and use only one stitch between frond pairs. Tie off your thread. Start at the tip of the fern and make one stab stitch on each frond from the stem to the middle of the frond.
Starting at the base of the larger fiddle fern, use the chain stitch to cover the stem. Tie off and begin at the base again with a second color of thread using the whipped chain stitch.
Next page
![Kozue Yazawa [矢澤こずえ] - Blue & White Embroidery: Elegant Projects Using Classic Motifs and Colors](/uploads/posts/book/319389/thumbs/kozue-yazawa-blue-white.jpg)
