If you are an Annies customer and have a question about the instructions on a pattern you have purchased, please visit: AnniesCatalog.com/pages/customer_care/pattern_services.html
To download templates for easy printing, view the download instructions at the end of this book or click the Templates chapter in the Table of Contents.
is the perfect solution to every quilters dilemma: that basket of scraps. You know the one; it always seems to grow rather than getting smaller or going away. This book holds the solution: pincushions are small, very useful and a great stash-buster. Imagine all the beautiful pincushions you can make with those gorgeous fabrics youve been tucking away. Our designers have outdone themselves again.
Every consideration was addressed when it came to skill levels, styles and colors. Theres truly something for everyone. There are 14 pincushion patterns, some with options, and three beautiful needlebook patterns as a bonus. There comes a time in every quilters life when the need to make something small is desirable. There are times when you need just a little something to fill an afternoon or perhaps you need a take-along project to have ready when the occasion arises. If you have this book in your sewing room youve got the patterns and inspiration for those small projects at your fingertips.
You can make a fun colorful pincushion for any time of year by simply changing out the fabrics.
Materials
Scraps white print and yellow dot Thread Monofilament Quilting thread Long needle Polyester fiberfill 1 () cover button kit 1 () flat 2-hole button Basic sewing supplies and equipment
Project Notes
Read all instructions before beginning this project. Stitch right sides together using a seam allowance unless otherwise specified. Refer to Placement Diagram and project photo for positioning of embellishments.
From yellow dot:
Cut 1 (6) B square.
From yellow dot:
Cut 1 (6) B square.
Cut 1 circle according to manufacturers instructions for cover button.
Completing the Pincushion
With right sides together, sew A and B squares around all sides as shown in , leaving a 2 opening on one side.
 Figure 1
 Referring to to box the corners, separate layers at one corner and reposition to nest the seams; press seams open. Trim in from the corner.
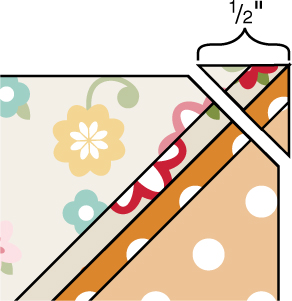 Figure 2
 Stitch corner closed from trimmed edge as shown in .
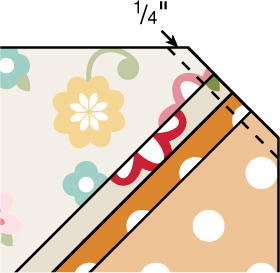 Figure 3
 Repeat steps 2 and 3 on remaining three corners of the pincushion.
Turn pincushion right side out through opening and stuff with fiberfill to desired firmness. Turn edges under and hand-stitch opening closed using monofilament. Cover button referring to manufacturers instructions. Using a long needle double-threaded with quilting thread, anchor thread to the bottom of the pincushion with a few stitches. Insert needle into flat button, then bring needle through the pincushion coming out the top center. Add cover button and bring needle back through pincushion to the flat button, going through opposite buttonhole.
Repeat a few times, pulling thread so top button is tightly nestled into pincushion. Wrap thread twice around flat button to secure, take a stitch under it, knot and cut thread to complete the pincushion. 
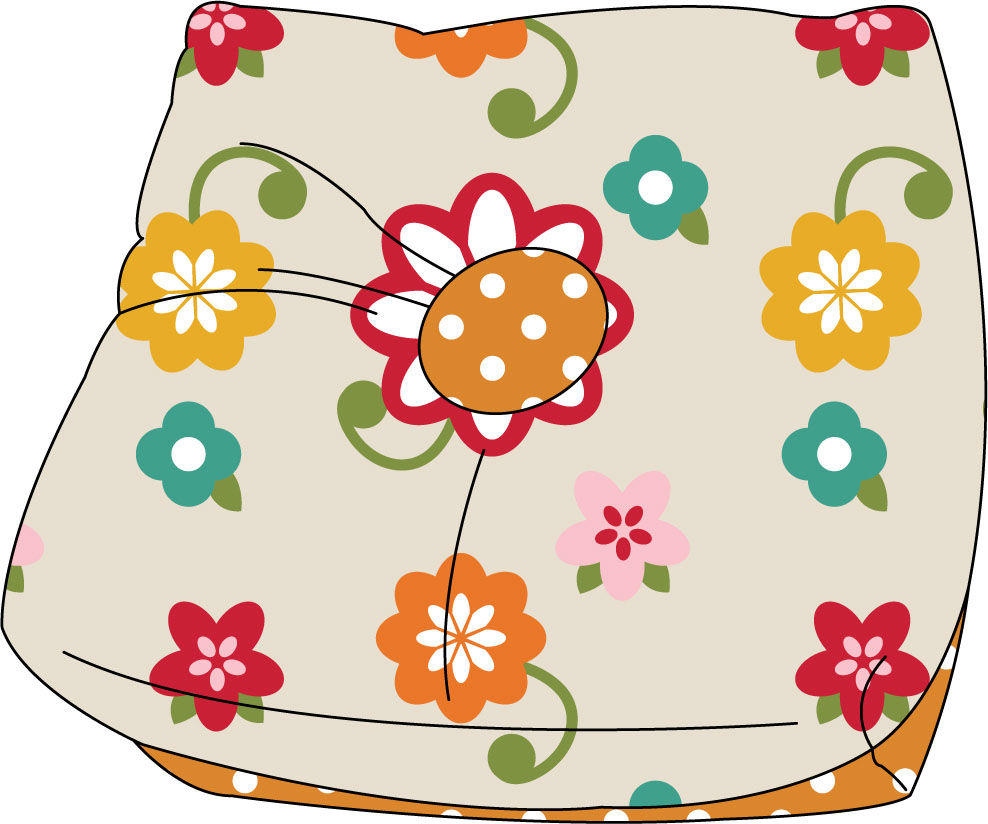 Seasonal Square Pincushion
Placement Diagram 4 4 1
Biscornu (pronounced biss-core-new or bee-ss-corn-uh) is a French word used to describe an eight-sided pillow. This technique makes adorable pincushions, and its easier than it looks!
Designs by Bea Lee

Skill Level
Confident Beginner
Finished Sizes
Gentlemans Fancy Biscornu: 4 4 2 Block Size: 6 6 finished Number of Blocks: 2 Batik Biscornu: 3 3 1 Block Size: 4 4 finished Number of Blocks: 2
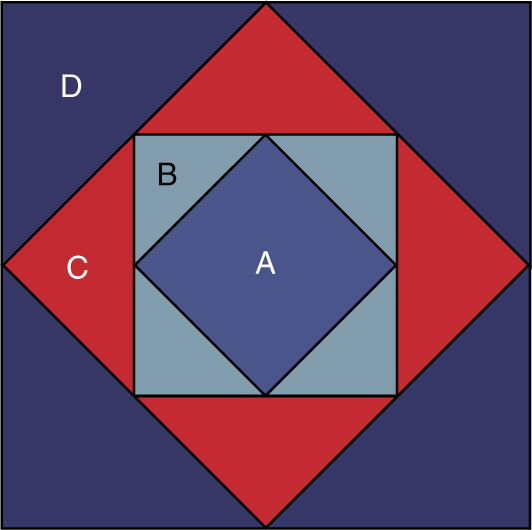 Gentlemans Fancy
 6 6 Finished Block Make 2
Project Notes
Read all instructions before beginning this project. Stitch right sides together using a seam allowance unless otherwise specified.
Gentlemans Fancy Biscornu

Materials
Scraps 1 each light, medium and dark blue tonals or prints, and 1 red print Thread Embroidery floss Embroidery needle Crushed walnut shells 1 (1) decorative button Basic sewing supplies and equipment
Cutting
From medium blue scrap:
Cut 2 (2) A squares.
From light blue scrap:
Cut 4 (2) squares.
From light blue scrap:
Cut 4 (2) squares.
Subcut each square in half on 1 diagonal to make 8 B triangles.
From dark blue scrap:
Cut 4 (3) squares. Subcut each square in half on 1 diagonal to make 8 D triangles.
From red print:
Cut 4 (3) squares. Subcut each square in half on 1 diagonal to make 8 C triangles.
 Figure 1
 Referring to b); press.
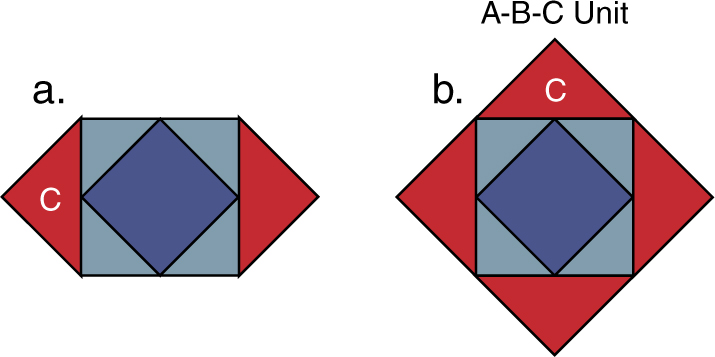 Figure 2
 In the same manner as previous steps and referring to , stitch D triangles to all four sides of the A-B-C unit to complete one Gentlemans Fancy block; press.
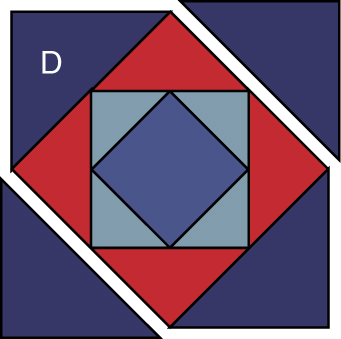 Figure 3
 Repeat steps 13 to make a second Gentlemans Fancy block.

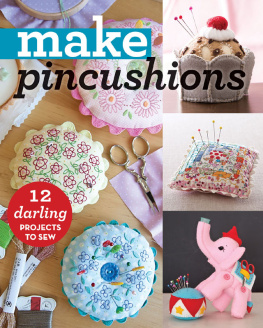

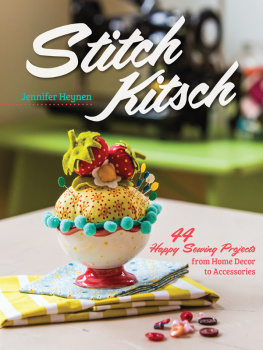


 Figure 1 Referring to to box the corners, separate layers at one corner and reposition to nest the seams; press seams open. Trim in from the corner.
  Figure 2 Stitch corner closed from trimmed edge as shown in .
  Figure 3 Repeat steps 2 and 3 on remaining three corners of the pincushion.
 Seasonal Square Pincushion
 Gentlemans Fancy
 Figure 1 Referring to b); press.
  Figure 2 In the same manner as previous steps and referring to , stitch D triangles to all four sides of the A-B-C unit to complete one Gentlemans Fancy block; press.
  Figure 3 Repeat steps 13 to make a second Gentlemans Fancy block.