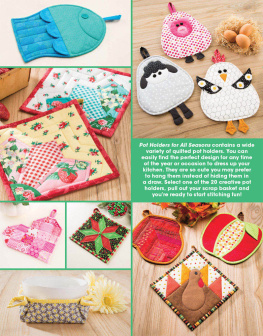
Introduction If the words pot holders bring to mind a drawerful of thick grubby rags, then you need to try some of these fun pot holder patterns! They are quick and easy projects that are decorative but practical too. They can be personalized with your favorite fabrics and colors, and they make great gifts. This book offers 20 different patterns that cover a year of seasons and holidays. Several are based on traditional quilt-block patterns, some are pieced and some appliqud. I hope you enjoy making these quick projects to spruce up your kitchen all year round! Meet the Designer

Chris Malone has been sewing and crafting most of her life. As an accomplished sewist, quilter and designer, she has had hundreds of designs published in sewing and quilting publications and has authored several books of her own.
She is a regular contributor to Quilters World magazine and Annies quilting and sewing book titles. Chris whimsical style has been a favorite of many quilters and sewists, and is easily recognizable at a glance. Chris resides in the diverse and beautiful Willamette Valley of Oregon. Table of Contents General Information
Table of Contents
Guide
Pages
General Instructions The 20 pot holder designs in this book are all easy and fun projects that require a minimum of materials. Here are a few tips on the supplies you will need, general assembly instructions and finishing tips you may find helpful.
Basic Tools & Supplies Scissors for paper and fabric Rotary cutter, ruler and mat (optional) Nonpermanent (water- and/or air-soluble) fabric-marking tools Template material Sewing machine Walking or even-feed foot (optional) Hand-sewing needles Straight pins and pincushion Binding clips (optional) Seam ripper Steam/dry iron and ironing surface
Fabric Use all-cotton fabrics for the projects in this book.
Synthetic fabrics such as polyester and nylon can melt and burn easily. The fabric yardage requirements are smallthese pot holders are a great way to use up scraps and fat quarters. Batting Layers of both 100 percent cotton batting and needle-punched insulated batting are used in most of the projects in this book. The cotton batting is soft and dense and wont melt from high heat. The insulated batting is added to reflect the heat back to the source. Do not add this batting to anything you will be using in the microwave. Substitute a second layer of cotton batting in place of the insulated batting if you wish to use your pot holder in the microwave. Walking or Even-Feed Foot This sewing-machine foot is useful because a pot holder has multiple layers. Walking or Even-Feed Foot This sewing-machine foot is useful because a pot holder has multiple layers.
Known as a walking or even-feed foot, it feeds the upper and lower layers of fabric and batting through the machine at the same rate to prevent wrinkles and folds. General Assembly Instructions Read all instructions carefully before beginning each project. All seams are " unless otherwise directed. The finished measurements given for each project include the outer seam allowance. Press each seam as you sew. Appliqu Many of the pot holders are made with appliqus using fusible web with paper release and a machine blanket stitch to finish the raw edges.
Refer to Raw-Edge Fusible Appliqu for specifics. Other appliqu methods may be substituted if desired. All of the appliqu patterns are reversed so they will face the correct direction when fused to the background. When appliqus overlap, slip the edge of one under the other before fusing. To add dimension to appliqu pieces, use the padded appliqu method, a technique in which batting is sewn into the appliqu shape.
Raw-Edge Fusible Appliqu One of the easiest ways to appliqu is the raw-edge fusible-web method.
Raw-Edge Fusible Appliqu One of the easiest ways to appliqu is the raw-edge fusible-web method.
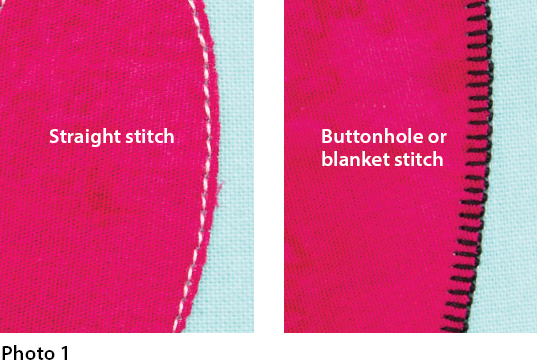
Paper-backed fusible web individual pieces are fused to the wrong side of specified fabrics, cut out and then fused together in a motif or individually to a foundation fabric, where they are machine-stitched in place. Choosing Appliqu Fabrics Depending on the appliqu, you may want to consider using batiks. Batik is a much tighter weave and, because of the manufacturing process, does not fray. If you are thinking about using regular quilting cottons, be sure to stitch your raw-edge appliqus with blanket/buttonhole stitches instead of a straight stitch. Cutting Appliqu Pieces Fusible appliqu shapes should be reversed for this technique. Trace the appliqu shapes onto the paper side of paper-backed fusible web.
Leave at least " between shapes. Cut out shapes leaving a margin around traced lines. Note: If doing several identical appliqus, trace reversed shapes onto template material to make reusable templates for tracing shapes onto the fusible web. Follow manufacturers instructions and fuse shapes to wrong side of fabric as indicated on pattern for color and number to cut. Cut out appliqu shapes on traced lines. Remove paper backing from shapes. Again following fusible web manufacturers instructions, arrange and fuse pieces to quilt referring to quilt pattern.
Or fuse together shapes on top of an appliqu ironing mat to make an appliqu motif that can then be fused to the quilt. Stitching Appliqu Edges Machine-stitch appliqu edges to secure the appliqus in place and help finish the raw edges with matching or invisible thread (Photo 1). Note:To show stitching, all samples have been stitched with contrasting thread.
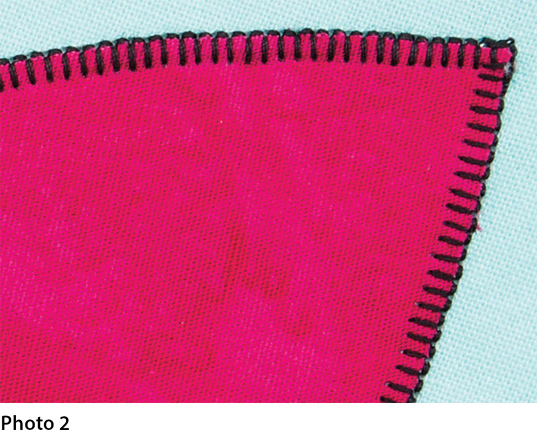
 Invisible thread can be used to stitch appliqus down when using the blanket or straight stitches. Do not use it for the satin stitch. Definitely practice with invisible thread before using it on your quilt; it can sometimes be difficult to work with. A short, narrow buttonhole or blanket stitch is most commonly used (Photo 2).
Your machine manual may also refer to this as an appliqu stitch. Be sure to stitch next to the appliqu edge with the stitch catching the appliqu. 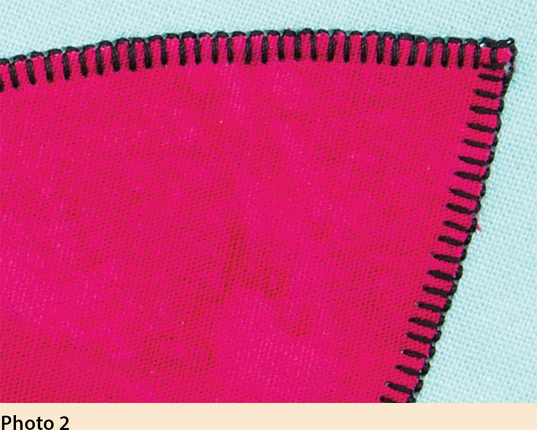
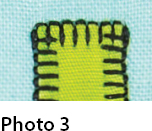
 Practice turning inside and outside corners on scrap fabric before stitching appliqu pieces. Learn how your machine stitches so that you can make the pivot points smooth. To stitch outer corners, stitch to the edge of the corner and stop with needle in the fabric at the corner point. Pivot to the next side of the corner and continue to sew (Photo 3).
You will get a box on an outside corner. 





 Chris Malone has been sewing and crafting most of her life. As an accomplished sewist, quilter and designer, she has had hundreds of designs published in sewing and quilting publications and has authored several books of her own.
 Invisible thread can be used to stitch appliqus down when using the blanket or straight stitches. Do not use it for the satin stitch. Definitely practice with invisible thread before using it on your quilt; it can sometimes be difficult to work with. A short, narrow buttonhole or blanket stitch is most commonly used (Photo 2).
 Practice turning inside and outside corners on scrap fabric before stitching appliqu pieces. Learn how your machine stitches so that you can make the pivot points smooth. To stitch outer corners, stitch to the edge of the corner and stop with needle in the fabric at the corner point. Pivot to the next side of the corner and continue to sew (Photo 3).
