Wayne Lennox - Classic Outhouse: Full plans for the ultimate outdoor throne
Here you can read online Wayne Lennox - Classic Outhouse: Full plans for the ultimate outdoor throne full text of the book (entire story) in english for free. Download pdf and epub, get meaning, cover and reviews about this ebook. year: 2013, publisher: Cottage Life, genre: Home and family. Description of the work, (preface) as well as reviews are available. Best literature library LitArk.com created for fans of good reading and offers a wide selection of genres:
Romance novel
Science fiction
Adventure
Detective
Science
History
Home and family
Prose
Art
Politics
Computer
Non-fiction
Religion
Business
Children
Humor
Choose a favorite category and find really read worthwhile books. Enjoy immersion in the world of imagination, feel the emotions of the characters or learn something new for yourself, make an fascinating discovery.

- Book:Classic Outhouse: Full plans for the ultimate outdoor throne
- Author:
- Publisher:Cottage Life
- Genre:
- Year:2013
- Rating:5 / 5
- Favourites:Add to favourites
- Your mark:
Classic Outhouse: Full plans for the ultimate outdoor throne: summary, description and annotation
We offer to read an annotation, description, summary or preface (depends on what the author of the book "Classic Outhouse: Full plans for the ultimate outdoor throne" wrote himself). If you haven't found the necessary information about the book — write in the comments, we will try to find it.
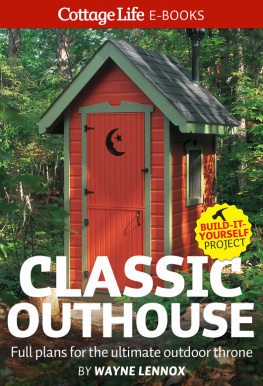
Biffy, kybo, privy. There are many words for outhouse but only one way to build the best: with Cottage Lifes Classic Outhouse. Award-winning cottage DIY expert Wayne Lennox provides comprehensive, step-by-step instructions, with detailed project plans and a materials list, so you can create a bright and comfortable outdoor toilet.
Wayne Lennox: author's other books
Who wrote Classic Outhouse: Full plans for the ultimate outdoor throne? Find out the surname, the name of the author of the book and a list of all author's works by series.


Classic Outhouse: Full plans for the ultimate outdoor throne — read online for free the complete book (whole text) full work
Below is the text of the book, divided by pages. System saving the place of the last page read, allows you to conveniently read the book "Classic Outhouse: Full plans for the ultimate outdoor throne" online for free, without having to search again every time where you left off. Put a bookmark, and you can go to the page where you finished reading at any time.
Font size:
Interval:
Bookmark:


CLASSIC OUTHOUSE
A Cottage Life magazine E-Book
Distributed by HarperCollinsCanadaLtd
Copyright 2013 Cottage Life Media, a division of Blue Ant Media Partnership
All rights reserved
ISBN 978-0-9880666-8-7
www.cottagelife.com
The floor structure is constructed of 2" x 6" pressure-treated spruce (see ).
Cut all the pieces to length according to . Treat the cut ends. The inner frame consists of two 43 1/2" and two 55 1/2" pieces nailed together with 3 1/2" galvanized ardox spikes to form an interlocking framework.
Add the two 42" joists and the two 15" bridging pieces. This is one of the times we have taken a few liberties with accepted building practices: The joists are not 16" on centre.
Construct the outer frame from the remaining two 46 1/2" and two 58 1/2" pieces. Make an extremely strong corner by nailing not only the outside corners together, but also nailing through the outer frame corner into the inner frame. The outer header joists must also be nailed to the inner frame; 3 1/2" spikes can be used if you drive them at an angle; otherwise, they will stick through.
Part of the material package for this project includes two sheets of 5/8" spruce sheathing. The sheets should be cut to create two 4' x 6' and two 2' x 4' pieces. Rip three 3" x 24" pieces from one 2' x 4' section, and then cut the balance of the sheet to 24" x 36". From the other 2' x 4' segment, rip one 3" x 24" strip, and then cut the sheet to 24" x 36". A table saw would have been ideal for this process, but I used my circular saw and a guide made from an old particleboard shelf and two clamps.
Install the plywood floor according to (you will need to cut two of the 24" strips down to 21"). Use 2" galvanized ardox nails and nail the plywood to both inner and outer frame structures.
If you did not build the floor right on top of the pit foundation timbers in the first place, have someone help set it on top of the foundation. Level carefully.

Cut eight 76 1/2" studs from four 2" x 4" x 14's. The remaining pieces, as shown in , are cut from two more 2" x 4" x 14' pieces and two 2" x 4" x 10's.
Quite likely, you will be building one wall at a time, but for greater efficiency, lay out according to the diagram the location of the studs on the two 60" bottom plates and the two 60" top plates. Nail the studs to the bottom and top plates using 3 1/2" spikes (two for the bottom and two for the top for each stud).
The blocking, windowsill, and window header, as well as the seat deck support can now be located on the studs and fastened with 3 1/2" spikes; for greater strength you might choose to fasten the seat deck support in place with #8 x 3" screws.
The double top plate for the side wall measures 53", which leaves just the right gap to fit the top plates of the front and rear walls. Nail in place with 3 1/2" spikes hammered in at an angle.
Are the walls square? Check the diagonal measurements: They must be equal for a structure to be square. The 1" x 3" x 8' spruce in the materials list is meant to be used as temporary wall bracing, which will let you move the wall section around without having it rack and twist. With your squared-up wall section lying flat, lay a 1" x 3" diagonally across the wall, then mark and cut so the bracing does not extend beyond the bottom or top plates. Attach the temporary bracing to the wall with 2" galvanized ardox nails (leave the nails sticking out so you can remove them later on). Repeat for the other side wall.
Like the side walls, the rear wall is a very straightforward bit of framing. Note that the studs are 78" long because there is no double top plate. Lay out the location for the studs on the 48" top plate and the 41" bottom plate as in (this time it was convenient and reasonable to use 16" centres). Nail in place with 3 1/2" spikes.
Lay out the location of the 14 1/2" blocking, and nail to the studs.
The 15 1/4" blocking pieces should be notched according to the detail drawings in . Do not attach at this time; once all four walls are in place, these are designed to be secured with screws to the side walls to minimize racking. Likewise, do not attach the 21" gable stud, as it makes more sense to do so when assembling the roof structure.
You can choose to attach the rear seat deck support now with spikes or screws, or wait until later to make sure it fits between the side wall seat deck supports.
Secure a piece of 1" x 3" spruce as a temporary diagonal brace. Remember that it must be trimmed to provide clearance for the side wall top plate when the walls are erected.
The front wall is similar to the rear wall, except that the studs are 76 1/2" long (like the side walls). Notice that the door header is laid flat and nailed to the top plate, as is often the case in smaller structures where strength above an opening is not as critical. Notch the blocking pieces (), but do not attach until all four walls are in place (these too will be secured with screws).
Since the bottom plates are so short, I suggest that you drill clearance holes and attach to the studs with #8 x 3" screws to minimize splitting.
Diagonal bracing is very difficult to install on the front wall at this time, so just skip it. The bracing can be dealt with once the walls are in place (just be sure to handle the wall section carefully).
Put the gable stud aside until later.
At this stage, it might be wise to look for a suitable helper (virtually anyone with a pulse will do). Position a side wall brace side in on the floor. Additional short temporary braces can be nailed diagonally from the ends of the wall to the outer frame of the floor for support; you can fine-tune for plumb once the bottom plate is nailed in place ().
The side wall bottom plate should be flush with the outside front and rear edges of the floor. Nail in place (about eight 3 1/2" spikes should be adequate, evenly distributed between inner and outer floor frames). In turn, leave each short brace attached to the floor frame, but remove it from the end of the wall; then check for plumb and nail the brace back to the wall.
Position the rear wall brace side in on the floor. The top plate should fit in the gap that was provided in the side wall (). Check for plumb. Nail the rear wall top plate to the side wall top plate.
The rear wall bottom plate should be flush to the rear outer edge of the floor and tight to the side wall bottom plate. Nail in place with six 3 1/2" spikes.
Position the remaining side wall on the floor, brace side in. Nail the rear wall top plate to the side wall top plate. The walls should be plumb if the floor was levelled and the walls were squared during construction; however, you might have to make some minor adjustments, so check for plumb before nailing the top plates together for good. The bottom plate should be flush to the outside front and rear edges of the floor. Nail in place.
Carefully position the front wall on the floor. Nail the front wall top plate to the top plates of the side walls. The bottom plates of the front wall should be flush to the outside front edge of the floor and tight to the side wall bottom plates (make adjustments based on whether or not the studs for the door frame are plumb). Since they are so short, and might split if nailed, I suggest drilling two clearance holes in each bottom plate and screwing them to the floor frame with #8 x 3" screws.
Font size:
Interval:
Bookmark:
Similar books «Classic Outhouse: Full plans for the ultimate outdoor throne»
Look at similar books to Classic Outhouse: Full plans for the ultimate outdoor throne. We have selected literature similar in name and meaning in the hope of providing readers with more options to find new, interesting, not yet read works.
Discussion, reviews of the book Classic Outhouse: Full plans for the ultimate outdoor throne and just readers' own opinions. Leave your comments, write what you think about the work, its meaning or the main characters. Specify what exactly you liked and what you didn't like, and why you think so.