Footings (six in all) will need to be in place before construction can begin.
I am partial to a double rim joist at the base of structures like this because of its greater strength, especially at interlocking corners. And I like pressure-treated (PT) lumber for any part of a structure close to the groundalthough, since the floor frame does not, in fact, touch the ground, you could use ordinary lumber.
With the to guide you, cut all pieces for the floor frame to length (wear a dust mask when you cut PT lumber and treat the cut ends). Lay out the joist locations16" on centreon the inner rim joists. Note that the measurement to the centre of the first joist from the end must take into account the 3" thickness of the double rim). Leave a 3/4" space between the two laminated bunkie joists that sit at the 10' mark and the first deck joist. This gap allows rain and melt-water to drain between the boards.
Nail or screw the inner frame together. (The 3 1/2" deck screws in the are needed only if you are screwing the frame together.) Remember to keep joist crowns up; the crown is the convex edge of a board when viewed from the end. Nail or screw the outer rim joists to the inner frame.
Cut bridging pieces to length and install between floor joists.
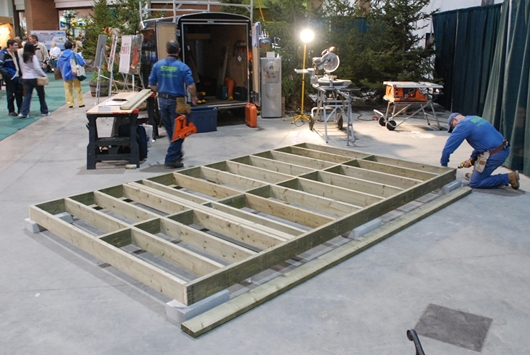
Tip: When you measure for the bridging, take your measurements between the joists where they are secured to the rim, not in the middle. After installing two or three bridging pieces, check the cumulative measurement of bridging and joists and compare with the measure at the rim joist to be sure youre not bending the joists out of line. Adjust the next piece you install to compensate, if needed.
Two-and-a-half sheets of 5/8" tongue-and-groove plywood are required to cover the floor for the dwelling part of the building. Square up the floordiagonals must be equaland screw the plywood to the floor frame.
Level the floor frame, if required.
Cut the side wall pieces to length. Note that the window headers consist of two 2 x 6s laminated together with a piece of 1/2" plywood between as a spacer. Also, the 6 x 6 by 43 1/2" side headers are mitred 45 at the porch end and notched at the other end (. Drill clearance holes. Cut eight 1/2" plugs and put them aside for now. (A plug cutter is an inexpensive accessory available at any lumber or hardware store. Use it to make your own matching plugs from castoffs. Of course, there are also commercially available plastic plugs.)
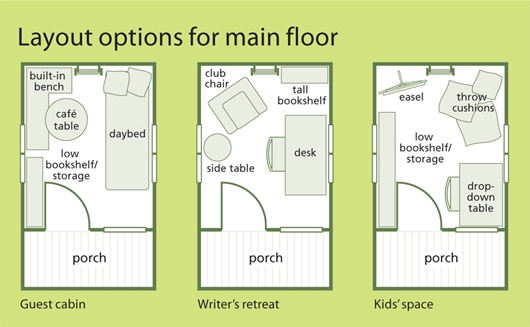
Lay out the stud locations on the bottom and top plates as in (make sure that your layout is consistent with the rough opening for your windows). Note also that the centres are not all 16". When siding, start from the porch end. The edge of the second 4 x 8 sheet will line up with the middle of a stud marked with an X. The remaining piece is 2' wide (a 4 x 8 sheet ripped in half provides the two 2' pieces, one for each side).
Nail or screw the wall frame together on the ground, adding the double top plate last (lay out the location of the rafters on the double top plate first, starting from the porch end). Do not add the 6 x 6 side headers yet.
Cut the 2 x 4 blocking to length and nail between the studs.
We selected CanExel 4 x 8 pre-finished panels for this project for a number of reasons: sub-sheathing is unnecessary, siding time is reduced, and they look good. On the downside, there is a limited colour selection and the finish is only under warranty for five years, so repainting could be necessary after that. Cut five sheets to a length of 93 1/2" (good-side down to avoid chipping on that side). Rip one piece in half, lengthways.
Lay the sheets on the wall so that the edges meet the top plate. Transfer the location of the rafters on the edges of the sheathing. Remove the siding and cut 1 1/2" by 5 3/4" notches where marked (see ). The siding panels will sit proud of the top plate. These notches allow the rafters to sit tight against the plates and also let the siding butt against the bottom of the roof boards thereby sealing the building from drafts. You can be a little generous with the cuts as small gaps can be filled with caulking.
Lay the siding pieces back on the walls, making sure that the bottom edges are 3" below the bottom plates (this lip can later be nailed to the rim joist). Square up the frame and nail the siding to the wall using 2" galvanized ardox nails, spaced about 8" apart.
Find two helpers. Stand each wall up in turn, being careful not to damage the bottom edge of the panels. Line up the bottom plates with the floors edges. Screw or nail the bottom plates to the floor.
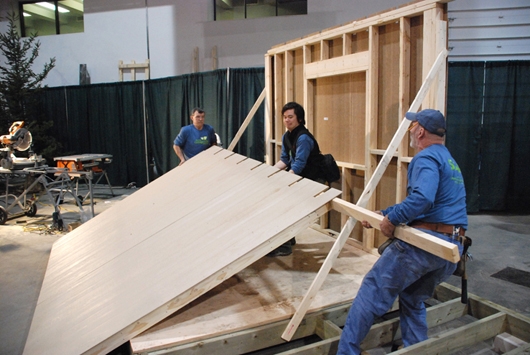
Tip: Dont drive the nails home yet in case you need to move the wall. Nail temporary braces from the end studs to the rim joist. The walls should tip out slightly at the top.
Add a 1 x 3 temporary, vertical brace at the porch end (see photo below), from the rim joist to the end of each top plate. Insert the 6 x 6 side headers into the space created when you framed the side walls. Screw to the top plates and to the 2 x 4 studs. This is also a helper-assisted procedure!
Drill a 1"-dia. by 2"-deep hole down through the top plate and into the side header where indicated in . Drill a 5/16" clearance hole all the way through.
If you have a reciprocating saw, cut out the window openings from the inside. If you only have a jig saw, drill holes through the panelling at each corner, go outside, draw lines between the outside radii of the holes, and follow the lines to cut out the window openings.
Do not add the 6 x 6 posts yet.
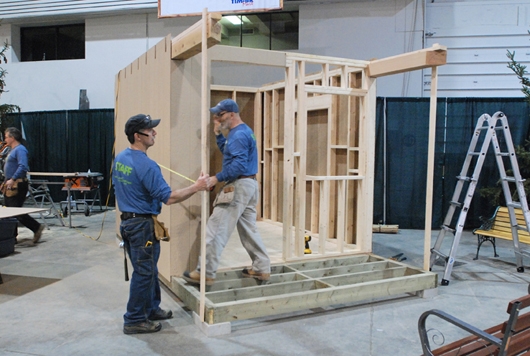
Cut all the pieces and assemble the rear wall as shown in . Since there are no window openings, cladding is simply a matter of nailing two 4' by 89 1/2" panels to the assembled wall. Align the top edges of the panels with the seam between the two 2 x 4s that make up the top plate.
With a helper, lift the rear wall assembly into place. Nail or screw the bottom plate to the floor. Nail or screw the corners together. Nail the 3 1/2" overhangs to the side wall end studs. Nail the bottom edge of each panel to the rim joists.
Cut all front wall pieces to length (). The header over the window consists of two pieces of 2 x 4 laminated together. Since the front wall is not a load-bearing wall, the header over the door consists of a single 2 x 4 on the flat to provide the correct dimension for the entrance door rough opening.

