Contents
Introduction
Making a lampshade
Making lampshades using self-adhesive backing material is a simple technique that anyone can master.
Materials required
lampshade ring sets
or plain rings or
tapered lampshade rings
clips to clip onto bulbs, pyramid frames, wall-mounted frames or any other frame, depending on the desired shape
white or transparent self-adhesive backing material
thick vinyl glue or PVA glue
strong double-sided sticky tape to stick the lampshade together
self-adhesive binding tape
and, of course, all kinds of fabric, paper, braids, etc. Let your imagination run wild!

Tools required
You will not need to spend very much:
pair of dressmaking scissors and pair of paper scissors
cutter
metal ruler
cutting mat
hole punch
pair of pliers
small paintbrush cut to a point for the glue
wooden clothes pegs
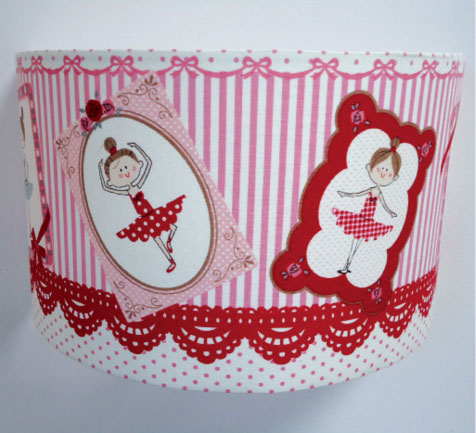
Frames
Lampshades are made with rings, frameworks or other oval, square or rectangular shapes, as well as copper structures coated with white epoxy paint.
A traditional conical, drum or cylindrical shade is made with two separate rings that are stuck to self-adhesive backing material.
The lampshade must always have a wide opening to enable the heat of the bulb to dissipate.
For a table lamp, the lampshade ring set is at the base of the lampshade and the plain ring is at the top. These rings are inverted if you want to make a pendant light. A lampshade ring set is a plain ring with the mounting ring for the lamp holder at its centre.
To make a pyramid or wall-mounted lampshade, a framework is used onto which the self-adhesive backing material is stuck, covered with the desired material.
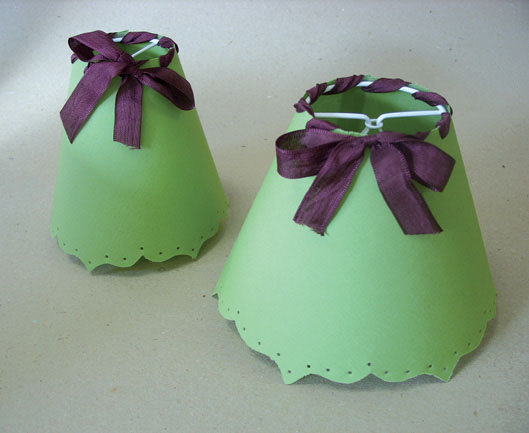
Ring sets for tapered shades are used for scalloped lampshades or other decorative edgings. These lampshades are stuck together at the top, but the bottom of the lampshade is cut in a decorative way: there is therefore no ring at the bottom.
Clips that clip onto the bulbs are also available and are used to make small shades for a chandelier.
Self-adhesive backing material
Self-adhesive backing material diffuses the light and gives the required rigidity to the lampshade.
The front is white or transparent; the reverse is a film grid that is carefully removed, so that paper or fabric can be stuck to it.
The white self-adhesive backing material is the most traditional and the most commonly used. The transparent self-adhesive backing material is suitable for certain decorative papers so as to reveal their luminosity. It also enables the inside of a fabric to be highlighted, if you so wish. Self-adhesive backing material is bought by the metre; it is available in a width of 1.2m (1.2yd).
Covering the self-adhesive backing material
Any type of fabric may be stuck to the self-adhesive backing material, but it is best to avoid synthetic fabrics and go for natural ones instead, e.g. linen, cotton, silk, etc.
Wrapping paper, fibre paper or wallpaper can also be applied to the self-adhesive backing material. This is not an exhaustive list.
If you would like a strong light, then it is better to choose a fine, clear fabric. However, for a decorative lampshade (often used for accent lighting around the home) you can have fun choosing more original materials and colours.
Glue the covered self-adhesive backing material onto the rings or the framework with some vinyl glue, i.e. a thick PVA glue that you apply between the self-adhesive backing material and the metal with a paintbrush.
Leave it to dry for about an hour, held together with several clothes pegs.
Stick the lampshade together with some strong double-sided sticky tape.
Pattern
To make a lampshade you need a pattern. For a damaged lampshade that you would like to revamp, carefully remove the old cover and trace it onto the self-adhesive backing material using a pencil, to make an identical lampshade using the original rings.
To make a new lampshade, design the template:
For a cylindrical lampshade, two rings with the same diameter, this is easy: multiply the diameter of the lampshade by 3.14 to obtain its circumference and add 1.5cm (58in) for sticking the lampshade together.
This will make a rectangle, with the height being that of the height of the lampshade.
For a conical lampshade, where the two diameters are different, the template has to be a geometric construction that needs to be calculated. In shops that sell lampshade accessories, you can also find template boards and sewing patterns, which means you can avoid having to make this calculation!
For a pyramid lampshade or a wall-mounted shade, place the frame against the self-adhesive backing material to draw the template that corresponds to the framework.
Upcycling idea! Old lampshades found in second-hand shops or car boot sales can be used as templates once you have removed their coverings.
Finishes
You can apply a self-adhesive binding tape to finish off the edge of the lampshade.
Alternatively, you can leave an overlap of 1cm (38in) of fabric and turn it up inside the lampshade.
You can glue on braids too:
The main braid used is military braid: a little cord approximately 3mm (18in) wide that enhances the lampshade. They come in all sorts of colours and finishes: serge, grosgrain, serpentine, etc. the choice is vast. You can finish a lampshade with a coat of varnish. This is a simple finish that is ideal for the beginner. Make little holes with a hole punch every 2cm (34in) on the covered self-adhesive backing before the lampshade is assembled. The ribbon keeps the rings attached to the cover, so there is no need for glue.
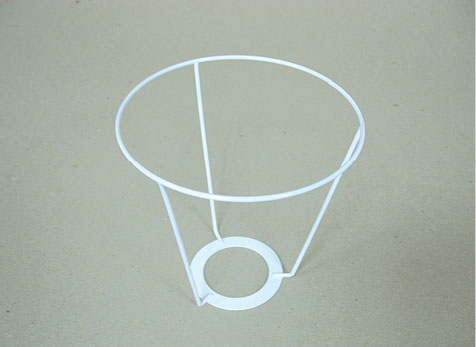
Tapered lampshade ring
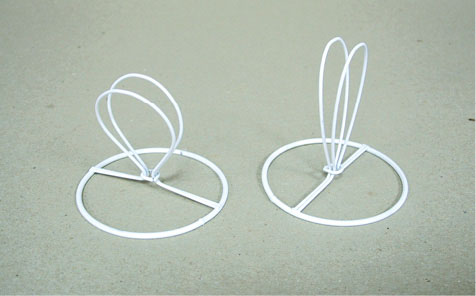
Clip-on fitter
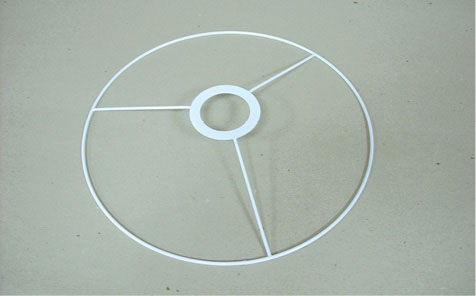
Lampshade ring sets

Pyramid frame

Half-circle wall-mounted frame
Making a cylindrical lampshade from wallpaper
The cylindrical lampshade is a very easy lampshade to make and is ideal for beginners.
You need to use two rings of the same diameter: a lampshade ring set (ring with a smaller ring), onto which the lamp holder will be screwed, and a plain ring.

