.

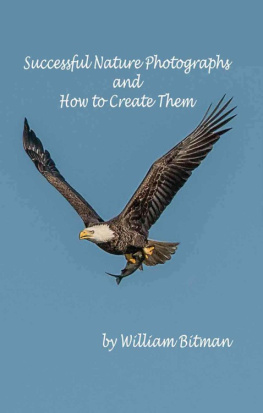
Successful Nature Photographs
And How To Create Them
By William Bitman
William Bitman 2014
www.bitmanNaturePhoto.com
About This Book
Successful Nature Photographs is a guide for improving your photographic abilities. I have grouped different subject categories into separate chapters, starting with subjects that are more accessible and require less expensive equipment.
The following introduces the elements and techniques for successful photography. I will explore their application with specific images throughout the book.
The cover image is presented and discussed in Chapter 23 on bird flight.
Elements Of Successful Images
A successful image is one that people want to look at more than once. The elements of a successful image are:
1) an interesting subject,
2) in an interesting situation,
3) captured utilizing excellent technique.
Elements of excellent technique are:
1) sharpness of the main subject(s),
2) compelling composition, and
3) proper exposure, in which there are details in the shadows and no overblown highlights.
Compositional elements include:
1) placement of subjects,
2) arrangements of secondary objects, lines, shadows, and colors,
3) a leveled view,
4) angle of view,
5) lens focal length,
6) foreground/background relationship, and
7) inclusion and exclusion of objects.
Typical reasons that an image falls short of being successful include:
1) blurry main subject,
2) uninteresting subject,
3) distracting background, or
4) too much contrast, especially overblown highlights.
Fundamentals Of Good Technique
The following discussion provides a foundation for the notes on images. Please see the Glossary for explanations of terms.
Exposure is a result of:
1) capture mode (e.g., manual, shutter (also called time), aperture, program, or auto),
2) shutter speed,
3) aperture,
4) ISO, and
5) white balance.
Shutter speed, aperture setting, and steadiness of the camera determine sharpness of your subject. Along with discussing sharpness, this discussion will include proper exposure.
Basic Technique For Still Subjects
For still subjects, the ISO can be set very low, such as ISO100 to avoid digital noise. For most still subjects, shutter speed is not critical and you can let it depend on the aperture you select. This enables you to select an aperture that provides enough depth of field for your subject. For instance, a sweeping landscape calls for a small aperture, such as f/16 so that both foreground and background are in sharp focus. If, however, you are isolating a specific subject and you want all other objects to be a soft blur, then you have the freedom of selecting a large aperture, such as f/4, which produces a narrow depth of field.
The basic steps for photographing a still subject are:
1. Set the ISO mode to static ISO so that the camera doesnt automatically increase the ISO unnecessarily. This is usually a menu setting.
2. Set the ISO to a low setting: usually ISO 100 or 200.
3. Set the camera exposure mode to aperture priority,
4. Set the aperture to an appropriate value based on your subject. This allows the camera to determine the shutter speed.
5. For situations where the shutter speed that the camera selects is slow, such as may occur at dawn, dusk, and on cloudy days, you may need camera support, such as a tripod, in order to prevent blur due to camera movement. Alternatively, you can increase the ISO setting in such a situation.
Lens selection and placement have the greatest affect on composition. Additionally, you can fine-tune your composition in post-processing. These actions will be discussed throughout the book for relevant images.
Basic Technique For Moving Subjects
For moving subjects, first determine how fast a shutter speed is necessary to freeze subject movement. Taking test shots can help you determine this. Then determine the depth of field you need to keep the entire subject in focus. Set your camera exposure mode to manual so that your selected shutter speed and aperture remain as you set them. For a combination of shutter speed and aperture to produce a correct exposure, the ISO must be set correctly based on the lighting conditions. Therefore, the best method is to set the ISO mode to automatic. This allows the camera to set the ISO as high as necessary to produce a correct exposure. Although very high ISO values can add digital noise to your image, it is better to capture the image rather than be left with an unusable underexposed image. There are ways in software to reduce digital noise during post processing.
Subjects that move very fast, may require a camera that can capture images at a fast rate, such as 10 fps in order to increase the likelihood that you capture just the right moment.
Unlike still life and landscape photography, moving subjects require you to quickly move the camera to catch the action, whether you hand-hold or use a tripod fitted with a responsive tripod head. With a non-active subject, you might have the time to select and mount the lens that frames your vision perfectly. But with most moving subjects, you are fortunate when you can get a sharp image, even if the subject is somewhere in a corner of the frame. Most of my action shots have been composed on the computer. First I rotate the image so that the horizon is horizontal, or the eyes of the subject present a satisfying pose, usually along the horizontal axis. Then I crop around the subject in order to create a composition that presents a balanced image. These two simple adjustments can turn a diffuse lopsided image into a satisfying work of art that shows off both your subject and your artistic and technical ability as a photographer.
Consummate Backyard Photographer
Most of my photographs have been taken within 50 miles of my house. I make use of my backyard, nearby gardens, parks, zoos, aquariums, and butterfly gardens. My portfolio has benefitted from the fact that although I have mostly lived in Maryland, I recently had lived in Southern California for 3 years, thus expanding my backyard opportunities. In addition, once a year I take a vacation to a national park or wildlife refuge area. Of the approximately 1,000 nature images in my portfolio, about 100 of them were taken in my Maryland backyard, and about 100 were taken in my California backyard, while it lasted. Another 100 were taken in local parks. I took about 150 images during trips to national parks and wildlife areas. About 500 of my images were taken at local zoos and 50 were taken at local aquariums. Over the 5 year period during which I frequented zoos once a week, I averaged about 2 successful images per trip.
Patience
The key to building a quality portfolio is to start a session with the mindset that you only need one really good image per session to add to your collection. Calmly concentrate on a single exhibit or opportunity. Dont feel that you need to rush to the next exhibit. I found that if I rush from exhibit to exhibit with a catch-as-catch-can approach, I come home with only one photo that people actually enjoy viewing. Instead, select a subject of interest, and watch and wait for a truly special moment to occur. Once you know you have captured an excellent image, then you can move on to another photo opportunity.
Catching action at just the right moment provides a clear element of success. With portraits, a factor for success is to include an extra element of interest in the image. It could be an unusual pose, a meaningful interaction, a dynamic expression, an expressive glance, an interesting background object, or a compelling color scheme. Without something extra, the image is just yet another picture of a you-name-it. People have seen hundreds of photos of whatever it is you are photographing. The objective is to make your photo unique and interesting.
Next page
