Smith & Wesson M&P 15-22
Similar/Identical Pattern Guns
The same basic assembly/disassembly steps for the M&P 15-22 also apply to the following guns:
Smith & Wesson M&P 15-22 Performance Center
Smith & Wesson M&P 15-22 MOE
Smith & Wesson M&P 15-22 CA
| Data: | Smith & Wesson M&P 15-22 |
| Origin: | United States |
| Manufacturer: | Smith & Wesson, Springfield, Massachusetts |
| Cartridge: | .22 Long Rifle |
| Magazine capacity: | 25 rounds |
| Overall length: | 33 inches extended, 30 inches collapsed |
| Barrel length: | 16 inches |
| Weight: | 5 pounds |
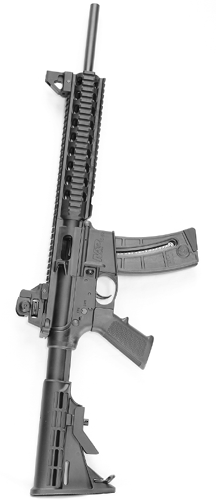
One of the interesting side effects of the modern sporting rifle phenomenon is the production of like models in rimfire calibers. The M&P 15-22 is such an example, produced in conjunction with the Smith & Wessons M&P line of semi-automatic centerfire rifles, introduced in 2009. These rifles, based on the AR-15, are very popular, and with rising costs in ammunition and production, the alternative of shooting rimfire ammunition through a largely similar (or otherwise identical in some cases) rifle for training purposes has great appeal. One of many similar models from many companies, the M&P 15-22 is perhaps the best seller of them all and for good reason.
It is lightweight, accurate enough for training or plinking and has a very simple, solid method of operation. Furthermore, it shares many parts in common with its.223 Rem. big brothers, and handles in a closely similar fashion as well. While a special wrench is necessary to change the barrel or handguard, the rest of the rifle is very simple to maintain and its ability to mount a large variety of optical sights brings it a great benefit as well.
Disassembly:
Pull out the rear takedown pin. Rotate the upper open from the lower.
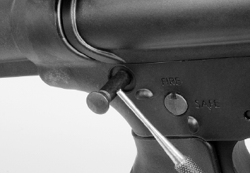
Pull out the front pivot pin to detach the upper from the lower
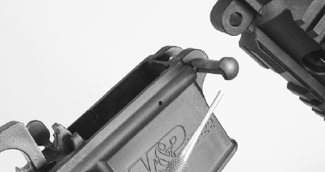
To remove the bolt catch, drive the bolt catch roll pin forward or backward out of the bolt catch. The bolt catch will fall out as will the bolt catch buffer and the bolt catch buffer spring.
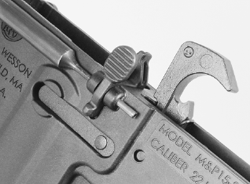
Depress the magazine button until it bottoms. Then rotate the magazine catch counterclockwise until it can be removed from the receiver. Remove the button and the magazine catch spring from the right side of the receiver. Gently release the magazine catch button as it is under spring tension.
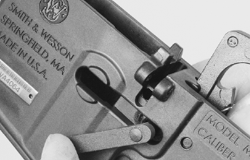
With the hammer in the fired position, drive out the hammer pin in either direction.
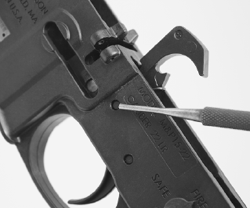
Drive out the trigger pin and remove the disconnector from inside the slot in the trigger. The trigger will now float in the receiver but will not be removable until the selector is removed.
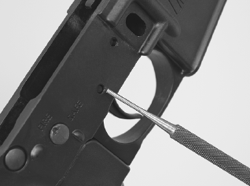
Unscrew the pistol grip screw, which is accessed from the bottom of the pistol grip. As the pistol grip comes off, the selector detent and spring and the rear pivot pin detent and spring can be accessed.
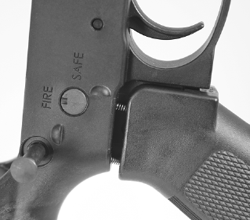
Remove the selector from the lower receiver. The trigger can now be removed.
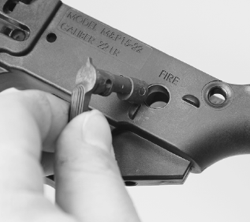
The front pivot pin can be removed by using a 1/16th-inch punch. Push it through the small hole in the front of the pivot pin to depress the detent. Use the punch to rotate the pivot pin out of alignment with the detent, then pull the pivot pin out of the receiver. Catch the detent and spring as they will jet out of the receiver.
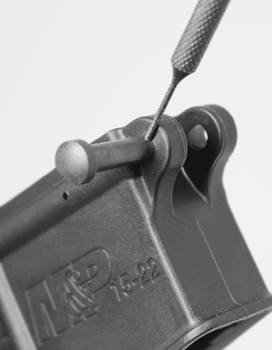
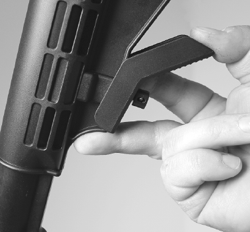
To remove the butt stock, pull down on the rear of the stock lever and pull the stock off of the receiver. To access the storage compartment in the receiver extension, pull out the rubber plug.
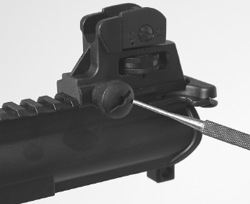
The iron sights are retained by thumb screws. Disassembly of the rear sight is not recommended unless something is broken.
Pull the charging handle and bolt back and out of the gun together.
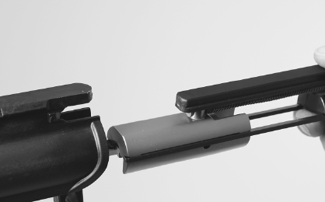
Push the bolt slightly back on its rails to allow the clearance slot on the spring guide to clear the ears at the rear of the bolt assembly. Control the spring as it is under compression. Pull the rear of the bolt assembly off of the bolt.
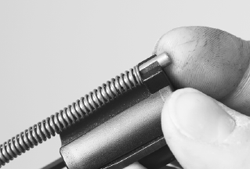
The spring guide can be pulled out from the front of the bolt.
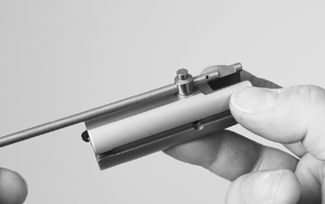
Driving out this pin will free the guide rod housing, the firing pin and the firing pin spring.
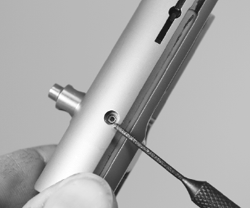
To remove the extractor, pull backward on the extractor detent and pull the extractor from the bolt. Control both the extractor detent and spring as they are under compression.
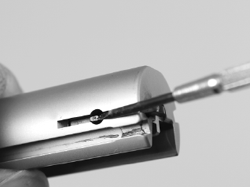
The ejector is part of the barrel assembly. The hand guard and barrel are retained by a castle nut. A special wrench will be needed to remove this nut. It is not recommended that this be done unless the ejector needs to be replaced.

