The Popsicle Recipe Book Fun and Easy Homemade Treats By Michael Holtby 2013 Wynwood Publishing All rights reserved. No part of this publication may be reproduced, distributed, or transmitted in any form or by any means, including photocopying, recording, or other electronic or mechanical methods, without the prior written permission of the publisher, except in the case of brief quotations embodied in critical reviews and certain other noncommercial uses permitted by copyright law. We hope you enjoy these delicious, frugal recipes. If you have, wed love some feedback and reviews on our Amazon page! Please check out more of our cookbooks: The Survivalist Cookbook - Recipes for Preppers Infused Drinks: 53 Recipes for Infused Fun Ethiopian Cuisine: A Cookbook Recipes for Kids: 51 Fun and Creative Dishes Cuban Cooking: 80+ Recipes Frugal Cooking for Simple Living (90+ Recipes) Desi Sweets: 46 Indian Dessert Recipes Thai Cooking: Quick and Easy Recipes Table of Contents Classic Popsicles Adult Popsicles
Popsicle. The word itself evokes memories of childhood, of the intense summer heat, and of the sticky, sweet drops of flavor that would always end up all over your hands. With popsicles not only enjoyed by the young, but equally favored by the young at heart, its no wonder each year billions of popsicles are enjoyed and consumed by people all over the world.
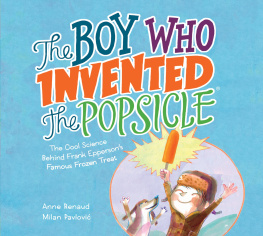
The popsicle has not only become a cultural icon that spans generations, but has also built a multi-billion dollar industry. So, how did the frozen, flavored, yummy ice end up as one of the worlds most beloved summer treats? It was all started over 100 years ago by none other than a child. Believe it or not, popsicles were not only invented by an 11-year-old boy, but were also created completely by accident. In 1905, 11-year-old Frank Epperson of San Francisco left a mixture of powdered soda, water, and a stirring stick in a cup outside one night, and as the night grew cold, the mixture froze solid. When Frank awoke the next morning, he found the frozen ice and, like any 11-year-old would do, he ate it. The original name for his invention was the Eppsicle, but after he got older and started to make them for his own children, they began calling them Pops sicle.
So, in 1923 he changed the name of his frozen treat and applied for a patent, which he later sold to the Joe Lowe Company in New York, and after that the Popsicle gained popularity very quickly, and sold at only a nickel each. Since the popularity of popsicles skyrocketed, it eventually became a household name all across the country. While Popsicle is technically a brand name for ice pops sold in the US and Canada particularly, it has become a generic trademark. This means that the brand name has become so popular that it is synonymous with the actual product being sold. In fact, the popularity of popsicles was so big that it influenced the first ice cream man. In Nebraska, a man began selling popsicles from a horse-drawn cart to children, which inspired others to do the same around the country.
The Popsicle began to represent American culture so much so that the Eighth Air Force Unit during World War II chose Popsicles as a symbol of American life. While the Popsicle originally came in seven flavors, there are now countless different flavor combinations sold in stores. Popsicles have evolved through the years from their original flavors of root beer, cherry, lemon, orange, banana, grape, and watermelon, to a huge variety of frozen treats that now include sugar free Popsicles, multi-colored Popsicles and milk based Popsicles such as the Fudgsicle and the Creamsicle. They have also come alive with many celebrated faces such as Snoopy, Spiderman, and The Incredible Hulk to create unique treats that children adore. However, thinking beyond the Popsicles sold in stores or in trucks, the potential of flavors is now infinite, with so many possibilities especially when you can easily make your own popsicles at home. Popsicles are one of the easiest at home summer treats to make.
The process is not only fun for every age, but only takes around 2-3 hours depending on your freezer. Rather than spending money on each Popsicle box in the freezer aisle of your store, or every time you hear the tune of the ice cream truck, Popsicles can be made easily for less than pennies a day with things that are already lying around your house. At any home goods store, or dollar store for that matter, you can purchase plastic Popsicle molds that already include a stick, and come in all shapes, colors and sizes. If you know you will be making a lot of Popsicles during the summer months, investing in a mold may save you some effort and will pay for itself in no time. However, buying molds is definitely not necessary for Popsicle making. Almost any cup will suffice for molding a Popsicle.
These options include plastic drinking cups, paper cups, empty yogurt containers, muffin trays, ice cube trays etc. Popsicles can be made using anything solid that has shape and is safe to put in the freezer. You can even pour your Popsicle mixes into a loaf pan and use a knife to slice up each pop! Of course another essential object used to make Popsicles is Popsicle sticks. These wooden sticks can be found at any local craft store, and are the perfect size and shape. Popsicle sticks usually come in bulk, so one purchase can last a very long time. However, if you dont have any Popsicle sticks, straws and spoons will work as well.
If you want to make mini Popsicles in ice cube trays, you could also use tooth picks, which will work perfectly. After you gather everything you need to make your own delicious Popsicles, you may want to grab some extra things that you might need just in case. When the Popsicle mix is still a liquid, if you arent using a mold it may be hard to get the Popsicle stick to stand straight up in the middle of the cup. This is easily fixed using Aluminum foil or plastic wrap. Simply wrap the foil or wrap around the cup when you are finished, and cut only a small hole in the middle for the stick to stand upright. This will stop the Popsicle stick from moving during the freezin g process.
Last but not least, you of course need a freezer and some space to allow your Popsicles to set without them being moved or disturbed while they are freezing. Once you have all the ingredients and supplies you need, youre one step closer to making a delicious homemade Popsicle; the perfect, refreshing treat for a hot summer night. So browse the recipes in this book, and start making your own homemade popsicles today! Cookies and Cream Popsicles Ingredients: 14 chocolate wafer cookies, about 4 oz total weight 1/4 cup fine sugar 1/4 cup water 1/2 cup sour cream 1/4 cup whole milk 1 cup heavy cream 1 tsp vanilla extract Directions: In a small bowl, crumble the cookies to make pieces about the size of peas. In a different bowl, stir together the sugar and 1/4 cup water until the sugar dissolves completely. Stir in the sour cream, milk, cream, and vanilla. Add the crumbled chocolate cookies and stir to mix.
If using conventional popsicle molds, divide the mixture across the molds. Cover and freeze until solid, at least 4 hours or up to 3 days. If using sticks, insert them into the molds when the pops are partially frozen, after about 1 hour, then freeze until solid, at least 3 more hours. Maple Coconut Ice Pops Ingredients: 1 can coconut milk, stirred well 1/3 cup maple syrup Heaping 1/2 cup toasted coconut flakes Tiny pinch of cinnamon, to taste Tiny pinch of s alt, to taste Directions: In a large bowl, stir together all ingredients to combine well. Divide mixture among Popsicle molds or small Dixie cups and freeze for 30 minutes. Insert sticks and continue to freeze for at least 6 additional hours or until solid.
Almond Butter and Carrot Cake Pops Ingredients: 4 large carrots 3/4 cup canned coconut milk 1/4 cup almond butter Juice from 1/4 of a lemon Cinnamon, Ginger, Salt all to taste Sweetener of choice ( honey, maple syrup, sugar, etc) Directions: Peel the carrots, and then cover them with water and bring to a rolling boil over high heat. Allow to boil for 7-10 minutes or until carrots are very soft. Drain the carrots and put them into a food processor. Puree the carrots until they are a smooth texture. Add in almond butter, lemon juice, and coconut milk. Blend well until everything is combined.
Next page
