Contents
Guide
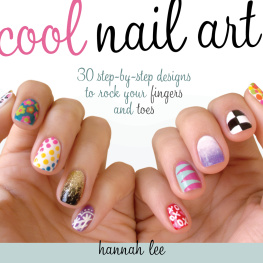
cool nail art
hannah lee

CINCINNATI, OHIO
contents
dedication
For Mom and Dad. I love you both.
introduction
Nail art has become one of the best accessories you can add to your look. Whether you want to dress it up, draw attention or keep it casual, you have so many options to choose from. You dont need to be a professional manicurist to create awesome nail designs. With a little practice, the right tools and the step-by-step tutorials found in this book, youll be creating your very own nail art in no time.
As clich as it may sound, practice does make perfect. Dont get discouraged if you dont get it right on the very first try. Certain techniques may take some getting used to, and its okay to make mistakes. Just be patient, keep trying and, before you know it, it will become easier and feel more natural. Nail art is a great way to express yourself and your style. Its like having small canvases on your fingers, and everywhere you go, you can share your art.
The best part is you can design your nails however you like! Change up the colors you find here, mix and match with just an accent nail or stick with the original look. Its all up to you!
before you begin
There are some important things you should know before you start your nail art project. Great-looking nail art is not only about the design but also about preparation. You may be tempted to skip the prep work, but these tips and techniques will give you clean, healthy nails and help your manicure last longer.
Prepping Your Nails
The best way to prep your nails is to establish a simple nail care routine. Start by shaping your nails with a nail file.
The five most popular nail shapes are square, oval, squoval (square oval), round and almond (pointed). Review the shapes at right to determine which one fits you best. The designs in this book dont require any specific shapes.  Oval
Oval  Round
Round  Almond or Pointed
  Squoval
  Square
 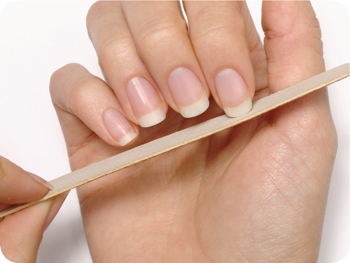 File each nail in a single direction. Filing back and forth can be too harsh for the nail and could possibly cause damage.
 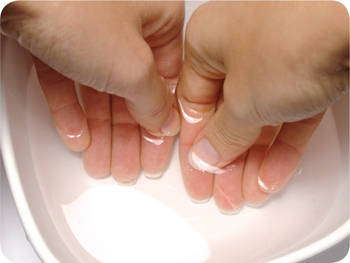 If you have any dead skin around your cuticles, soak your nails in a bowl of warm water for five minutes.
This will soften the skin. 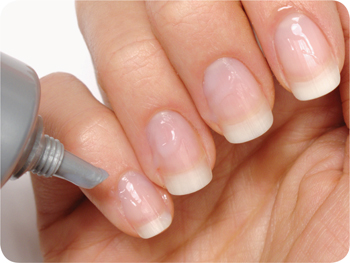 Apply a cuticle remover around each cuticle, following the manufacturers instructions for how long to let it set.
 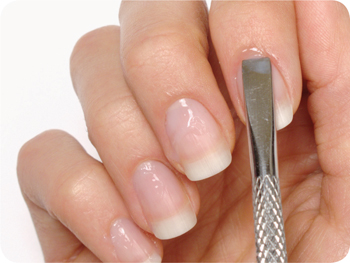 With a pusher, gently push the cuticles back slightly. This will remove any dead skin and create a better area for designing.
 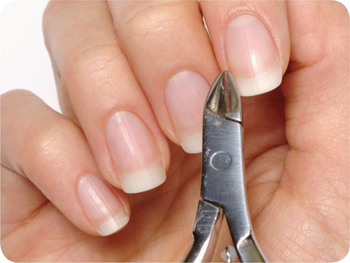 If you have any hangnails, carefully clip them with a pair of nail clippers.
Hydrating Your Nails
Its important to keep your hands and nails moisturized.
Cuticle oil and hand cream are a great way to get this job done. 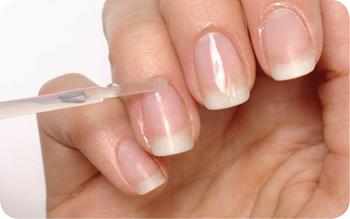 Apply a drop of cuticle oil to each nail.
 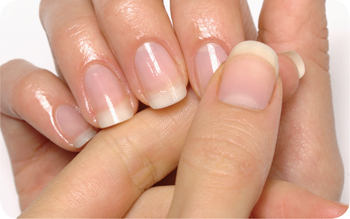 Massage the oil into each nail.
 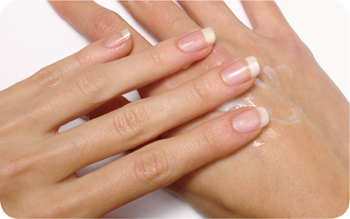 Apply your favorite lotion to your hands to moisturize them as well.
 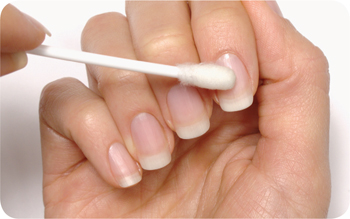 Allow the cuticle oil to soak in for at least five minutes.
Tools and Techniques
Some essential tools and techniques will help you achieve the best results for your designs.
Tools and Techniques
Some essential tools and techniques will help you achieve the best results for your designs.
These tools are not hard to find or expensive, and some are household items you might already have. If you cannot find these items in your local store or beauty supply, you can easily find them online. Once you are prepped and ready for nail art, always apply a base coat to your nails first. A base coat is a product made specifically to prolong the life of your manicure. A base coat protects your natural nail from staining, fills in lines to create a smooth surface and helps polish adhere to the nail. When you are finished with your design, it is crucial to end with a top coat that will protect your manicure.
A top coat is a product that smooths out any imperfections, seals in your manicure for the best protection against chipping and gives a shiny finish. Some top coats used in this book are matte, which means they are flat and without shine. Make sure you also apply top coat to the free edge (front tip) of your nail for maximum protection. A dotting tool is one of the most popular nail art tools. This tool usually has two rounded ends of different sizes, one on each end of the handle. Its used to create patterns and shapes for your designs.
Smaller dotting tools can also be used for applying tiny details in a design. To use this tool, apply a small drop of polish or acrylic paint to a plastic sandwich bag, then dip just the tip of the tool into the polish and gently apply dots onto the nail. The more polish you get on the tip, the larger your dot will be. If you are creating a different shape with the tool, such as outlines for a cheetah print, its best to glide the tool along without pressing too hard. Gentle pressure ensures you dont drag the tool into your base polish and ruin the design. 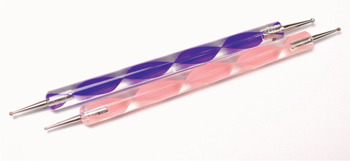 Dotting tools A small nail art brush is great for applying colors and details.
You can find packs of these in all different shapes and sizes online or in beauty supply stores. You can use standard small paintbrushes as an alternative. To use this brush, apply a small drop of polish or acrylic paint to a sandwich bag and dip the tip of the brush into the polish. Carefully paint the nail as you would with a regular paintbrush. Remember to clean your brushes after each step to lengthen the life of your tools. Acrylic paint is easy to remove: just rinse the brush with water.




 CINCINNATI, OHIO

 Oval
Oval  Round
Round  Almond or Pointed
  Squoval
  Square
  File each nail in a single direction. Filing back and forth can be too harsh for the nail and could possibly cause damage.
  If you have any dead skin around your cuticles, soak your nails in a bowl of warm water for five minutes.
 Apply a cuticle remover around each cuticle, following the manufacturers instructions for how long to let it set.
  With a pusher, gently push the cuticles back slightly. This will remove any dead skin and create a better area for designing.
  If you have any hangnails, carefully clip them with a pair of nail clippers.
 Apply a drop of cuticle oil to each nail.
  Massage the oil into each nail.
  Apply your favorite lotion to your hands to moisturize them as well.
  Allow the cuticle oil to soak in for at least five minutes.
 Dotting tools A small nail art brush is great for applying colors and details.