Runge - The 3-in-1 Kiki Bag Pattern
Here you can read online Runge - The 3-in-1 Kiki Bag Pattern full text of the book (entire story) in english for free. Download pdf and epub, get meaning, cover and reviews about this ebook. City: Lafayette;CA, year: 2016, publisher: C&T Publishing, genre: Home and family. Description of the work, (preface) as well as reviews are available. Best literature library LitArk.com created for fans of good reading and offers a wide selection of genres:
Romance novel
Science fiction
Adventure
Detective
Science
History
Home and family
Prose
Art
Politics
Computer
Non-fiction
Religion
Business
Children
Humor
Choose a favorite category and find really read worthwhile books. Enjoy immersion in the world of imagination, feel the emotions of the characters or learn something new for yourself, make an fascinating discovery.
- Book:The 3-in-1 Kiki Bag Pattern
- Author:
- Publisher:C&T Publishing
- Genre:
- Year:2016
- City:Lafayette;CA
- Rating:3 / 5
- Favourites:Add to favourites
- Your mark:
The 3-in-1 Kiki Bag Pattern: summary, description and annotation
We offer to read an annotation, description, summary or preface (depends on what the author of the book "The 3-in-1 Kiki Bag Pattern" wrote himself). If you haven't found the necessary information about the book — write in the comments, we will try to find it.
Runge: author's other books
Who wrote The 3-in-1 Kiki Bag Pattern? Find out the surname, the name of the author of the book and a list of all author's works by series.


The 3-in-1 Kiki Bag Pattern — read online for free the complete book (whole text) full work
Below is the text of the book, divided by pages. System saving the place of the last page read, allows you to conveniently read the book "The 3-in-1 Kiki Bag Pattern" online for free, without having to search again every time where you left off. Put a bookmark, and you can go to the page where you finished reading at any time.
Font size:
Interval:
Bookmark:
Publisher: Amy Marson
Creative Director: Gailen Runge
Editor: Liz Aneloski
Technical Editors: Mary E. Flynn and Alison M. Schmidt
Design Direction: Kristy Zacharias
Cover Designer: April Mostek
Page Layout Artist: Casey Dukes
Production Coordinators: Zinnia Heinzmann and Tim Manibusan
Production Editor: Alice Mace Nakanishi
Illustrator: Kirstie L. Pettersen
Photo Assistant: Sarah Frost
Style photography: Page + Pixel
Studio photography: Diane Pedersen
Published by Stash Books, an imprint of C&T Publishing, Inc., P.O. Box 1456, Lafayette, CA 94549
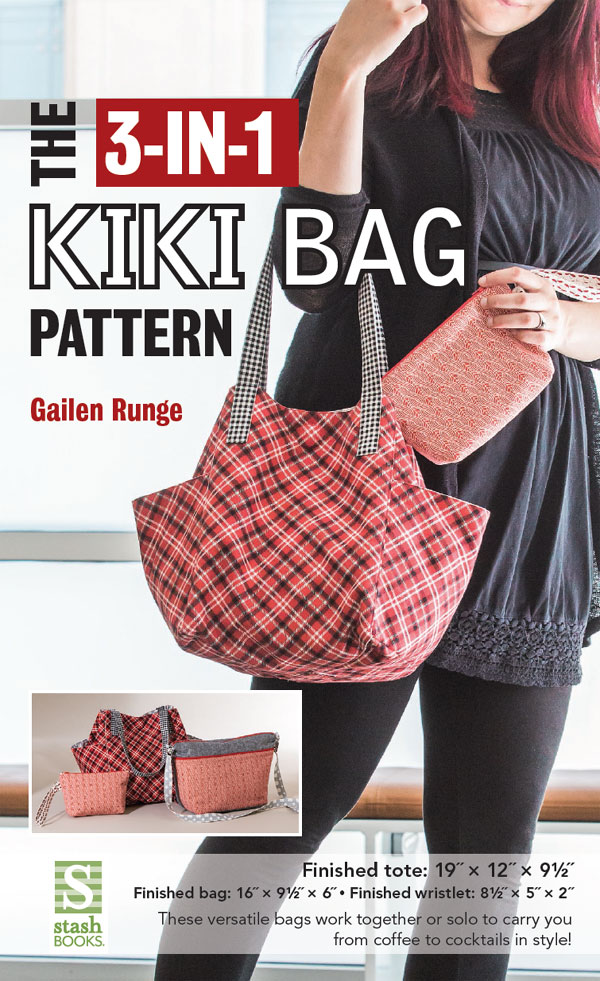
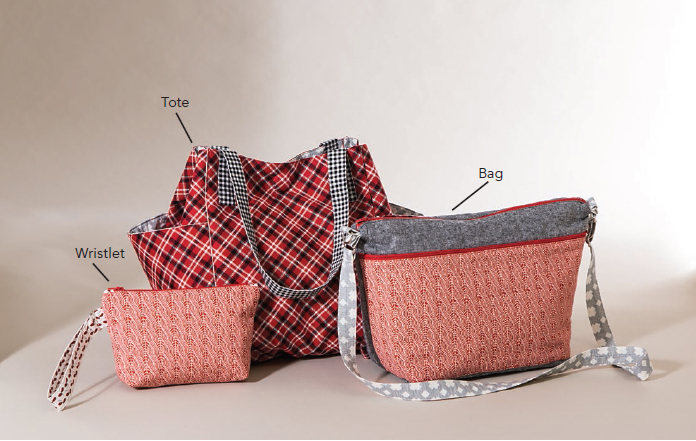
The 3-in-1 Kiki Bag
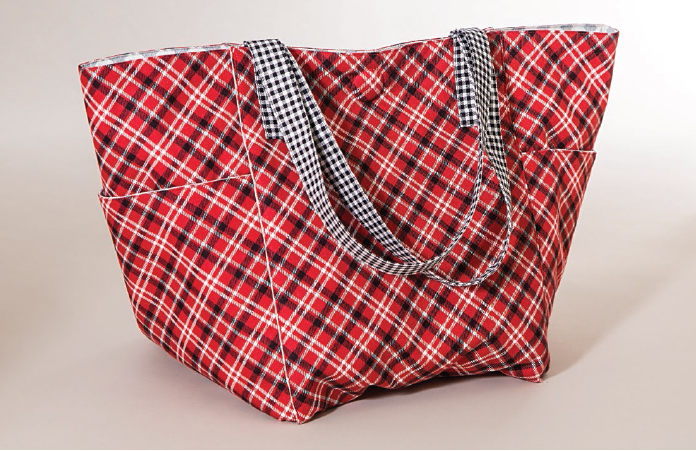
Finished tote: 19 12 9
Finished bag: 16 9 6
Finished wristlet: 8 5 2
General Advice
I have discovered that the adage about using the right tool for the job is amazingly applicable to sewing machine feet! Yes, you can topstitch beautifully without an edge stitching (blind hem) foot, but the edge stitching foot makes it so much easier and so much more foolproof! Making this bag, I am constantly switching in between my presser feet: edge stitching, zipper foot, open toe foot, closed toe foot I keep them in a little bowl next to my machine so I can grab them easily.
I have also found in my own sewing that the right tool for the job is often glue. I use pins when I need to, but use glue (yes, even permanent glue!!) far more often. Its the perfect tool to hold zippers in place for sewing and straps together before topstitching. A little dot goes a long way and dries almost immediately.
You can use as many or as few fabrics as you like for these three bags (tote, bag, and wristlet). I used the same fabric for all of the linings. While I supplied one yardage amount for all of the straps, its easy to see what fabric is needed in the cutting section to make adjustments for your own style. (For the bag in the cover photograph, I used different fabrics for each of the three straps!)
For thread, choose yours based on your fabrics but also based on your top-stitching abilities. These three bags all feature top stitching as a design element. If youre confident in your stitching, you might consider a contrasting fabric/thread combination. If youre a little unsure, consider matching thread to fabric to help wavy stitches blend in better. I was switching between three top threads and bobbin threads constantly, and rarely did the thread in the top match the bobbin thread!
As a bag maker, the single thing that improved my abilities and my outcomes more than any other was reading Nicole Mallalieus book The Better Bag Maker. What a revelation!
MATERIALS
Yardage is based on 42-wide fabric. Allow extra fabric for directional prints.
FABRIC
Tote outer fabric: 1 yard
Bag outer fabric: yard
Bag outer zipper pocket fabric: yard
Wristlet outer fabric: yard
Lining fabric: 1 yards
Strap fabric: yard
INTERFACING
Fusible fleece: 1 yards
Medium-weight fusible: 3 yards (I use Pellon 931TD Fusible Midweight.)
Medium-weight stiff interfacing: scrap (at least 2 8) (such as Timtex or fast2fuse by C&T Publishing)
HARDWARE AND NOTIONS
5 D-rings 1
2 swivel hooks
1 adjustable slider
Magnetic purse closure
2 zippers 16 (to match bag fabric)
1 zipper 7 (to match wristlet fabric)
Fabric glue (I use FabriTac by Beacon Adhesives.)
CUTTING
Patterns for the tote can be found on the pullout, or you can cut dimensionally, following the illustrations.
Tote
From tote outer fabric and lining, cut:
2 tote front/backs
2 tote sides
2 tote pocket/bottoms
2 tote hexagons (outer fabric only)
From strap fabric, cut:
4 strips 2 27 for shoulder strap
2 strips 4 1 for tabs
From fusible fleece, cut:
2 tote front/backs
2 tote sides
2 tote pocket/bottoms
1 tote hexagon
From interfacing, cut:
2 tote front/backs
2 tote sides
2 tote pocket/bottoms
4 strips 25 for shoulder straps
2 strips 4 for tabs
Bag
From bag outer fabric, cut:
2 rectangles 17 13 for front/back
From outer zipper pocket fabric, cut:
1 rectangle 17 7
From bag lining fabric, cut:
2 rectangles 17 13 for front/back
1 rectangle 17 7 for outside zipper pocket
1 rectangle 17 8 for inside divided pocket (optional)
From strap fabric, cut:
1 strip 2 WOF for shoulder strap
1 strip 2 18 for tabs
From fusible fleece, cut:
2 rectangles 17 13 for front/back
From interfacing, cut:
1 strip 2 the length of your strap strip (Note: The length can be pieced from shorter pieces.)
1 strip 2 18 for tabs
Wristlet
From wristlet outer fabric and fusible fleece, cut:
2 rectangles 9 7
From wristlet lining fabric, cut:
2 rectangles 9 7
1 rectangle 6 7 for card pocket (optional)
From strap fabric, cut:
2 strips 1 3 for zipper ends
1 strip 2 17 for strap and D-ring tab (Later youll cut into 12 and 3 lengths.)
From interfacing, cut:
1 strip 2 17 for strap and D-ring tab
The Tote
Seam allowances are unless otherwise specified.
Outside Pieces
Trim off each edge of the fusible fleece pieces.
Center and fuse the fleece to the wrong side of each outer tote piece. (Only 1 hexagon piece is fused to fleece.)
Fuse the interfacing pieces to the wrong side of the matching lining pieces.
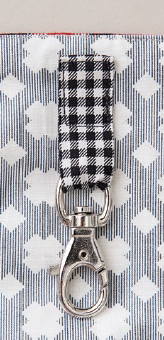
Swivel Hook Tabs
These swivel hooks can be left unhooked, as seen in the photo, or they can be hooked together to close the bag. When you carry the bag inside the tote, hook the tabs to the D-rings on the bag to secure it.
Center 1 strip of fusible interfacing on the wrong side of a corresponding tab fabric strip. Fuse in place.
Fold in both long edges until they meet in the middle and press in place.
On each short end, fold in both ends neatly. Tack the ends down with a small dab of glue, if desired.
Slide a swivel hook on the tab to the middle and fold the tab in half.
Pin or glue-tack the ends of the tab together (keep 1 nearest the swivel hook free of glue).
Center the tab on right side of 1 lining fabric side, with the swivel hook facing down and the top edge down from the top of the fabric. Pin or glue-tack in place. Topstitch around the tab, starting at a top corner, down an edge 1, across the tab, back up 1, then along the top.
Repeat Steps 16 with the other tab strip and the other side lining piece.
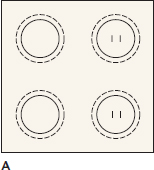
Magnetic Closure
Use a metal ring that came with the magnetic closures to trace 4 circles on the stiff interfacing (such as Timtex) with between each circle. Mark the 2 slots on 2 of the circles as well. Cut out each circle, outside the lines. Cut the slits on 2 of the circles with a point cutting tool, such as a utility knife. Set aside. Figure A
On the wrong side of both front and back lining pieces, mark the magnetic closure placement with a dot. Its 1 down from the top center of each piece. Figure B
Next pageFont size:
Interval:
Bookmark:
Similar books «The 3-in-1 Kiki Bag Pattern»
Look at similar books to The 3-in-1 Kiki Bag Pattern. We have selected literature similar in name and meaning in the hope of providing readers with more options to find new, interesting, not yet read works.
Discussion, reviews of the book The 3-in-1 Kiki Bag Pattern and just readers' own opinions. Leave your comments, write what you think about the work, its meaning or the main characters. Specify what exactly you liked and what you didn't like, and why you think so.