First things first: Where do we find all these automation features? In Photoshop, you can access them under File > Automate and File > Scripts. In Bridge, youll find them under Tools > Photoshop. As well see, some functions appear in both applications and there are advantages to accessing the functions in both.
The main difference between accessing the automated commands from within Photoshop or Bridge is how you choose the files. Very simply, Bridge lets you easily choose images using the thumbnail view, and it combines automated tasks and scripts under one menu. When accessing the automated commands from within Photoshop, you need to select files by namebut you often can select a folder of files in addition to individual files.
Photoshop Built-In Automations
You will find Photoshops built-in automations under File > Automate. The beauty of these functions is that, unlike actions, they dont require any up-front work.
PDF Presentation
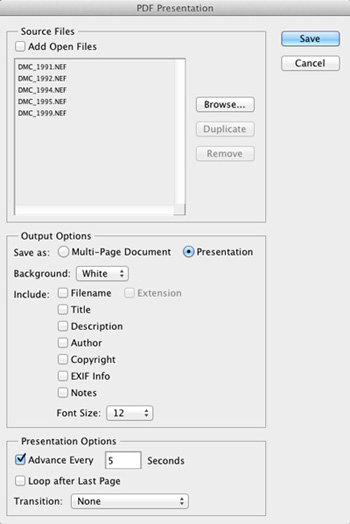
The PDF Presentation command is an example of an automated function with one very specific purpose: It turns a series of files into a single PDF file. That PDF file can either be a multipage document or a presentation. The main difference between the two options is that a PDF created as a presentation automatically opens in Acrobat Reader in Full Screen slide show mode. (The first time a PDF Presentation file is opened, Acrobat may request permission to enter full screen mode.)
To create a PDF file, choose File > Automate > PDF Presentation. In the top area of the dialog, add the files you want to include in the PDF file, either by adding all the files you currently have open or by browsing for files (). Then, choose between Multi-Page Document or Presentation, and set the options you want to include such as File Name or Tile.
Figure 1.1Use the PDF Presentation dialog to configure PDFs.
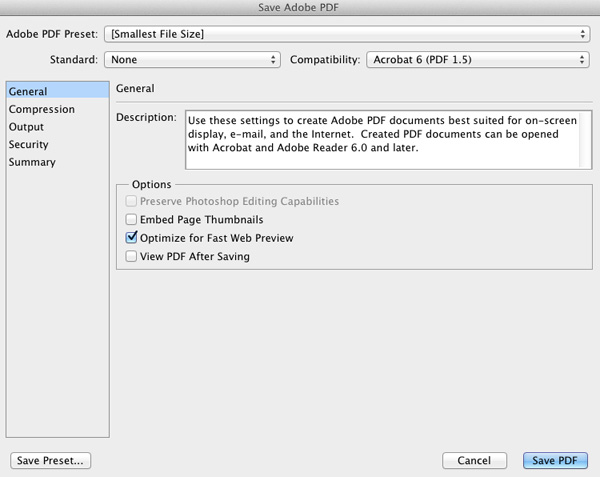
If you are creating a Presentation, you can control how fast the slides advance, the loop after the last page, and transitions between slides. Once you set all the options and click OK, a standard PDF creation dialog opens. Here you can set options to control the size, color, quality, and more in the PDF ().
Figure 1.2The Save Adobe PDF dialog for customizing the PDF creation.
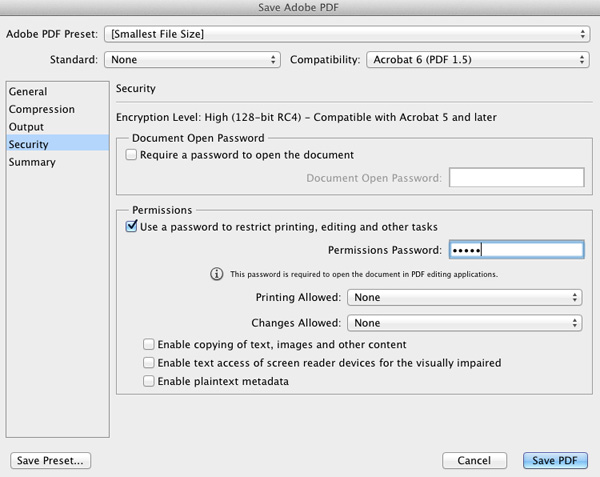
In the Save Adobe PDF dialog, click Security at left to limit peoples ability to work with the PDF file. For example, you can set up a password to restrict printing and editing. Use this option to send a PDF of images to a client while ensuring that they cant print the images ().
Figure 1.3The Security controls in the Save Adobe PDF dialog.
Crop and Straighten Photos
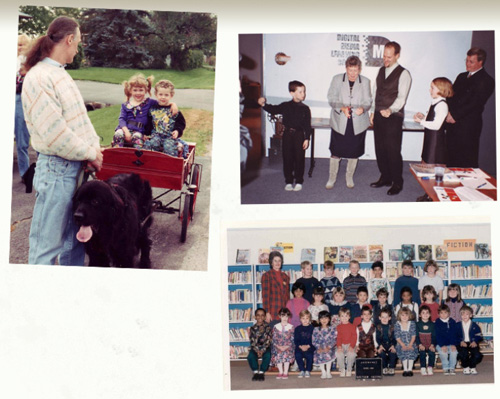
The Crop and Straighten Photos command automatically detects multiple images on a page, and then separates and straighten them. This function is designed for use with a scanner. You place multiple photos on a scanner, scan them all at once, and then open the file in Photoshop. You dont even have to worry about placing them carefully or straightPhotoshop takes care of that. The only things you have to worry about is leaving space between the photos so Photoshop can detect the edges. (If necessary, place a darker piece of paper behind the photos to create enough contrast to detect the edges.)
shows a scan of several photos; notice how I didnt even worry about trying to straighten the photos.
Figure 1.4A quick scan of multiple photos.
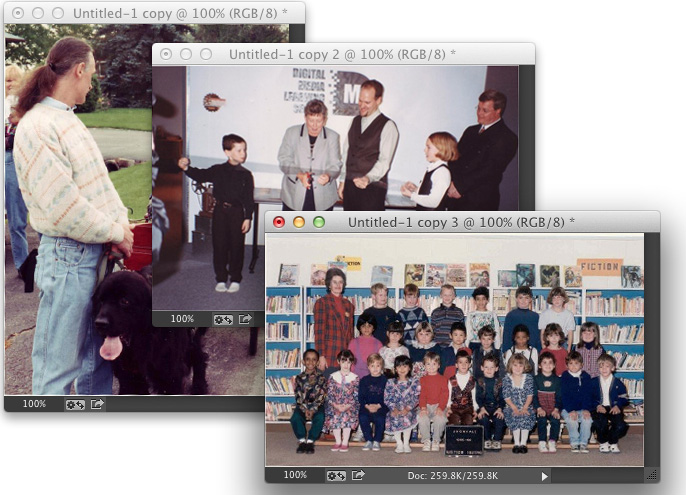
Once you open the scan in Photoshop, choose File > Automate > Crop and Straighten Photos. Thats itPhotoshop does the rest, creating separate files from the images it detects ().
Usually, the results are pretty good, although occasionally youll get an odd result with an unusual crop. This happens when the edge of a photo isnt detected properly. Also, you may need to do some additional cropping or straightening because sometimes Photoshop uses the outer edge of the photo (the border) rather than the image area. Still, even when it doesnt work perfectly and the results need some tweaking, its still better...compared to the alternative.

