Table of Contents
Guide
Pages
If you are an Annies customer and have a question about the instructions on a pattern you have purchased, please visit:
AnniesCatalog.com/pages/customer_care/pattern_services.html
Templates
To download templates for easy printing, view the download instructions at the end of this book or click the Templates chapter in the Table of Contents.
Introduction
Working with 2" strips can be fun and a time-saver. You can purchase precut and color-coordinated strips, or you can use your stash to create your own economical color mix. Whether you purchase strips or choose to cut your own, youre in for a real treat. The versatility of 2" strips may surprise you.
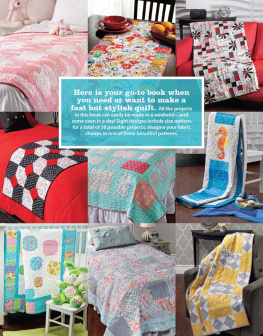
More Jelly Roll Quilts has eight great patterns with alternate-size options to create four more. Each pattern uses precut strips in unique ways, and the patterns are designed to get the most out of your strips. This book has everything from runners to bed quilts. Once you discover the ease of piecing with strips, youll want to purchase or cut more. The possibilities are endless once you allow yourself to explore 2" strips. Be creativejust think of the many combinations that are possible and enjoy using your stash in unique ways.
Table of Contents
General Information
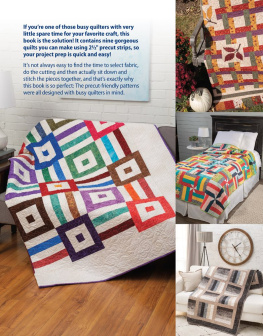
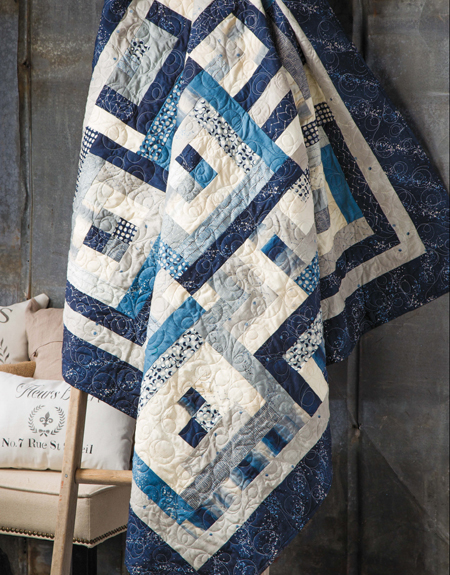
The construction is easy and allows for lots of creative color placement.
Designed & Quilted by Holly Daniels
Inspiration
I just like to play around with layering and optical effects; sometimes something fun comes out of it. Holly Daniels
Skill Level
Confident Beginner
Specifications
Quilt Size: 60" x 60"
Block Size: 16" x 16" finished
Number of Blocks: 9
Materials
40 (2" by fabric width) light/medium/dark tonals and prints strips
yard light print
1 yards dark print
Backing to size
Batting to size
Thread
Basic sewing tools and supplies
Project Notes
Read all instructions before beginning this project.
Stitch right sides together using a " seam allowance unless otherwise specified.
Materials and cutting lists assume 40" of usable fabric width.
Designers Tip
Cut the longest rectangles (16" and 12 ") first and then use the remainder of the strips for smaller pieces. To increase variety, cut one long piece from each dark/medium strip.
Cutting
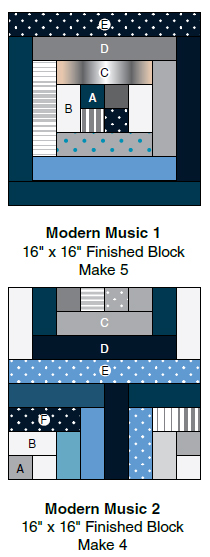
The cutting list and instructions steps will make five identical Modern Music 1 blocks and four identical Modern Music 2 blocks. Refer to the Designers Tip for hints to change value placement from block to block and adjust your cutting as needed.
From dark tonal & print strips (approximately 15):
Cut 10 (2" x 16") E, 14 (2" x 12") D, 4 (2" x 8") C, 8 (2" x 6") F and 12 (2" x 4") B rectangles, and 10 (2") A squares.
From medium tonal & print strips (approximately 13):
Cut 4 (2" x 16") E, 10 (2" x 12") D, 8 (2" x 8") C, 8 (2" x 6") F and 8 (2" x 4") B rectangles, and 34 (2") A squares.
From light tonal & print strips (approximately 12):
Cut 20 (2" x 8") C, 8 (2" x 6") F and 14 (2" x 4") B rectangles, and 8 (2") A squares.
From light print:
Cut 6 (2" by fabric width) G/H strips.
From dark print:
Cut 6 (4" by fabric width) I/J strips.
Cut 7 (2" by fabric width) strips for binding.
Completing the Blocks
Referring to Figure 1, sew a medium A square to a dark A square to make a row; press. Repeat to make two rows. Stitch rows together to make an A unit; press.

Sew a light B rectangle to opposite sides of the A unit as shown in Figure 2; press. Sew a light C rectangle to top and bottom to make an A-B-C unit; press.

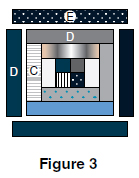
In the same manner, referring to Figure 3, add light C rectangles to opposite sides of the A-B-C unit, medium D rectangles to the top and bottom, dark D rectangles to the sides and dark E rectangles to the top and bottom to complete a Modern Music 1 block; press seams toward each rectangle when added.
Repeat steps 13 to make a total of five Modern Music 1 blocks, changing value placement from block to block, if desired (see Designers Tip).
Designers Tip
The designations of dark, medium and light are subjective. You may want to substitute and change the values of the rectangles and squares for the A units and two inner rings in the blocks. To maintain the pattern, use similar values of fabric in each ring and keep the outermost ring a darker value.
Referring to Figure 4, sew four medium A squares together in a row; press. Sew a medium C rectangle to one long side to make an A-C unit; press.

Sew a dark B rectangle to opposite sides of the A-C unit; press. Stitch a dark D rectangle to the bottom as shown in Figure 5; press.

In the same manner, add a light F rectangle to opposite sides of the A-B-C-D unit and a medium E rectangle to the bottom to complete the top section (Figure 6); press.


