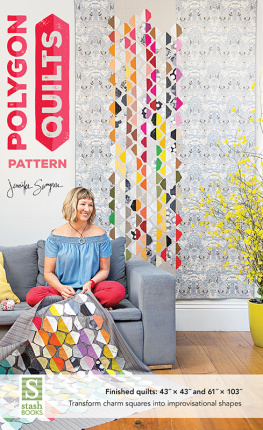
Polygon Quilts Pattern
Finished Polygon Play quilt: 43 43
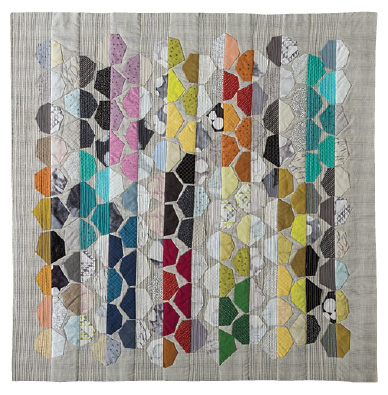
Finished Polygon Toile quilt: 61 103
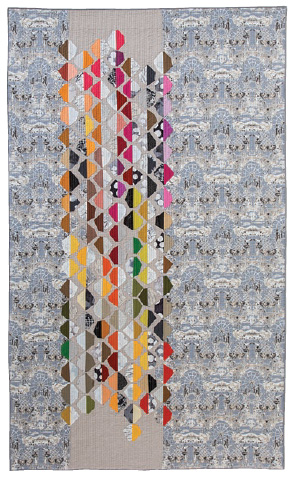
Polygon Play is a free-spirited twist on the appliqu hexie quilt. The improv approach is super easy, and the quilt comes together quickly using half-square triangles (HST) made from 5 precut charm squares or scraps from your fabric stash. Playful, forgiving, and creative quiltmaking is so satisfying, because, frankly speaking, its a lot of fun! This pattern has the freedom of improv yet also the basic structure of a simple layout, materials list, and instructions. Enjoy the process, and let your inner artist shine!
I have been going crazy with making the polygons, and I am getting faster and faster at continuously piecing them. Its addicting, and I can do it anywhere! I just put my squares in a little sewing pouch with my roller and glue sticks. I usually carry two to three sticks at a time because I run out of glue quickly.
The hexie quilts by Nicole Daksiewicz were my jumping-off point. I forgot my hexie templates on a sewing weekend and had to improvise with the materials I had hence this new pattern! There are two quilt-size options in this pattern43 43 (square) and 61 103 (large rectangle)and polygon layout options for inspiration.
Show me your work! Tag me on Instagram (@jennifersampou, #polygonplayquilt, and #jennifersampou).

Polygon Play
Finished quilt: 43 43
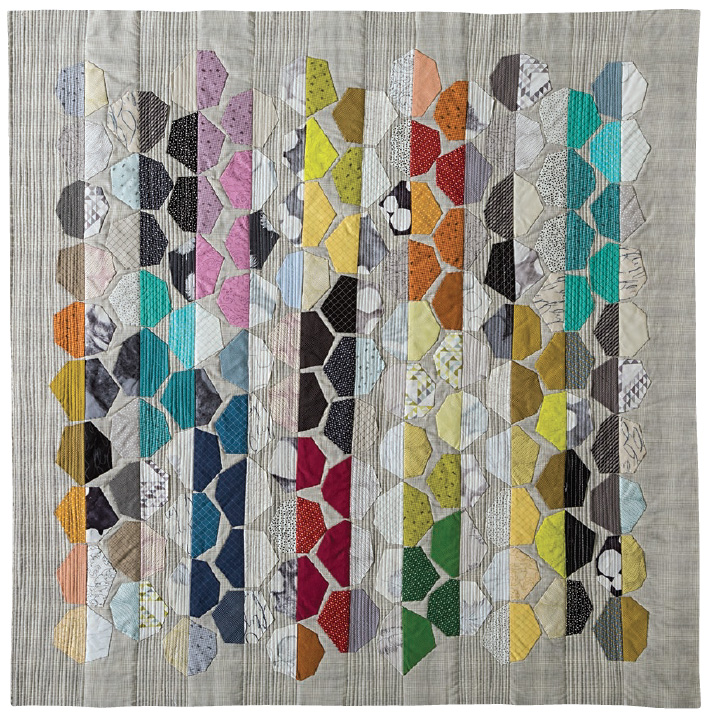
MATERIALS AND CUTTING
Polygons: 3 packs of 5 precut charm squares (4042 squares per pack). I used Black & White Collection 2, Studio Stash 3Cool Story, and Studio Stash 3Warm Story by Jennifer Sampou for Robert Kaufman Fabrics. You will need 105 total in your final layout; this will give you extra to make your layout just right.
or
3240 squares 5 5 each of light, dark, bright, and neutral fabrics. A few repeated fabric squares are okay. You will need 105 total in your final layout; this will give you extra to make your layout just right.
Background: 44 44 (I used Studio Stash Yarn Dyes by Jennifer Sampou for Robert Kaufman Fabrics.)
JENNIFERS NOTE
I recommend that you use a woven (yarn dye) or solid for the quilt background because wovens and solids tend to be wider than prints. If you use a print background, it may measure 43 43, which means the polygons will come closer to the edge of the fabric when arranged than the photo shows. Its not a problemjust be aware that when you lay out the polygons, you may need to make minor adjustments or make your polygons smaller. See the actual layout size. You could be a bit more generous with your turn under, and it will result in smaller polygons. Play with it!
School glue sticks: 5
Binding: yard. Cut 5 strips 1 width of fabric.
Backing: 1 yards
Lightweight 100% cotton batting: 48 48
JENNIFERS NOTE
I started by using a special fabric appliqu glue stick, went through $30 worth of refills, and said, To heck with that! So I am recommending an inexpensive school glue stick. It is a little bulkier to handle, but this isnt fussy work.
Jennifers thoughts about COLOR AND VALUE
Color and value go hand in hand. You can create secondary patterns if you work with color families from polygon to polygon, nesting them together like families to create striped effects, diagonal coloring, or grouped color/value areas. Play with different ways to lay out the pieces, and take a picture with your phone to see what you like best.
Jennifers thoughts about TEXTURE
Combine prints, yarn dyes, and solids. I love to combine a variety of fabric textures with all the work I do in quilting and sewing. By combining an Essex linen/cotton blend with a metallic, fine-printed cotton from Japan and my textural yarn-dyed plaids and stripes from India, I capture not only a visual sheen but a depth of fiber; its nicer to touch because of the variety of textures.
Different weaves and fibers also capture and reflect the light differently, adding interest to your project. Noting the finer details in any work you do elevates your effort to designer caliber. Once you pay heed to these finer points, it refines your eye, and the time you put into the project gives you a better result. I also choose faux fur for some of my pillow backings. Gone are the days of having to use only like fabrics. If you have one fabric thats more flimsy than another, an easy option is to stabilize the lighter one if you are having a hard time with fabric moving or slipping.
Making the Polygons
Organize multiple piles of squares based on color and value.
Choose 2 fabrics you like, and pair them with right sides together. I used 1 light with 1 dark and 1 bright with 1 neutral. Create 63 pairs total.
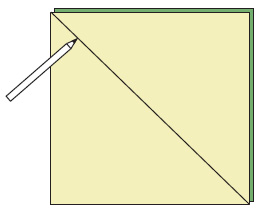
Using a ruler, mark a diagonal line across each square set with pen or pencil. This represents the cutting line.
Sew on each side of the marked line; then cut on the marked centerline.
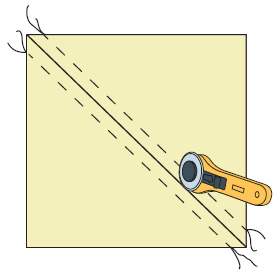
jennifers tip
I like to chain piece ten at a time by sewing one side of the line on all ten first and then sewing all ten down the other side. Fast!
Press the seams open to create 126 HSTs.
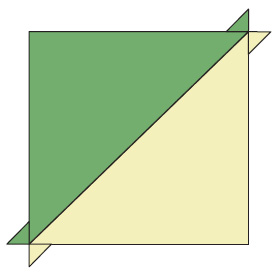
With the wrong side facing up, apply glue to the edges. Fold down the sides, working clockwise around the polygon, until you have created a 6-, 7-, or 8-sided polygon. Be sure that all the raw edges are turned under. This is fun! Hey, get a rookie to help! Dont worry about making anything exact; each one will be different. Play with the shape! Some polygons will be wonkier, larger, or smaller than others. This is what makes this overall pattern so interesting and dynamic!
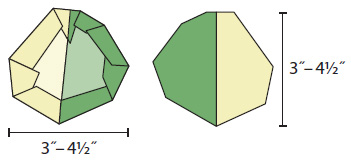
Glue down the folded edges. Make 126.
JENNIFERS NOTE
Hand basting the folded edges instead of gluing is also a good solution if you want to prepare the pieces on the go and not deal with any sticky issues. This is a purists approach.
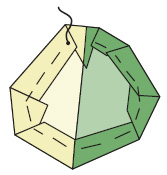
Press all of the polygons with a hot iron once dry. Place the polygons between 2 scrap cloths if you are worried about getting glue on your iron. For this layout you will only need 105, so you will have extra to play with to get your design just right.
Placing the Polygons on the Background
Establish the centerline of the background fabric by folding it in half and marking it with tailors chalk or lightly pressing with an iron.
Next page
