Table of Contents
Guide

2010 Rourke Publishing LLC All rights reserved. No part of this book may be reproduced or utilized in any form or by any means, electronic or mechanical including photocopying, recording, or by any information storage and retrieval system without permission in writing from the publisher. www.rourkepublishing.com Adult supervision is suggested for nail art projects. Please do not leave sharp or small objects, nail polish, or nail polish remover where very young hands can find them. Author Acknowledgments Thank you to Di and Jeannie at Adevia of Forest Lake; to Meg for testing; to Tommy for your patience; and to the Blue Door and Rourke teams. p. cm. -- (Creative crafts for kids) Includes bibliographical references and index. -- (Creative crafts for kids) Includes bibliographical references and index.
ISBN 978-1-60694-344-1 (hard cover) ISBN 978-1-60694-506-3 (soft cover) 1. Nail art (Manicuring)--Juvenile literature. I. Title. RL94.M392 2009 646.7'27--dc22 2009003901 Printed in the USA  Post Office Box 643328 Vero Beach, Florida 32964
Your Starter Supplies
Caring for your fingernails is fun and good personal . Even if you do not polish your nails, keep them clean, trimmed, and moisturized.
It is easy with a few supplies. 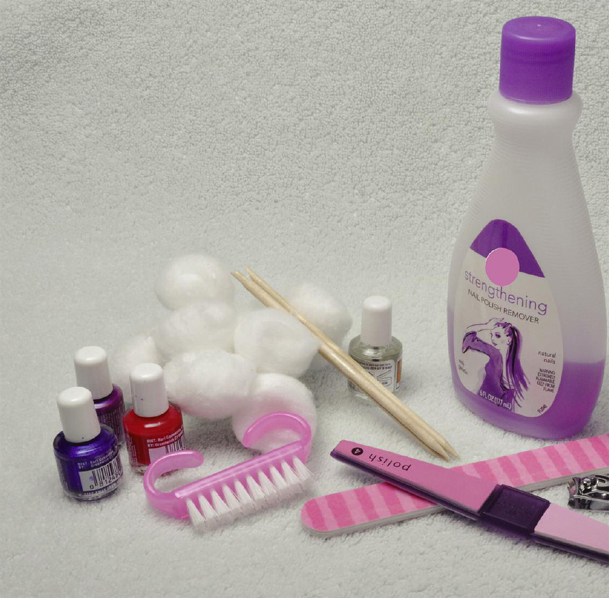 You Will Need: clear base coat or top coat nail polish nail buffer colored nail polish crystal file or emery board a soft, small nailbrush nail clippers nail polish remover rubbing alcohol a stylus, toothpick, or other pointed tool tissues or cotton balls
 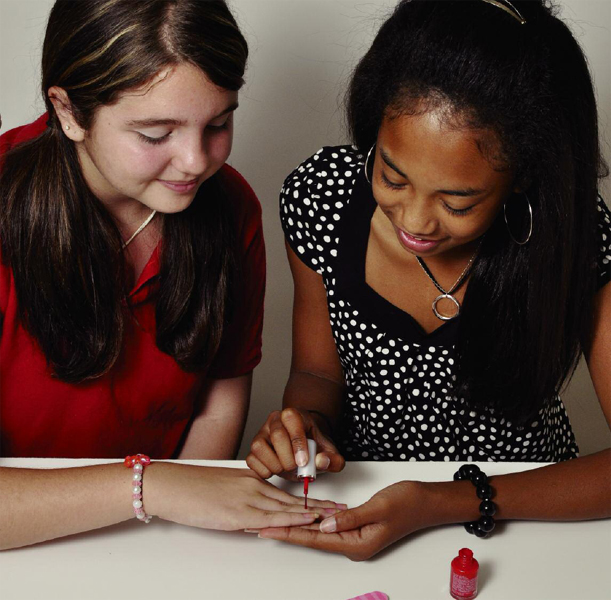 Safety First! Use nail products with an adults permission. Nail products contain toxic chemicals that are harmful if swallowed. They also catch fire easily and damage wood, carpeting, and other materials. T i P Use a basket to store your nail gear, so air can dry the tools.
Start with a Manicure
A is a beauty treatment for your hands and nails.
Before you decorate your nails with polish, clean and shape them. You Will Need: nail polish remover tissue or cotton balls nail clippers nailbrush crystal file or emery board nail buffer oil or olive oil hand towel moisturizer T i P Keep nail tools clean and do not share them. Tools can carry diseases. Heres How: Remove old nail polish with nail polish remover and a cotton ball or tissue. 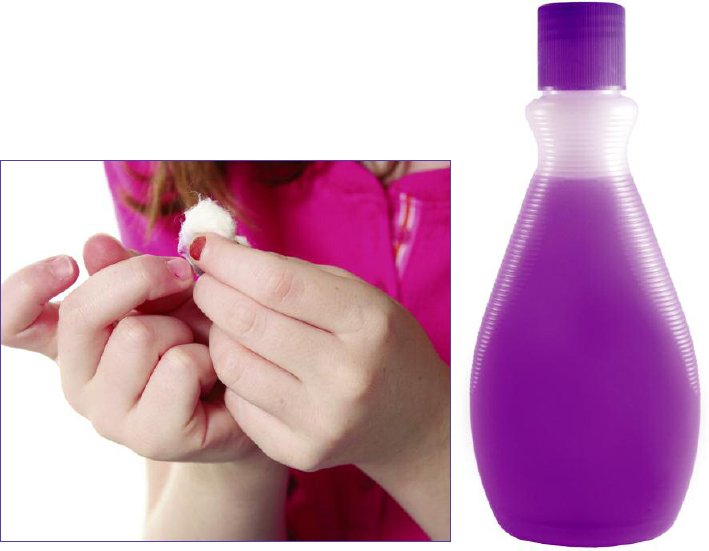
 How Fast Do Nails Grow? Growing from the base to fingertip takes four to six months. Each fingernail grows at a different speed.
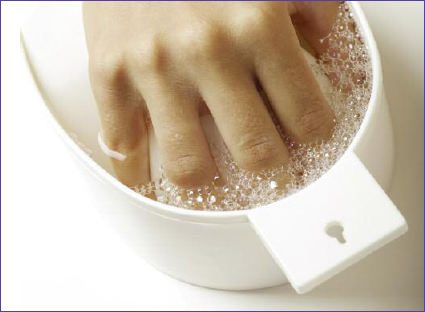
Nails on your longest fingers grow fastest. Soak your hands for 15 minutes in warm, soapy water or take a bath. Clean under your nails with the nailbrush or orangewood stick. Use nail clippers to trim your nails straight across the . 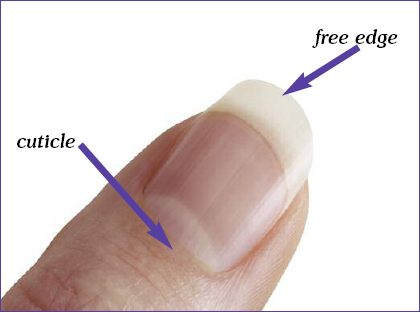
 File your nails in one direction. Do not saw back and forth.
Smooth the free edges and round the corners. Finish shaping with the buffer. Use light sideways strokes. Rub cuticle oil into the base of each nail. Gently push back the skin around your nails. Wash your hands and pat them dry.
Rub moisturizing lotion into your hands and nails. T i P No Nibbling! Biting your nails damages them, spreads nasty germs to your mouth, and it hurts. To quit nibbling, use a special clear polish that tastes bitter, wear a mouth guard, or squeeze a stress ball. 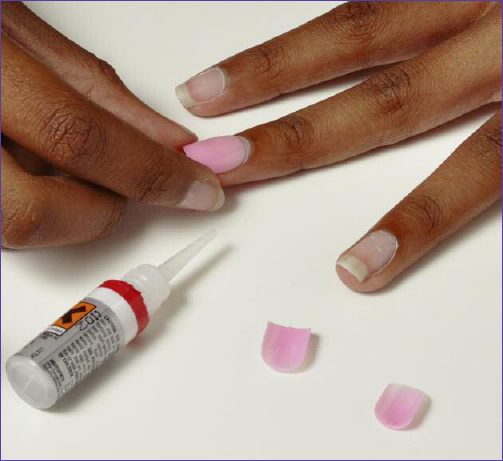 Grow Your Nails in Less than an Hour and gel nails attach with special chemicals and tools. A Long History Religions that forbid wearing fingernail polish may allow coloring the nails with natural . Henna fades but does not wash off.
Many people prefer henna designs on their skin instead of tattoos. 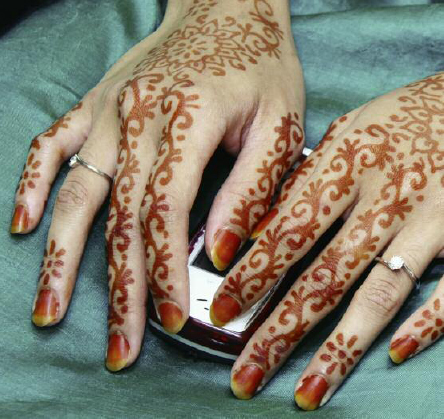
Painting with Polish
Almost all nail art starts with a clean, smooth base of polish. To begin, cover a flat work area with old newspapers. Rub the polish bottles between your palms to stir the . You Will Need: tissues rubbing alcohol clear nail polish any color nail polish nail polish remover cuticle oil or olive oil T i P Close polish bottles tightly.
Heres How: Dribble rubbing alcohol on a tissue and wipe each nail.
Heres How: Dribble rubbing alcohol on a tissue and wipe each nail.
Alcohol removes oils and helps the polish resist chipping. Start at the middle of the nail base and pull the brush toward the free edge in a straight line. Start another stripe beside the first one at the nail base and paint toward the free edge. Continue painting stripes until the nail is covered. Add a second coat. Let your nails dry completely.
Finish with clear nail polish. Wait for the polish to dry before you do anything with your hands. If you smudge polish on your skin, dip the orangewood stick into the polish remover. Press it on the skin and dab off the polish. After the polish dries, rub cuticle oil on each nail. 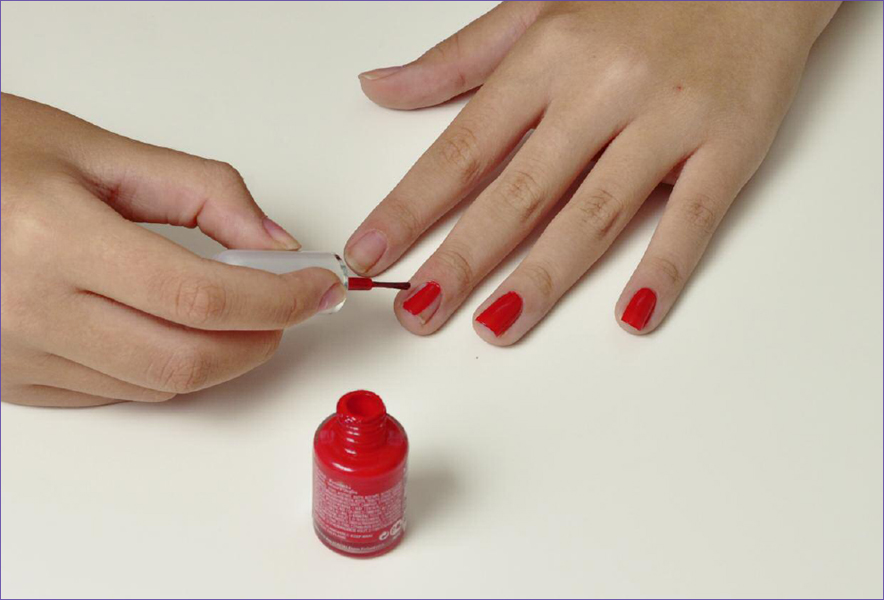 T i P If you are right-handed, paint your right hand first.
If you are left-handed, paint your left hand first. Work from the pinky to the thumb.
Make Your Own Supplies
Entire stores and websites sell just nail products. Professional tools and fancy extras are nice, but they are often expensive. Shop at the craft store instead and make your own nail art supplies. Make A Striper Brush Heres How: Clean an extra brush in nail polish remover.
Trim the bristles to a fine point. Use this brush to paint thin lines on nails. 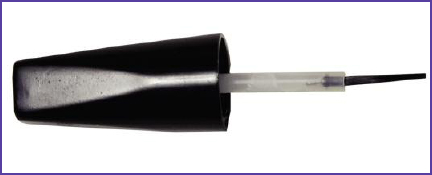 Nail Glitter Heres How: Paint colored polish on nails. Let dry. Dab glitter glue on dry polish. Use only small dabs.
Too much glue takes hours to dry. After the glue dries, cover with clear polish. T i P Instead of glitter glue, try clear drying craft glue and glitter sprinkles. Dab the glue on dry polish and sprinkle with glitter. Custom Nail Stickers Stores sell nail stickers, small jewels, and other decorations for instant nail art. You can make your own, too.
The stylus helps position these tiny stickers. Dip the point into clear polish; then poke the top side of the sticky art or jewel to put it into place. Heres How: Clip small magazine pictures or artwork to the size of your nail. Paint colored polish on nails. Let dry. Dab glue onto the nail where you want the magazine clipping.








 2010 Rourke Publishing LLC All rights reserved. No part of this book may be reproduced or utilized in any form or by any means, electronic or mechanical including photocopying, recording, or by any information storage and retrieval system without permission in writing from the publisher. www.rourkepublishing.com Adult supervision is suggested for nail art projects. Please do not leave sharp or small objects, nail polish, or nail polish remover where very young hands can find them. Author Acknowledgments Thank you to Di and Jeannie at Adevia of Forest Lake; to Meg for testing; to Tommy for your patience; and to the Blue Door and Rourke teams. p. cm. -- (Creative crafts for kids) Includes bibliographical references and index. -- (Creative crafts for kids) Includes bibliographical references and index.
  Post Office Box 643328 Vero Beach, Florida 32964
 You Will Need: clear base coat or top coat nail polish nail buffer colored nail polish crystal file or emery board a soft, small nailbrush nail clippers nail polish remover rubbing alcohol a stylus, toothpick, or other pointed tool tissues or cotton balls
  Safety First! Use nail products with an adults permission. Nail products contain toxic chemicals that are harmful if swallowed. They also catch fire easily and damage wood, carpeting, and other materials. T i P Use a basket to store your nail gear, so air can dry the tools.
 How Fast Do Nails Grow? Growing from the base to fingertip takes four to six months. Each fingernail grows at a different speed.
 File your nails in one direction. Do not saw back and forth.
 Grow Your Nails in Less than an Hour and gel nails attach with special chemicals and tools. A Long History Religions that forbid wearing fingernail polish may allow coloring the nails with natural . Henna fades but does not wash off.
 T i P If you are right-handed, paint your right hand first.
 Nail Glitter Heres How: Paint colored polish on nails. Let dry. Dab glitter glue on dry polish. Use only small dabs.