Table of Contents
Guide

2010 Rourke Publishing LLC All rights reserved. No part of this book may be reproduced or utilized in any form or by any means, electronic or mechanical including photocopying, recording, or by any information storage and retrieval system without permission in writing from the publisher. www.rourkepublishing.com Author Acknowledgments Thank you to Meg, Tommy, Kim and the crews at Rourke and Blue Door. Thank you to Ashley Wierback for producing the projects for photography. Photo credits: All photos Blue Door Publishing except Vladimir Mucibabic; Editor: Meg Greve Cover and page design by Nicola Stratford, Blue Door Publishing Library of Congress Cataloging-in-Publication Data Maurer, Tracy, 1965 Rock your room with crafts : creative crafts for kids / Tracy Nelson Maurer. cm. -- (Creative crafts for kids) Includes index. -- (Creative crafts for kids) Includes index.
ISBN 978-1-60694-345-8 (hard cover) ISBN 978-1-60694-507-0 (soft cover) 1. Handicraft--Juvenile literature. 2. Girls' bedrooms--Juvenile literature. 3. I. Title. Title.
TT171.M176 2009 745.5--dc22 2009003902 Printed in the USA 
Post Office Box 643328 Vero Beach, Florida 32964
Your Room, Your Space
Your bedroom is more than a place to sleep. You escape to your room with friends. You study there. You relax there. Decorate your space to reflect your . The projects in this book are designed for you to add your creative touch.
Make a look that is all about YOU! 
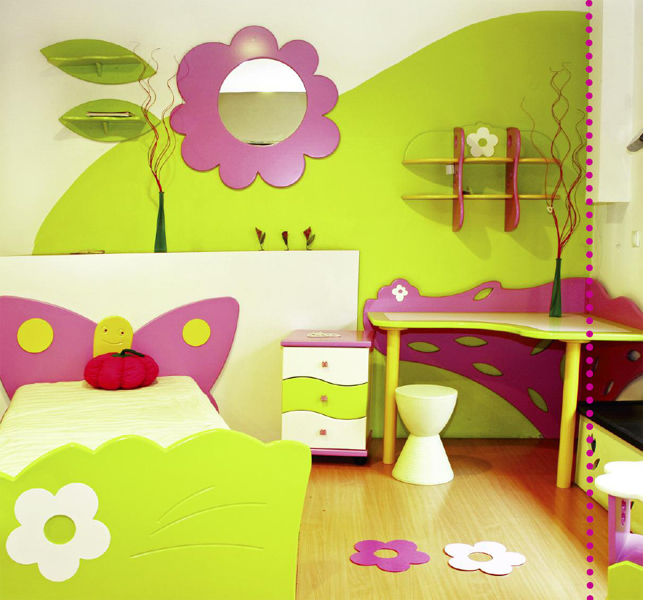 Think Theme Does your room have a , such as flowers, horses, or soccer? Does it show a certain style, such as glitzy, natural, or country? As you select materials for your projects, look for fabrics, colors, or other items that match your theme and style. T i P Before you rock your room, check with a parent and your roommate, if you have one.
Start Clean
Start by making your bed. Dust your shelves and vacuum the floor. To help organize your space, set up three cardboard boxes. Label the first one
Put Away.
Label the second one Give Away, and the third one Throw Away. Then start sorting your things into the boxes. When they are full, do what the boxes say!  T i P Take ten minutes every night to pick up your room. It stays neat this way. More Cleaning Ideas Time yourself. Set a kitchen timer for 15 minutes.
Work steadily for that time. Then take a break for five minutes. Go back to work for another 15 minutes and repeat until your room sparkles. Dance it clean. Play your favorite music. Whirl and twirl with your cleaning gear.
Wear a fanny pack. Using plastic bags in the fanny pack, organize hair , school or art supplies, lone socks, or other small items as you find them. 
Get Ready!
Decide with your parents how much money you can spend. Most materials for the projects in this book are budget friendly. They are also easy to find around your home or in a craft or fabric store. A New Room in Minutes Ask a parents permission first.
Move your furniture to create a new look quickly. Angle your bed, a chair, or small table in the corner to add interest. Pile new pillows on your bed, chairs, or floor for extra color. Hang bright posters or artwork on the wall, especially your own drawings. Starter Supplies Gather these supplies in a box or bucket to keep them handy for your projects. permanent fabric glue craft or tacky glue fabric scissors scissors tape measure 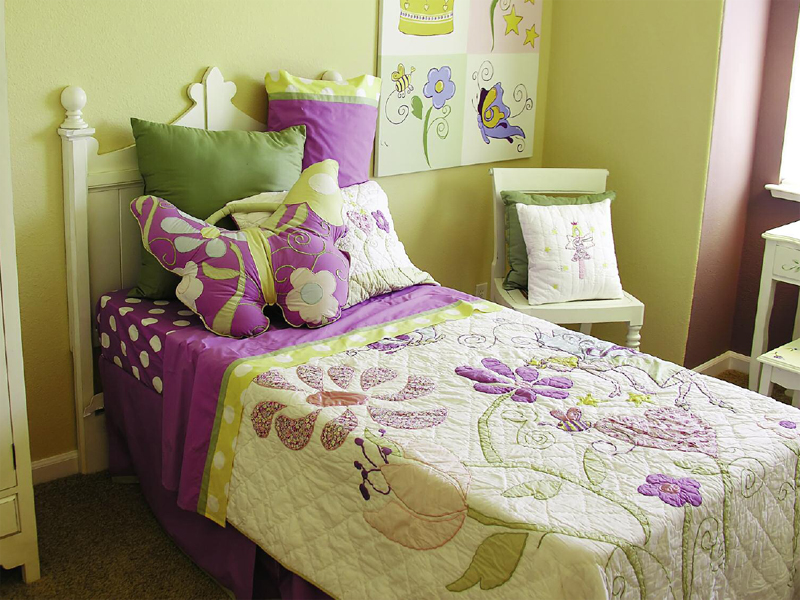
Fleece Fringe Blanket

You Will Need: tape measure fabric scissors print fleece fabric, 1-3/4 yards (1.6 meters) solid fleece fabric, 1-3/4 yards (1.6 meters) straight pins T i P Fleece is a stretchy material.
Be careful not to pull too hard on the knots. blanket that looks terrific from either side. Heres How: Lay your fleece fabric on a large, flat surface. A clean floor works best. Trim the edges, or the finished edges, from each piece of material. Fleece fabric usually has two selvage edges.
Place the two fleece pieces wrong side to wrong side, or back to back. Feel the fleece to check which is the backside. The soft, plush side is the front. Smooth any wrinkles. Check that your two pieces of fabric are the same size. If not, trim them to match.
Pin the two pieces together, keeping them back to back. Use the tape measure to place the pins 4 inches (10 centimeters) from the edge. Measure and cut a 4 inch (10 centimeter) square from each corner. To create the fringe, measure 1 inch (2.5 centimeters) from the first corner and cut a slit 4 inches (10 centimeters) deep. The base of your fringe should end at your pins. Continue cutting slits, one every inch (2.5 centimeters) down each side.
Then do the same across the top and bottom. Try to keep the cuts even and straight, but they do not have to be perfect. 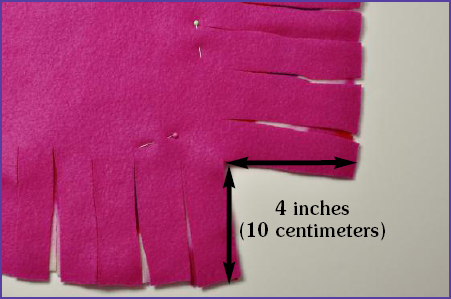
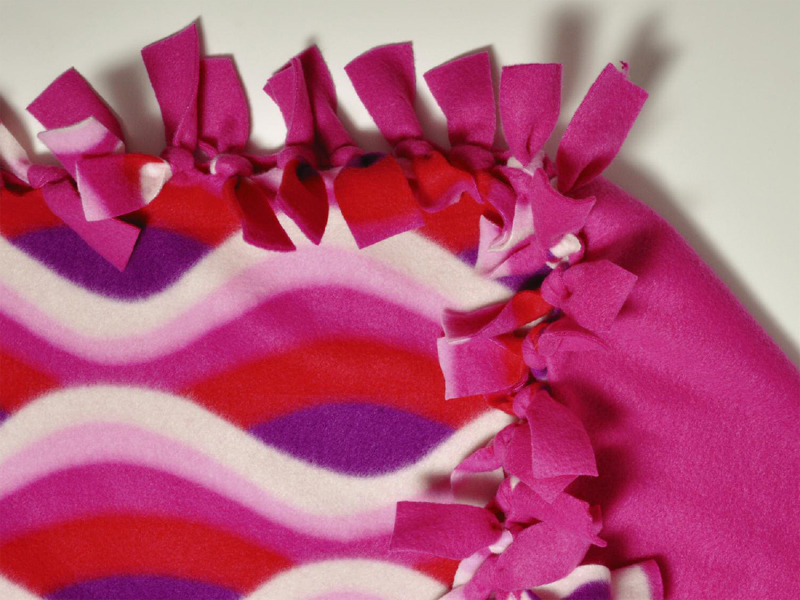 Using one fringe strip from the top fabric and one strip from the bottom fabric, tie an overhand knot at the base of the fringe. Tie a second, tighter overhand knot on top of the first one. Continue tying the strips, skipping every other pair. Then flip the blanket over and finish tying the remaining fringe pairs.
Remove the straight pins. Smooth out the blanket by tugging the knots until both sides lie flat. To make an overhand knot: 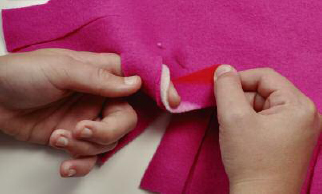 . Loop the two strips around your pointer, or index finger of your left hand (or your right hand, if you are left-handed).
 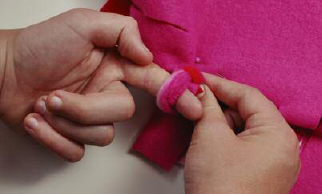 .
. 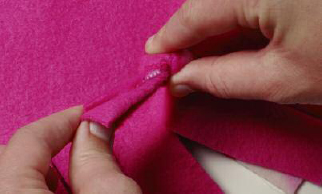 . Pull up. Pull up.
Snug the knot to the base of the fringe and smooth flat.
Doorway Beads
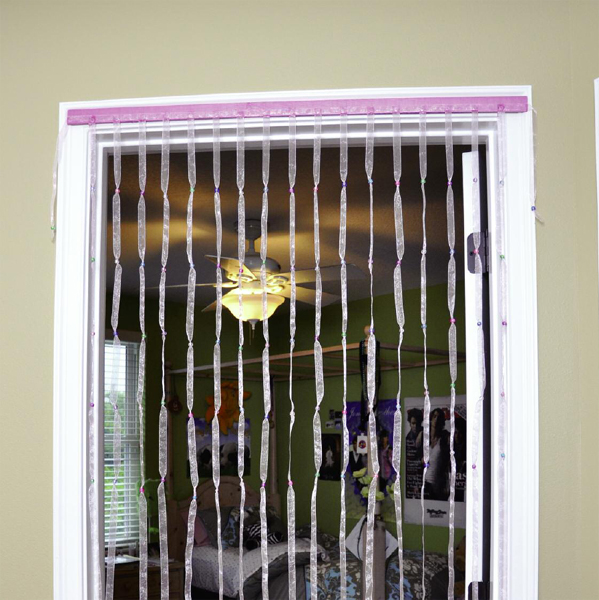
You Will Need: wooden yardstick or meterstick craft glue tape measure 17 tacks hammer 30 yards (27.5 meters) ribbon, 1/2 inch (1.25 centimeters) wide 90 beads to match ribbon acrylic paint to match ribbon Give your room a grand entrance. These beaded ribbons also look great over a closet doorway or window.





 2010 Rourke Publishing LLC All rights reserved. No part of this book may be reproduced or utilized in any form or by any means, electronic or mechanical including photocopying, recording, or by any information storage and retrieval system without permission in writing from the publisher. www.rourkepublishing.com Author Acknowledgments Thank you to Meg, Tommy, Kim and the crews at Rourke and Blue Door. Thank you to Ashley Wierback for producing the projects for photography. Photo credits: All photos Blue Door Publishing except Vladimir Mucibabic; Editor: Meg Greve Cover and page design by Nicola Stratford, Blue Door Publishing Library of Congress Cataloging-in-Publication Data Maurer, Tracy, 1965 Rock your room with crafts : creative crafts for kids / Tracy Nelson Maurer. cm. -- (Creative crafts for kids) Includes index. -- (Creative crafts for kids) Includes index.

 Think Theme Does your room have a , such as flowers, horses, or soccer? Does it show a certain style, such as glitzy, natural, or country? As you select materials for your projects, look for fabrics, colors, or other items that match your theme and style. T i P Before you rock your room, check with a parent and your roommate, if you have one.
 T i P Take ten minutes every night to pick up your room. It stays neat this way. More Cleaning Ideas Time yourself. Set a kitchen timer for 15 minutes.

 You Will Need: tape measure fabric scissors print fleece fabric, 1-3/4 yards (1.6 meters) solid fleece fabric, 1-3/4 yards (1.6 meters) straight pins T i P Fleece is a stretchy material.
 Using one fringe strip from the top fabric and one strip from the bottom fabric, tie an overhand knot at the base of the fringe. Tie a second, tighter overhand knot on top of the first one. Continue tying the strips, skipping every other pair. Then flip the blanket over and finish tying the remaining fringe pairs.
 . Loop the two strips around your pointer, or index finger of your left hand (or your right hand, if you are left-handed).
  .
.  . Pull up. Pull up.
 You Will Need: wooden yardstick or meterstick craft glue tape measure 17 tacks hammer 30 yards (27.5 meters) ribbon, 1/2 inch (1.25 centimeters) wide 90 beads to match ribbon acrylic paint to match ribbon Give your room a grand entrance. These beaded ribbons also look great over a closet doorway or window.