 Text copyright 2013 by Kim Schaefer Photography and Artwork copyright 2013 by C&T Publishing, Inc. Publisher: Amy Marson Creative Director: Gailen Runge Art Director: Kristy Zacharias Editor: Lynn Koolish Technical Editors: Helen Frost and Sandy Peterson Cover Designer: April Mostek Pattern Pack Designer: Kerry Graham Production Coordinator: Zinnia Heinzmann Production Editor: Alice Mace Nakanishi Illustrator: Wendy Mathson Photography by Christina Carty-Francis and Diane Pedersen of C&T Publishing, Inc., unless otherwise noted Published by C&T Publishing, Inc., P.O. Box 1456, Lafayette, CA 94549 Kim Schaefers Calendar Runners Download Copyright 2013 by C&T Publishing, Inc. ISBN 978-1-60705-563-1 Published by C&T Publishing, Inc.,
PO Box 1456, Lafayette, CA 94549.
www.ctpub.com All rights reserved. No part of this work covered by the copyright hereon may be used in any form or reproduced by any meansgraphic, electronic, or mechanical, including photocopying, recording, taping, or information storage and retrieval systemswithout written permission from the Publisher. Acceptable uses of this ELECTRONIC PRODUCT: 1.
Purchaser is entitled to print out as many copies of this ELECTRONIC PRODUCT as they wish for personal use. Photocopying, digitizing, and all other forms of copying to share or distribute the ELECTRONIC PRODUCT, whether for profit or not, is strictly prohibited. 2. Purchaser may not transfer the ELECTRONIC PRODUCT to any other person, via the Internet, email, on disk, in electronic or printed form or any other form without the written permission of C&T Publishing. Purchaser may not make the ELECTRONIC PRODUCT available over a network where it could be used by multiple computers at the same time. 3.
Purchaser may not rent, lease, transfer, lend, or share the ELECTRONIC PRODUCT. Limited Warranty: Limited Warranty on this ELECTRONIC PRODUCT. C&T Publishing, Inc. warrants the ELECTRONIC PRODUCT will be delivered by C&T Publishing, Inc. free from defects in materials and workmanship under normal use for a period of ninety (90) days from the date of original purchase. will not replace the ELECTRONIC PRODUCT due to Purchaser changing computers or accidentally deleting ELECTRONIC PRODUCT or for any other loss of the file that is considered out of the control of C&T Publishing, Inc. will not replace the ELECTRONIC PRODUCT due to Purchaser changing computers or accidentally deleting ELECTRONIC PRODUCT or for any other loss of the file that is considered out of the control of C&T Publishing, Inc.
Your exclusive remedy under this Section shall be, at C&T Publishing, Inc.s option, a refund of the purchase price of the ELECTRONIC PRODUCT. Contact us at 800-284-1114 or www.ctpub.com for more information about the C&T Teachers Program. We take great care to ensure that the information included in our products is accurate and presented in good faith, but no warranty is provided nor are results guaranteed. Having no control over the choices of materials or procedures used, neither the author nor C&T Publishing, Inc., shall have any liability to any person or entity with respect to any loss or damage caused directly or indirectly by the information contained in this book. For your convenience, we post an up-to-date listing of corrections on our website ( or at P.O. Box 1456, Lafayette, CA 94549.
Trademark () and registered trademark () names are used throughout this ELECTRONIC PRODUCT. Rather than use the symbols with every occurrence of a trademark or registered trademark name, we are using the names only in the editorial fashion and to the benefit of the owner, with no intention of infringement. Pattern Note: This digital file contains patterns that may not print true to size and may require sizing adjustments (inchmarks are included on patterns for reference). Depending on your viewing application or device, printing desired page may result in multiple printed pages.
General Instructions
Appliqu
The appliqu instructions are for fusible web with machine appliqu. If you prefer a different appliqu method, you will need to add seam allowances to the appliqu pieces.
The appliqu patterns have been drawn in reverse. A lightweight paperbacked fusible web works best for machine appliqu. Choose your favorite fusible web and follow the manufacturers directions. Patterns are available to print from http://tinyurl.com/10928-patterns.
Preparing the Appliqu
Trace all parts of the appliqu design on the paper side of the fusible web. Trace each layer of the design separately.
For example, all the petals on a flower are traced as a single piece and the center as another. Whenever 2 shapes in the design butt together, overlap them by about  to prevent any gaps between them. When tracing the shapes, extend the underlapped edge
  beyond the drawn edge in the pattern. Write the pattern number on each traced shape. Cut around the appliqu shapes, leaving a margin around each piece. Iron each fusible web shape to the wrong side of the appropriate fabric.
Cut on the drawn lines and peel the paper backing from the fusible web. A thin layer of fusible web will remain on the wrong side of the fabric. This will adhere the appliqu pieces to the backgrounds when ironed.
Fusing and Stitching the Appliqu
Position the appliqu pieces on the backgrounds. Press with an iron to fuse in place. Machine stitch around the appliqu pieces using a zigzag, satin, or blanket stitch.
Stitch additional lines as desired to add detail.
Making the Pieced Runner
Sew the 1 10 lattice strips between and on the ends of the 10 10 appliqu block backgrounds. Press. For the side inner borders, cut 3 strips 1 width of fabric. Piece strips together with diagonal seams and trim to make 2 strips 56 long. Sew the 1 56 side inner borders to the runner top.
Arrange and sew together 2 rows of 14 squares 4 4 for each of the side borders. Press. Sew the 2 side borders to the runner top. Press toward the borders. Arrange and sew together 2 rows of 5 squares 4 4 for each of the end borders. Press.
Sew the 2 end borders to the runner top. Press toward the borders.  TIP For easier handling, appliqu the border motifs to the border squares before sewing them together.
Making the Place Mat
Sew 2 strips 1 10 to the sides of the 10 10 appliqu block background. Press. Press. Press.
Arrange and sew together 2 rows of 3 squares 4 4 for each of the side borders. Press. Sew the 2 side borders to the place mat. Press toward the borders. 
Finishing
Layer the runner / place mat: Cut the batting and backing pieces 24 larger than the tops. Place the pressed backing down first with the right side facing down.
Place the batting over the backing and the runner or place mat top on top. Make sure everything is flat and smooth and that the top is centered over the batting and backing. Baste or pin. Quilt as desired. Bind the runner or place mat using your preferred method.
January
Made by Kim Schaefer Quilted by Diane Minkley of Patched Works, Inc.


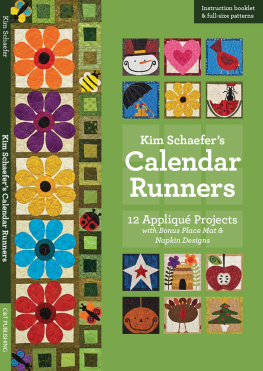






 Text copyright 2013 by Kim Schaefer Photography and Artwork copyright 2013 by C&T Publishing, Inc. Publisher: Amy Marson Creative Director: Gailen Runge Art Director: Kristy Zacharias Editor: Lynn Koolish Technical Editors: Helen Frost and Sandy Peterson Cover Designer: April Mostek Pattern Pack Designer: Kerry Graham Production Coordinator: Zinnia Heinzmann Production Editor: Alice Mace Nakanishi Illustrator: Wendy Mathson Photography by Christina Carty-Francis and Diane Pedersen of C&T Publishing, Inc., unless otherwise noted Published by C&T Publishing, Inc., P.O. Box 1456, Lafayette, CA 94549 Kim Schaefers Calendar Runners Download Copyright 2013 by C&T Publishing, Inc. ISBN 978-1-60705-563-1 Published by C&T Publishing, Inc.,
 to prevent any gaps between them. When tracing the shapes, extend the underlapped edge
  TIP For easier handling, appliqu the border motifs to the border squares before sewing them together.
