Barbara H. Cline - Under the Sea Quilt Pattern
Here you can read online Barbara H. Cline - Under the Sea Quilt Pattern full text of the book (entire story) in english for free. Download pdf and epub, get meaning, cover and reviews about this ebook. year: 2015, publisher: C&T Publishing, genre: Home and family. Description of the work, (preface) as well as reviews are available. Best literature library LitArk.com created for fans of good reading and offers a wide selection of genres:
Romance novel
Science fiction
Adventure
Detective
Science
History
Home and family
Prose
Art
Politics
Computer
Non-fiction
Religion
Business
Children
Humor
Choose a favorite category and find really read worthwhile books. Enjoy immersion in the world of imagination, feel the emotions of the characters or learn something new for yourself, make an fascinating discovery.

- Book:Under the Sea Quilt Pattern
- Author:
- Publisher:C&T Publishing
- Genre:
- Year:2015
- Rating:5 / 5
- Favourites:Add to favourites
- Your mark:
Under the Sea Quilt Pattern: summary, description and annotation
We offer to read an annotation, description, summary or preface (depends on what the author of the book "Under the Sea Quilt Pattern" wrote himself). If you haven't found the necessary information about the book — write in the comments, we will try to find it.
Barbara H. Cline: author's other books
Who wrote Under the Sea Quilt Pattern? Find out the surname, the name of the author of the book and a list of all author's works by series.


Under the Sea Quilt Pattern — read online for free the complete book (whole text) full work
Below is the text of the book, divided by pages. System saving the place of the last page read, allows you to conveniently read the book "Under the Sea Quilt Pattern" online for free, without having to search again every time where you left off. Put a bookmark, and you can go to the page where you finished reading at any time.
Font size:
Interval:
Bookmark:
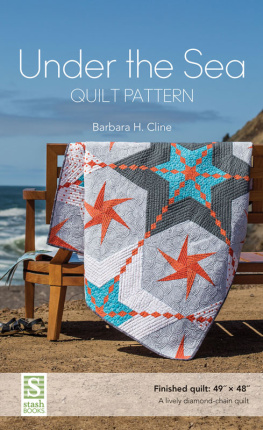
Under the Sea Quilt Finished quilt: 49 48 This project features stars, pinwheels, and diamonds. Diamonds run through the quilt, connecting the stars with diamond chains. Only two different triangle blocks are used in the piecing, but by changing the colors in the two triangle units, you get star designs and pinwheels where the triangle blocks meet. NOTE Please read before beginning this project.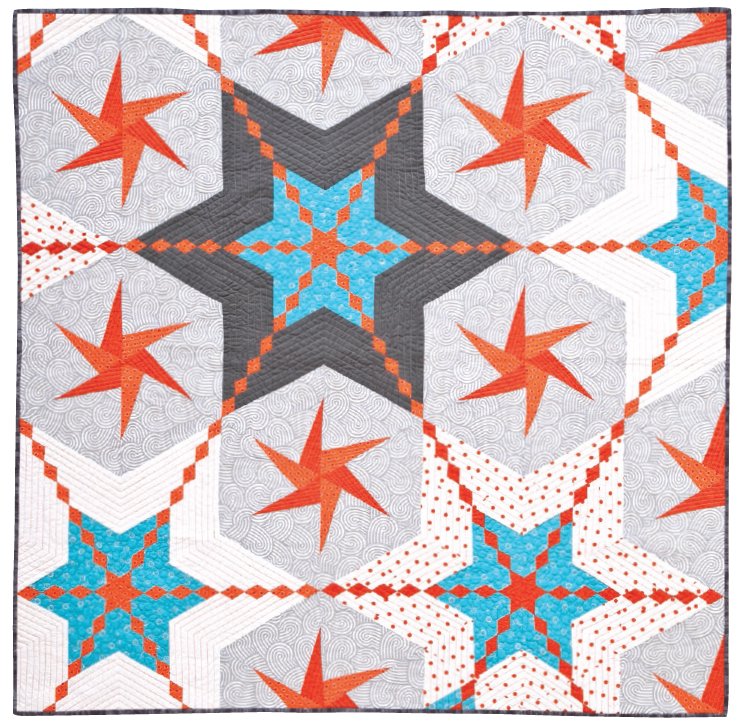 For other great projects from Barbara H. Cline, see her book Diamond Chain Quilts (from C&T Publishing). MATERIALS Yardage is based on 42-wide fabric. Orange with dots: yard for pinwheels and diamonds Orange solid: yard for pinwheels and diamonds Light gray print: 1 yards Dark gray solid: yard White: yard White with orange dots: yard Turquoise: yard Binding: yard Backing: 55 54 Batting: 55 54 Template plastic Creative Grids 60 Triangle ruler (optional) CUTTING .
Note: WOF = width of fabric.Optional: Refer to Cutting with the to cut the C pieces, following the measurement in brackets [4] and the instructions for the B pieces.Orange with dots Cut 6 strips 1 WOF. Cut 3 strips 2 WOF; subcut 22 pieces using template A. Orange solid Cut 4 strips 1 WOF. Cut 3 strips 2 WOF; subcut 23 pieces using template A. Light gray print Cut 7 strips 7 WOF; subcut 45 pieces using template B. [You can use the Creative Grids 60 Triangle ruler to cut 7 triangles, then place template B on the triangle and trim.] Dark gray solid Cut 1 strip 1 WOF.
Cut 2 strips 4 WOF; subcut 24 triangles [4] using template C. Cut 1 strip 2 WOF; subcut 12 (60) diamonds 2. White Cut 2 strips 1 WOF. Cut 3 strips 4 WOF; subcut 38 triangles [4] using template C. Cut 2 strips 2 WOF; subcut 20 (60) diamonds 2. White with orange dots Cut 2 strips 1 WOF.
Cut 2 strips 4 WOF; subcut 30 triangles [4] using template C. Cut 2 strips 2 WOF; subcut 16 (60) diamonds 2. Turquoise Cut 5 strips 1 WOF. Cut 4 strips 2 WOF; subcut 44 (60) diamonds 2. Binding Cut 6 strips 2 WOF. Construction Seam allowances are unless otherwise noted. Make the Four-Patch Diamond MAKE THE STRIP SETS On your cutting mat, pair up 1 strips in the following sequences: 2 pairs using white and orange with dots 2 pairs using white with orange dots and orange solid 3 pairs using turquoise and orange with dots 2 pairs using turquoise and orange solid 1 pair using dark gray and orange with dots Use scant seams to sew the paired strips into strip sets and press the seams toward the darker colors.
CUT THE DIAMOND STRIPS From each of the strip sets, you will cut diamond strips. Cutting Diamonds from Strip Sets Place the ruler on top of the fabric, aligning the rulers 60 line with the horizontal edge of the strip set. Make the first cut.  Rotate the cutting board and cut 1 diamond strips; be sure to align the 60 line with the horizontal edge of the strip set. From the strip sets, you will need the following: 40 white and orange with dots 32 white with orange dots and orange solid 60 turquoise and orange with dots 28 turquoise and orange solid 24 dark gray and orange with dots
 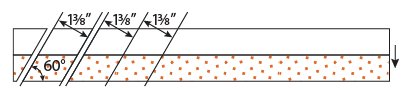 Matching pairs of the strip set sections, sew pairs together to form small pieced diamonds as shown.
  Make Large Triangles Piece the large triangle units by adding triangle C pieces to the pieced diamonds in the combinations shown. Make Large Triangles Piece the large triangle units by adding triangle C pieces to the pieced diamonds in the combinations shown.
Make the number of units indicated.  Make Pinwheel Triangle Units Sew the orange dot blade pieces A to the light gray print triangles B.
 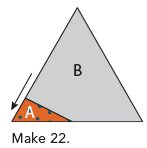 Sew the orange solid blade pieces A to the light gray print triangles B.
 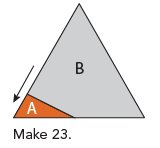 Assemble the Quilt Refer to the quilt layout diagram to position the units. Sew the triangles together into vertical rows and press the seams open. Sew the rows together and press.
Trim off the top and bottom of the quilt top beyond the triangle tips as shown by the cutting lines.  Finishing Layer, quilt, and bind as desired.
 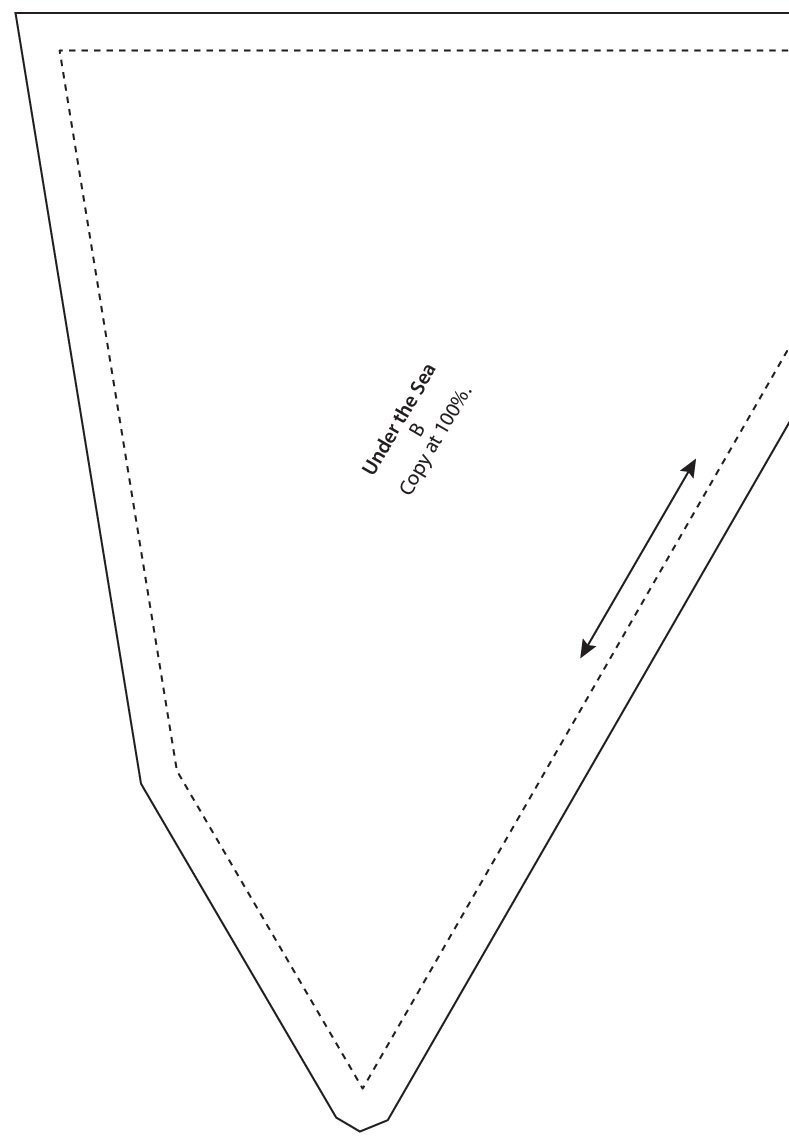 For all printable patterns or digital content: http://tinyurl.com/80070-patterns-download
 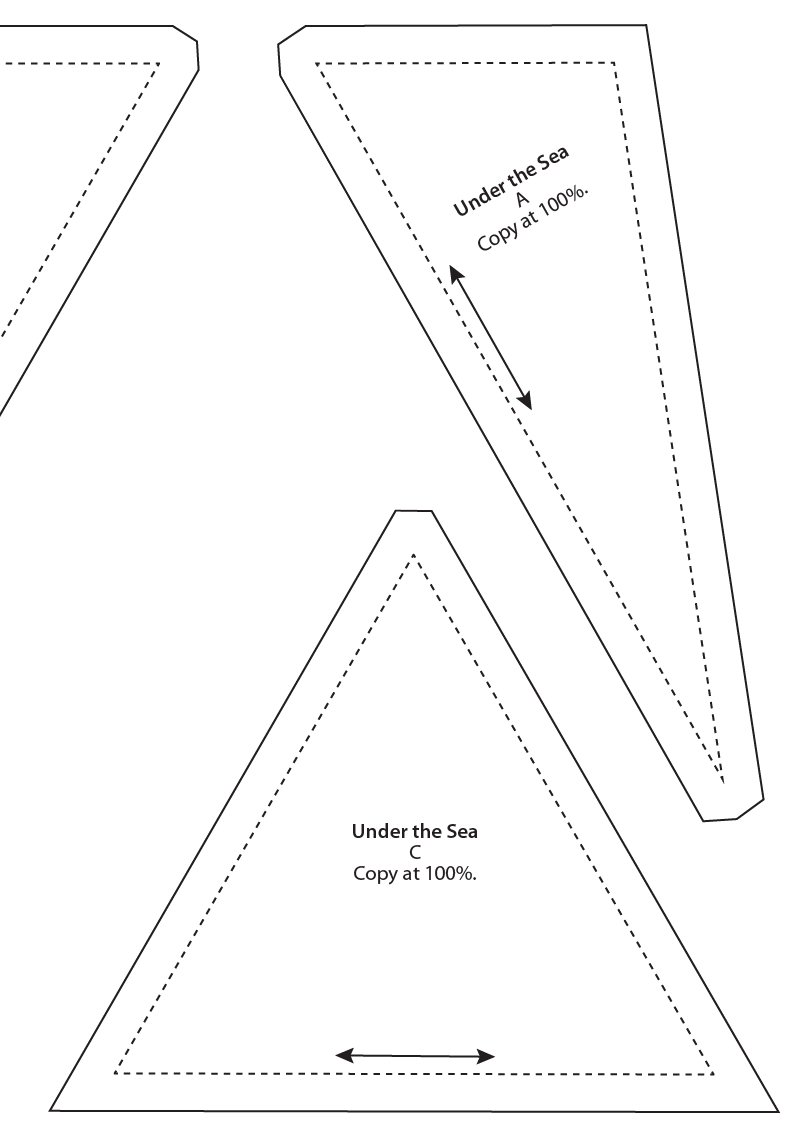 For all printable patterns or digital content: http://tinyurl.com/80070-patterns-download
 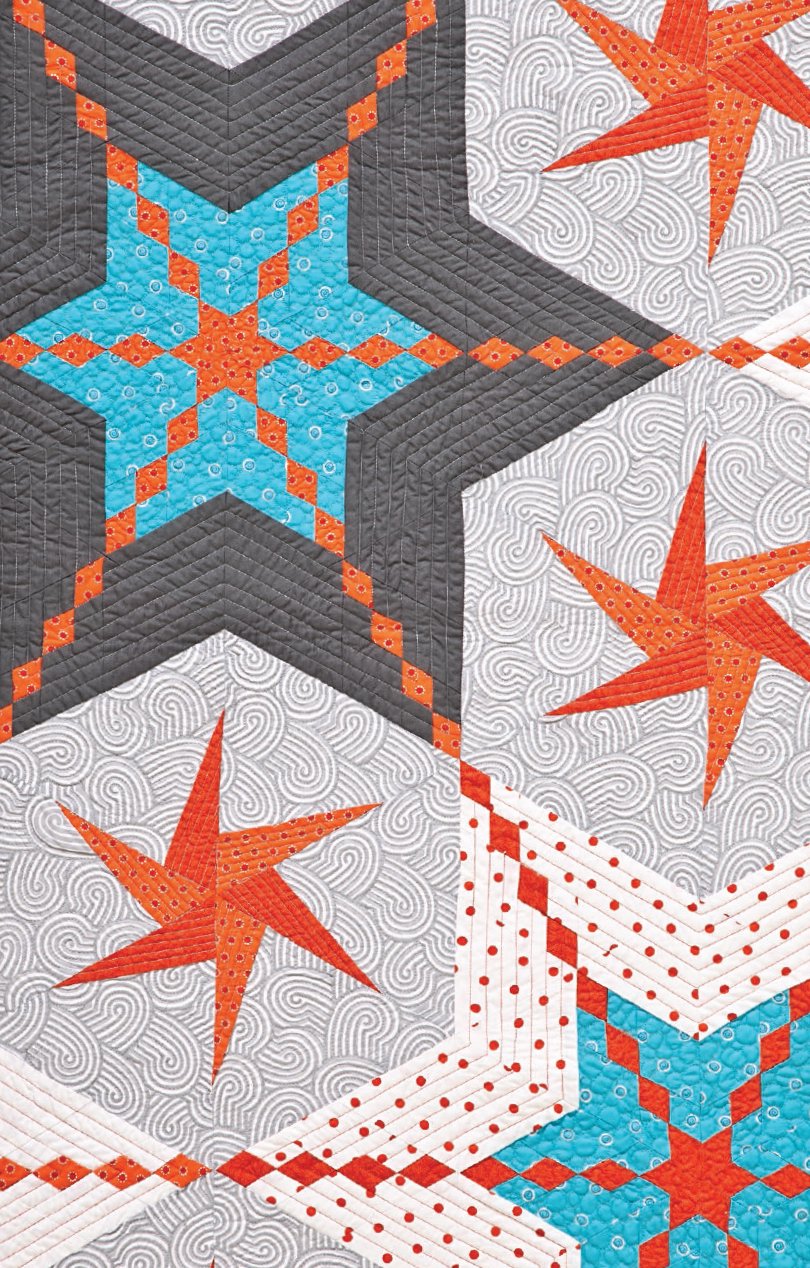 Diamond Quilt Basics Supplies Sewing machine in good working condition Rotary cutter with a sharp new blade Rotary cutting mat, 24 36 Rotary cutting rulers, 6 24 and 4 14 (Note: The smaller ruler is easier to handle when cutting strip sets.) Pins Sewing thread to match the fabric Transparent thread -wide presser foot (Accurate seam allowance is a must.) Double-sided fusible web Scissors Seam ripper Template plastic Glue stick Iron and ironing board Spray starch, such as Best Press Marking pencil Fabric Preparation and Pressing I prefer to preshrink my fabrics. Some fabrics shrink more than others. If you dont preshrink, the fabrics might shrink to different sizes after the quilt is pieced and washed, and the finished quilt may not lie flat. Also, I like to add Retayne color fixative to the washing machine when preshrinking to keep dark fabrics from bleeding.
As you cut template shapes and triangles, some of the edges will be cut on the bias. To keep these edges from stretching and distorting, handle the cut fabric pieces as little as possible and use spray starch to keep the fabric from stretching. Before cutting the fabric, spray it lightly with Best Press spray starch and press until dry. Follow the pressing directions, so the seams will nest together. After each sewing step, I press without steam, until I have sewn a completed block or triangles; then I press with steam. Cutting with Templates To make a template, photocopy the pattern as directed and roughly cut it out.
Glue the paper cutout onto the template plastic using a glue stick. Cut out the template on the pattern line, remove the paper, and label the template on the top side. Be sure to mark the grainline on the template, as well. Cutting template patterns from the fabric strips is more efficient than cutting from whole pieces of fabric. It eliminates making little cuts in your fabric and requires fewer rotations of the template. Place the fabric strip right side up and lay the template on the fabric strip near one end; cut around the template.
Next pageFont size:
Interval:
Bookmark:
Similar books «Under the Sea Quilt Pattern»
Look at similar books to Under the Sea Quilt Pattern. We have selected literature similar in name and meaning in the hope of providing readers with more options to find new, interesting, not yet read works.
Discussion, reviews of the book Under the Sea Quilt Pattern and just readers' own opinions. Leave your comments, write what you think about the work, its meaning or the main characters. Specify what exactly you liked and what you didn't like, and why you think so.