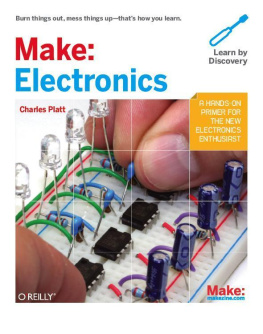
Brian Jepson - Learn to Solder: Tools and Techniques for Assembling Electronics
Here you can read online Brian Jepson - Learn to Solder: Tools and Techniques for Assembling Electronics full text of the book (entire story) in english for free. Download pdf and epub, get meaning, cover and reviews about this ebook. year: 2012, publisher: OReilly Media, genre: Home and family. Description of the work, (preface) as well as reviews are available. Best literature library LitArk.com created for fans of good reading and offers a wide selection of genres:
Romance novel
Science fiction
Adventure
Detective
Science
History
Home and family
Prose
Art
Politics
Computer
Non-fiction
Religion
Business
Children
Humor
Choose a favorite category and find really read worthwhile books. Enjoy immersion in the world of imagination, feel the emotions of the characters or learn something new for yourself, make an fascinating discovery.
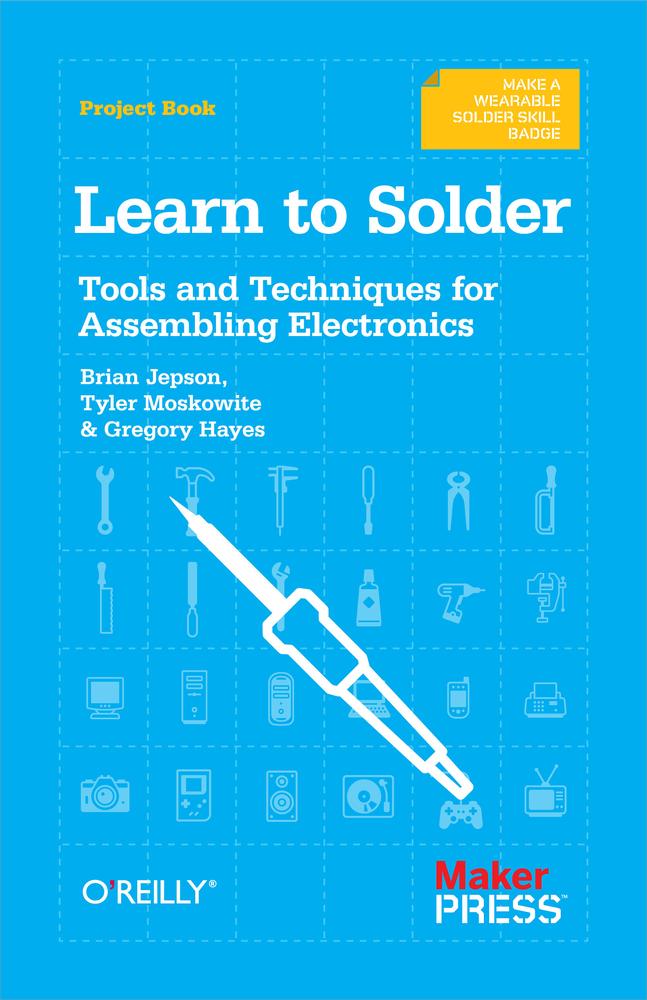
- Book:Learn to Solder: Tools and Techniques for Assembling Electronics
- Author:
- Publisher:OReilly Media
- Genre:
- Year:2012
- Rating:3 / 5
- Favourites:Add to favourites
- Your mark:
Learn to Solder: Tools and Techniques for Assembling Electronics: summary, description and annotation
We offer to read an annotation, description, summary or preface (depends on what the author of the book "Learn to Solder: Tools and Techniques for Assembling Electronics" wrote himself). If you haven't found the necessary information about the book — write in the comments, we will try to find it.
Learn the fundamentals of solderingand pick up an essential skill for building electronic gadgets. Youll discover how to preheat and tin your iron, make a good solder joint, desolder cleanly (when things dont quite go right), and how to use helping hands to hold components in place.
This concise book is part of MAKEs Getting Started with Soldering Kit. Using the tools in the kit and some electronic components, you can practice soldering while making fun blinky objects. Then show the world you just learned a new skill by wearing the Learn to Solder Skill Badge.
- Learn how to prepare your workspace
- Get to know the components youll work with
- Use the best methods for soldering components in place
- Experience the perfect solder joint
- Know how to desolder when things dont work the first time
Heat up the iron and start soldering today!
Brian Jepson: author's other books
Who wrote Learn to Solder: Tools and Techniques for Assembling Electronics? Find out the surname, the name of the author of the book and a list of all author's works by series.


Learn to Solder: Tools and Techniques for Assembling Electronics — read online for free the complete book (whole text) full work
Below is the text of the book, divided by pages. System saving the place of the last page read, allows you to conveniently read the book "Learn to Solder: Tools and Techniques for Assembling Electronics" online for free, without having to search again every time where you left off. Put a bookmark, and you can go to the page where you finished reading at any time.
Font size:
Interval:
Bookmark:
Copyright 2012
OReilly books may be purchased for educational, business, or sales promotional use. Online editions are also available for most titles (.
Nutshell Handbook, the Nutshell Handbook logo, and the OReilly logo are registered trademarks of OReilly Media, Inc. Learn to Solder and related trade dress are trademarks of OReilly Media, Inc.
Many of the designations used by manufacturers and sellers to distinguish their products are claimed as trademarks. Where those designations appear in this book, and OReilly Media, Inc., was aware of a trademark claim, the designations have been printed in caps or initial caps.
While every precaution has been taken in the preparation of this book, the publisher and authors assume no responsibility for errors or omissions, or for damages resulting from the use of the information contained herein.

Welcome to MAKEs Getting Started with Soldering Kit, and congratulations on taking a big step into the world of DIY electronics. Once you get the hang of soldering, you can put together some of the many great kits that are available, fix electronics that are broken, and build inventions of your own. With this kit, youll learn how to:
Prepare and clean your soldering iron
Assemble electronic circuits from kits
Transfer circuit designs from a solderless breadboard to a prototyping PCB
Correct soldering mistakes youve made
Theres a lot of great stuff in the box, and before you start using it, heres a tour of what youll find in there. shows the soldering tools youll be using most of the time.
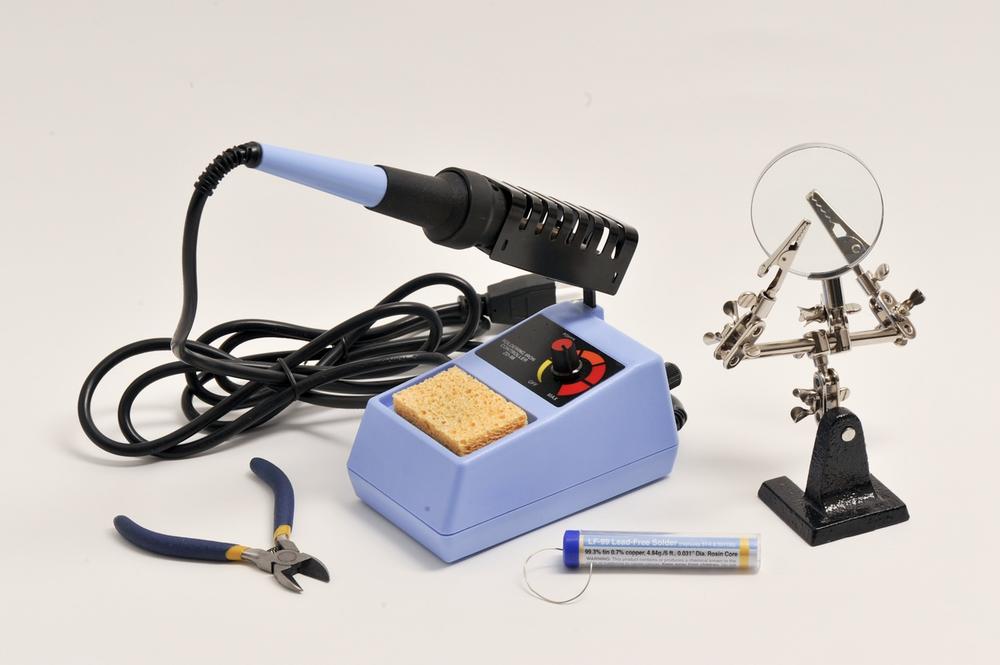
Figure 1. Basic soldering tools
(Top left) This soldering station includes a variable temperature controller, a cleaning sponge, soldering iron, and a ringed holder.
Crosscut pliers(Left) Youll use these to trim away excess leads after you solder components in place.
Solder tube(Bottom) This is enough solder to get you started and keep you busy over many projects.
Helping hands(Right) For those times when you need a third or fourth hand, the helping hands let you hold items steady while you solder.
Most of the time, youll only need the basic tools to get things done. But when you need to replace your soldering iron tip, correct a mistake you made while soldering, or need a tool to help keep components from overheating, youll need the items shown in .
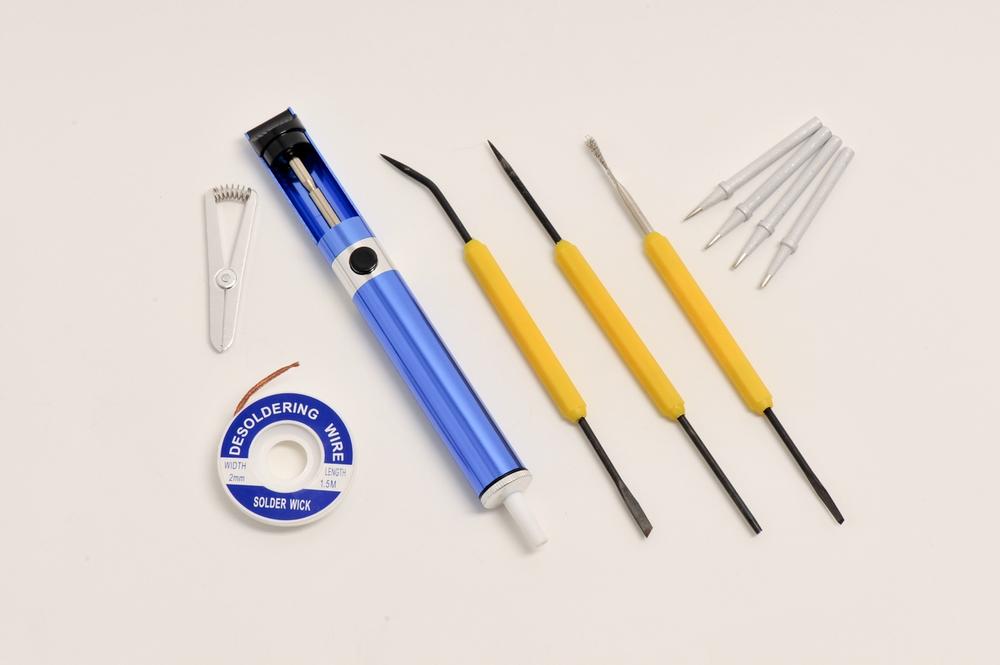
Figure 2. Advanced soldering tools
(Left) Clip this to sensitive components to help dissipate heat.
Desoldering wick(Bottom left) Use this to wick away excess molten solder.
Desolder pump(Center left) This pump will suck up molten solder when you have a lot of solder to remove.
Soldering tools(Center right) The scrapers, brush, and slotted probe come in handy when you need to move solder around or precisely position a component.
Replacement tips(Right) Tips dont last forever. When youve worn out your tip, use one of these as a replacement.
Our Learn to Solder Skill Badge Kit (the 2011 model is shown in and teach others how to solder.
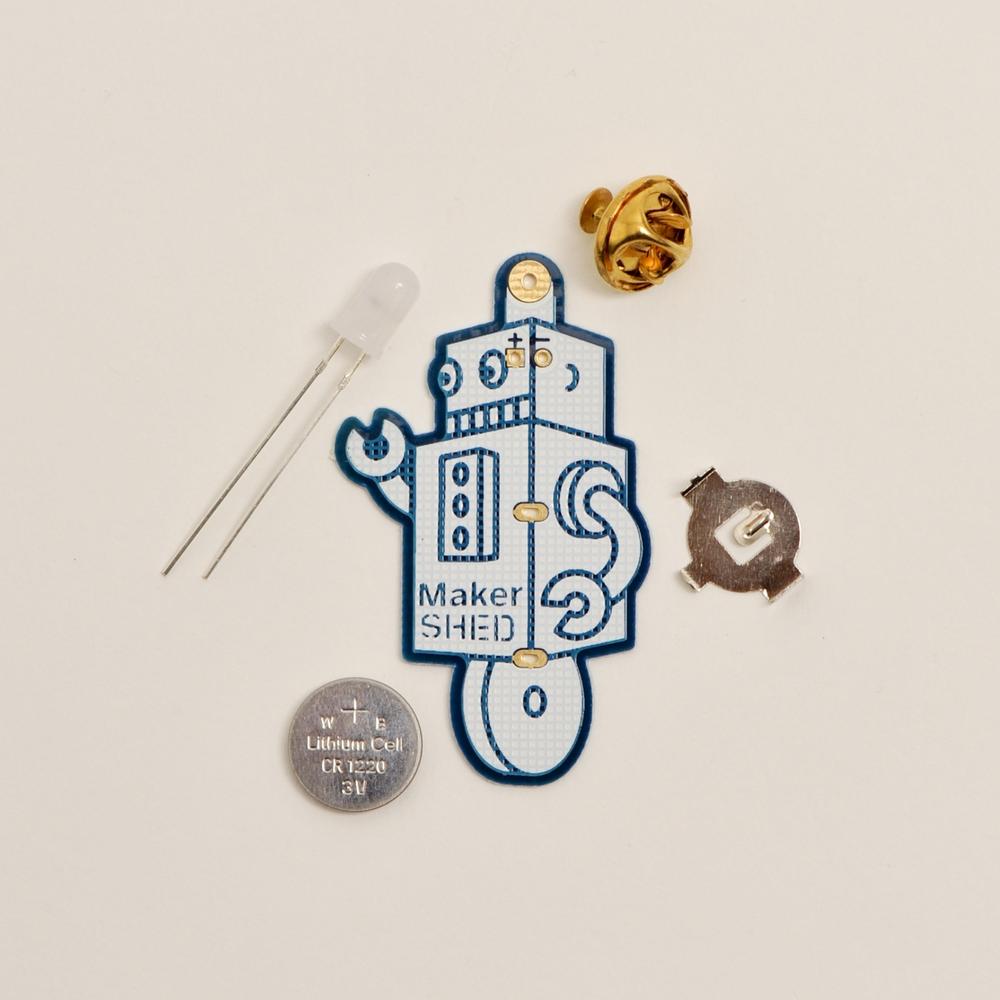
Figure 3. Learn to Solder Skill Badge, 2011 model
(Top left) This is an LED (Light-Emitting Diode) with a twist. Normal LEDs give off a single color, and keep shining as long as you give them power. Also, normal LEDs require a specific voltage to operate: dont give it enough power, it wont light at all; give it even a little too much, and you could burn it out.
This LED is different in both respects: it has three elements (red, green, and blue) that are under the control of a small integrated circuit (IC) embedded within the LED. The IC causes the elements to change color in a repeating pattern. Because the IC controls the voltage that it delivers to the individual color elements, its more tolerant of variations in the voltage you give it. For example, even though red LED color elements typically operate at around 2 volts, youre able to use a 3 volt battery with the pin.
The 2012 model uses two self-blinking LEDs instead of one self-color changing RGB LED.
CR1220 battery(Lower left) This coin cell battery supplies power to the pin.
Printed Circuit Board (PCB)(Center) The 2011 Learn to Solder Skill Badge features a friendly robot. The 2012 model will also have a robot, every bit as friendly.
Pin and clutch(Top right) This is what holds the pin to your clothing.
Battery holderThis keeps the battery on the PCB.
The 555 timer blinky is a simple circuit that makes two LEDs flash in an alternating pattern. When one is on, the other is off. shows the finished project. This is a slightly more challenging project than the skill badge.
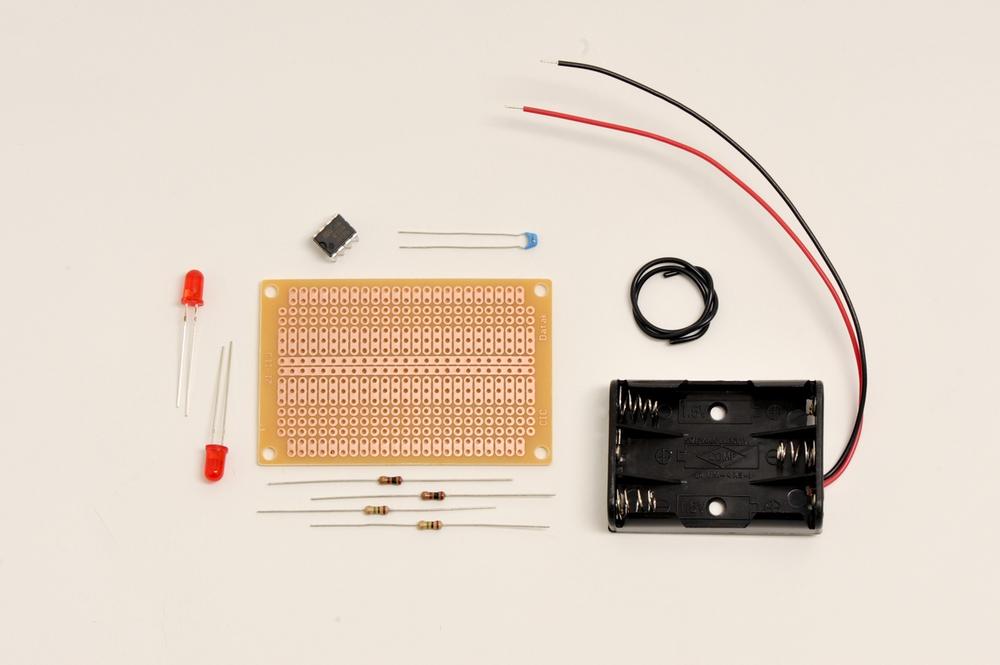
Figure 4. 555 blinky parts
(Left) Unlike the LEDs used in the skill badge, these are your normal, run of the mill LEDs.
Protoboard(Center) Look back at the skill badge PCB. Notice how it was custom designed for a single purpose. Now look at this protoboard PCB: its got a lot of different holes in convenient locations. You can build many kinds of simple electronics projects on a board like this.
555 Timer(Top left) The 555 timer is a special type of integrated circuit that can turn electrical current on and off in a repeating pattern. Its just what you need to blink an LED.
Capacitor(Top right) To customize the 555 timer, you need to connect certain components to it. The value (capacitance or resistance) of the component determines how quickly the 555 turns things on and off.
Hookup/Jumper Wire(Top right) Youll need this to connect one thing to another.
Resistors(Bottom) Resistors serve two purposes here: two are used to make sure the LEDs dont get too much current; the other two work with the capacitor to control the behavior of the 555 timer.
Battery Box(Right) This holds 3 AAA batteries.
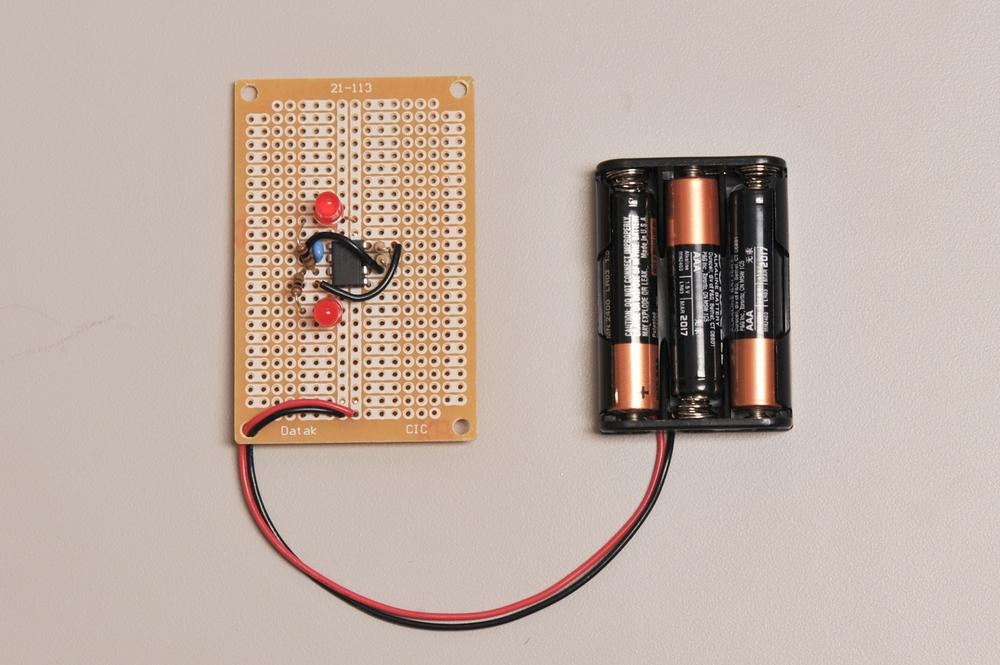
Figure 5. Finished 555 blinky
Maker Shed is here Monday to Friday, 7:30 AM to 5:00 PM Pacific Time
| Email: |
| Phone: 800-889-8969 or 707-827-7019 |
Font size:
Interval:
Bookmark:
Similar books «Learn to Solder: Tools and Techniques for Assembling Electronics»
Look at similar books to Learn to Solder: Tools and Techniques for Assembling Electronics. We have selected literature similar in name and meaning in the hope of providing readers with more options to find new, interesting, not yet read works.
Discussion, reviews of the book Learn to Solder: Tools and Techniques for Assembling Electronics and just readers' own opinions. Leave your comments, write what you think about the work, its meaning or the main characters. Specify what exactly you liked and what you didn't like, and why you think so.