The New
Encyclopedia
of
KNOTS

First published in Great Britain by
Brockhampton Press
a member of
the Hodder Headline Group
20 Bloomsbury Street
London WC1B 3QA
This edition copyright
G2 Rights
Text copyright 1997 Derek Avery
Illustrations drawn by Andrew Wright
copyright Superlaunch Ltd
Derek Avery
has asserted his right to be identified as the author of this work in accordance with the Copyright, Designs and Patents Act 1988
All rights reserved. No part of this publication may be reproduced, stored in a retrieval system, or transmitted in any form or by any means, electronic, mechanical, photocopying, recording or otherwise, without the prior permission in writing of all the copyright holders.
ISBN:978-1-78281-118-3
Reprint 2014
Authors note
There are strict regulations governing the use of wire eye splices in industry, and although certain knots are considered adequate for normal usage, you should always refer to the regulations in force at the time.
Never hold fish hooks in your bare hands; always use pliers to hold them firmly. Similarly, always be careful to wear heavy gloves or to wrap your hands in rags before pulling on thin monofilament lines or twine. This both avoids cutting your flesh and helps to give a better grip on the line.
The descriptions of the methods for tying all of the knots included here assume right-handedness, as individuals vary so much in their degree of ambidexterity.
Where a knot has been illustrated, it has been given a number working numerically from the beginning of the book. When more than one step has been illustrated in making a knot, the illustration number has been suffixed; thus the second step under the entry for binder turn is .
A
Admiralty eye splice: a wire splice generally considered adequate for normal industrial usage, the main feature of which is that after the first tuck, all strands are tucked away in an over one, under one sequence, against the lay of the standing part.

figure 1
There are also various ways of completing the first full tuck, the most common of which is in the strand order of 162354.
First establish the size of the eye and apply a seizing accordingly. Then unlay the strands to the required length, ensuring that they are in the correct order. The illustration ( The heart is always associated with strand 1, which is the first to be tucked and which is worked from left to right, over one and under one, with the standing part to the right. A marline spike or hollow splicing tool is used to separate the strands for tucking. After strand 1 has been tucked and hauled tight the heart can be cut out. Strand 6 is then tucked, also from left to right and also in an over one, under one sequence, and hauled tight. Strand 2 is worked from right to left, going around the same strand of the standing part as strand 6, but as it is progressing in the opposite direction it provides a locking turn when the strand is hauled tight. Strand 3 is worked from right to left, as is the next strand (5), but this strand breaks the established over and under sequence by being tucked under two strands initially. The final strand, 4, follows the previous strand (5) but reverts to the sequence of over one and under one, emerging between the two strands of the standing part that strand 5 had been tucked under. This completes the first tuck, and you can now continue, with all strands tucked over one and under one against the lay. Five full tucks are usual, and each strand should be hammered down with a mallet after each tuck.
Anchor bend see bucket hitch.
Anchoring see belaying to a mooring bollard or samson post.
B

figure 2
).

figure 3
Backwall hitch: a simple, quick and efficient method for attaching the tail of a rope to a hook. It relies upon a constant strain being maintained, but it will slip unless the knot is held in position while the strain is taken up ().
Bare end see bitter end.
Bargees eye splice: perhaps this is the simplest of splices, providing a rough and ready yet quite effective eye ().
Barrel knot see blood knot.
Becket bend see sheet bend.
Belaying: the method by which ropes are made fast on board ship and from ship to shore, by winding the rope under load in a figure-of-eight pattern around a fixture.
Belaying a rope with a cleat , or cleating , requires three or four cross turns of the rope, which passes under the horns of the cleat, crosses above the cleat (). This prevents the turns from falling off as the result of the boats motion. It is important that no load is applied to the half hitch, as this could result in jamming, making untying difficult. The half hitch is applied to the upper horn of the cleat, if the cleat is vertical.

figure 4.1
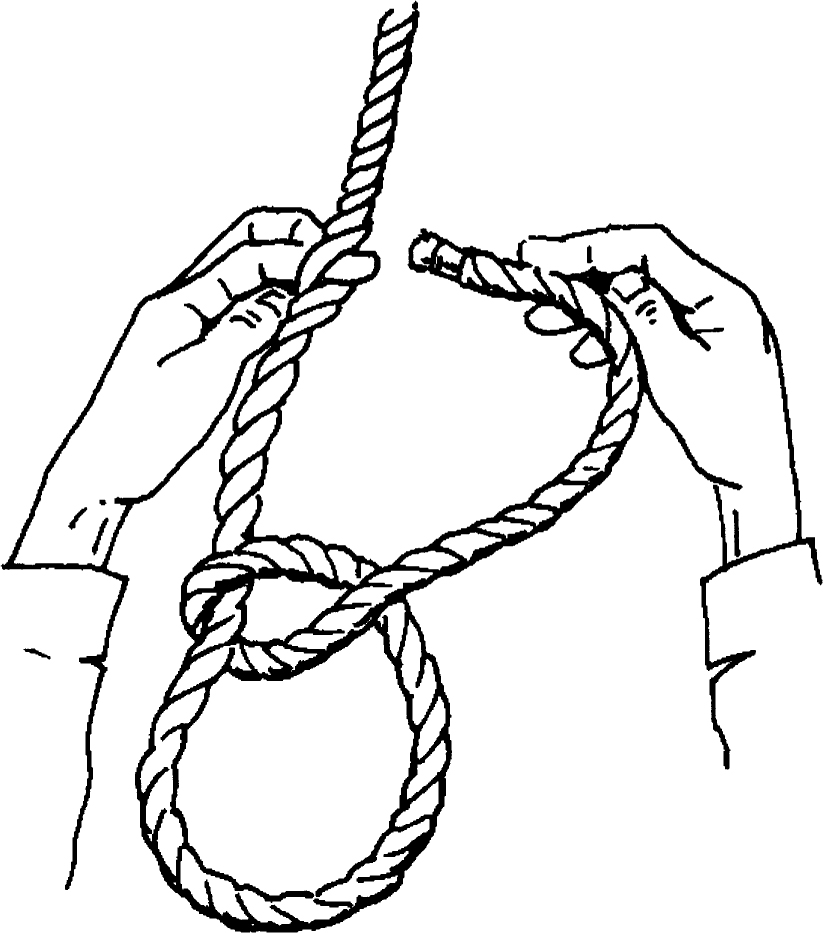
figure 4.2

figure 5.1

figure 5.2
Belaying a rope to a belaying pin is carried out in much the same way as when cleating. Make a start to the right of the pin with a full round turn taken clockwise around the pin; turns should always be taken in the same direction as that in which the rope is coiled. This prevents the strands from being forced open, and the rope will kink less. This does not apply to braided rope, which can be coiled or belayed in either direction without kinking. As in cleating, the cross turns on the belaying pin bear the load on the rope, and again a half hitch is added to keep the turns in place ().
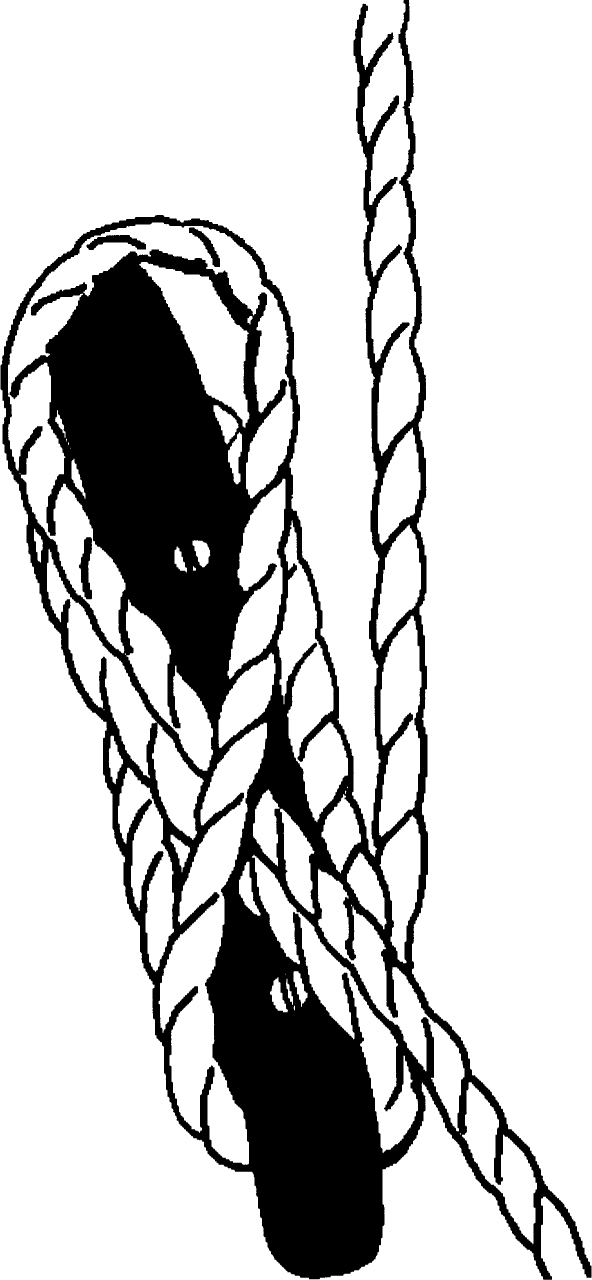
figure 5.3
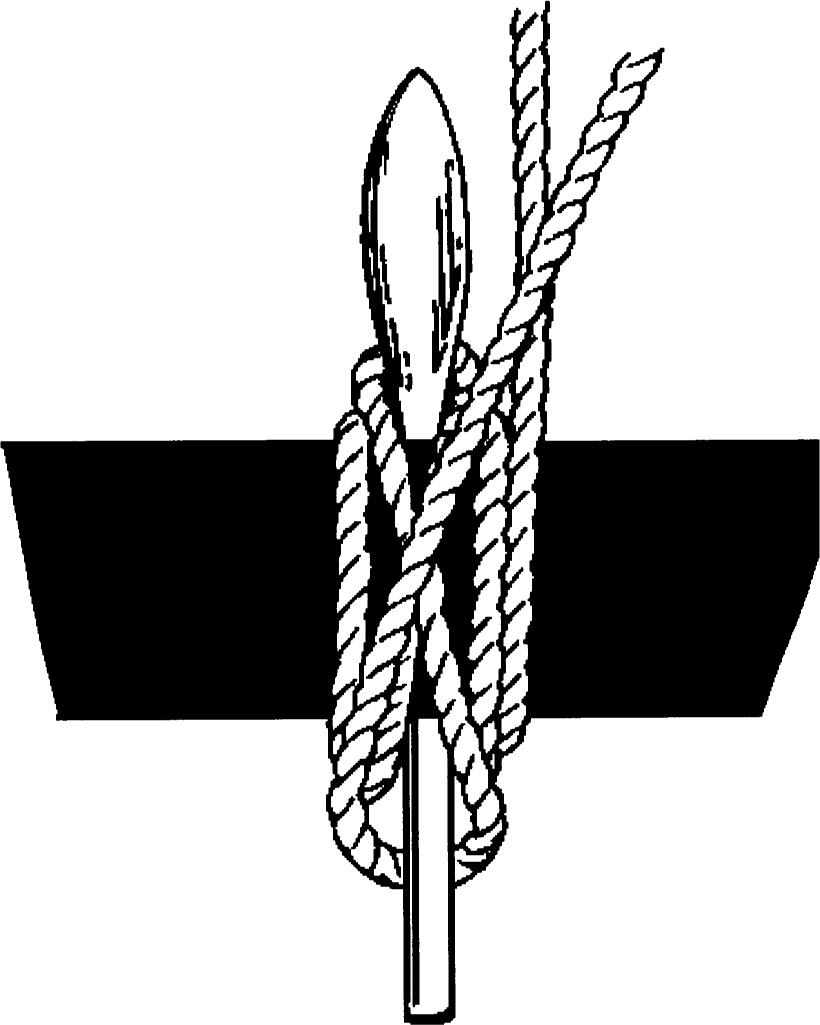
figure 6
Belaying to a mooring bollard or samson post secures a ship to shore. Take a series of turns around the post, and pass a bight of rope under the (loadbearing) standing part and then drop it over the turns on the post (). You can take the end around the post again, and pass another bight under the standing part to drop it over the post. You can repeat the process again, but on no account should you take a turn around the post with the standing part.
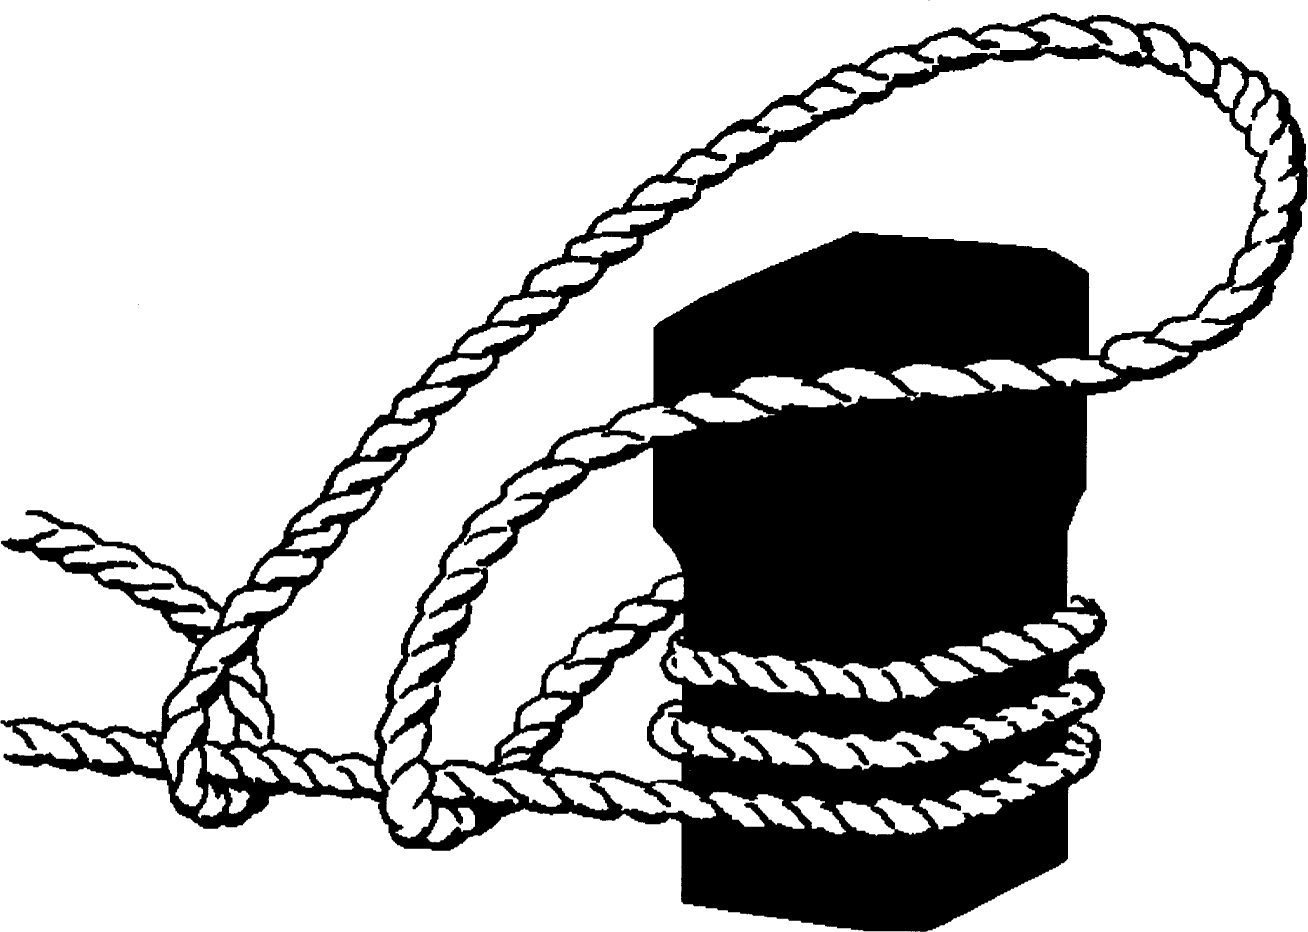
figure 7
A bollard with a pair of horizontal arms is known as a staghorn , and you can make fast a mooring line to a staghorn by taking the line around the bollard, up over one arm (), repeating the sequence until the line is secure. This method, which is sometimes called anchoring, permits the line to be cast off even while it is under load.
Next page
