Google SketchUp Workshop
Modeling, Visualizing, and Illustrating
Edited by
Laurent Brixius

Focal Press is an imprint of Elsevier
30 Corporate Drive, Suite 400, Burlington, MA 01803, USA
The Boulevard, Langford Lane, Kidlington, Oxford, OX5 1GB, UK
Authorized translation from the French language edition, entitled Crer avec SketchUp 16 Projets, de lArchitecture au Thtre, collective work directed by Laurent Brixius, published by Pearson Education France, Copyright 2009 Pearson Education France. English language edition published by Elsevier Inc., Copyright 2011.
No part of this publication may be reproduced or transmitted in any form or by any means, electronic or mechanical, including photocopying, recording, or any information storage and retrieval system, without prior written permission from the copyright holder and the publisher.
Details on how to seek permission, further information about the Publishers permissions policies and our arrangements with organizations such as the Copyright Clearance Center and the Copyright Licensing Agency, can be found at our website: www.elsevier.com/permissions.
This book and the individual contributions contained in it are protected under copyright by the Publisher (other than as may be noted herein).
Notices
Knowledge and best practice in this field are constantly changing. As new research and experience broaden our understanding, changes in research methods, professional practices, or medical treatment may become necessary.
Practitioners and researchers must always rely on their own experience and knowledge in evaluating and using any information, methods, compounds, or experiments described herein. In using such information or methods they should be mindful of their own safety and the safety of others, including parties for whom they have a professional responsibility.
To the fullest extent of the law, neither the Publisher nor the authors, contributors, or editors, assume any liability for any injury and/or damage to persons or property as a matter of products liability, negligence or otherwise, or from any use or operation of any methods, products, instructions, or ideas contained in the material herein.
Library of Congress Cataloging-in-Publication Data
Application submitted
British Library Cataloguing-in-Publication Data
A catalogue record for this book is available from the British Library.
ISBN 13: 978-0-240-81627-2
For information on all Focal Press publications visit our website at www.elsevierdirect.com
Printed in the United States of America
10 11 12 13 14 5 4 3 2 1
Typeset by: diacriTech, Chennai, India

Contents
Overview
OVERVIEW 1
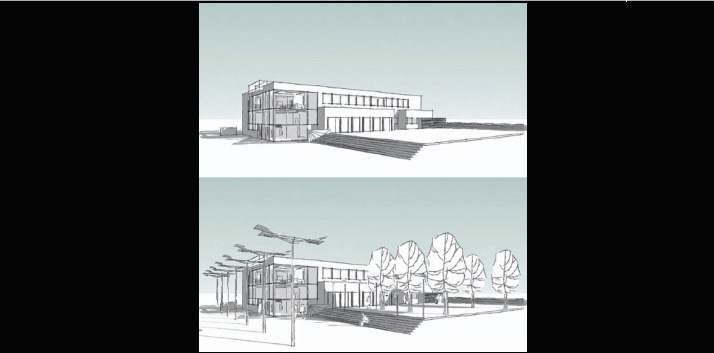
Working on Complex Models in SketchUp
SketchUp is both simple and intuitive; there is no doubt about that. It usually takes a couple of hours to get grips on it and to create your first 3D models. But when you are using it for a professional project with all the attendant time and quality constraints you have to get a few things straight first to avoid the traps that users inevitably fall into, whether they are beginners or experienced operators.
When you are working on a complex project, made up of a large number of elements, SketchUp can slow down, often considerably. The working methods and the tips and tricks presented in this book can considerably improve SketchUps performance, enabling you to work much more quickly. The good news is that many of the methods used to efficiently organize a model actually make SketchUp a lot quicker.
So, here are a series of good habits that you should pick up when you are working with your models, in order to optimize SketchUps performance.
Configure SketchUp
In an architectural project, solid foundations are indispensable for supporting the rest of the construction. Here is how to go about creating solid foundations in SketchUp.
Configure Your Template File
At the start of the project, configuring your model is a fundamental step that you should not neglect. But who gets any pleasure from continually reinventing the wheel? Instead of configuring your model for every new file, create your own template file in which you have configured all the options that do not change between projects.
To save your template file, from the Menu Bar, choose File > Save As Template. Type any relevant information into the fields (file name, description) and click Save. If you have a version of SketchUp earlier than 7.1, choose File > Save As; in the dialog box that appears, save the template file in the path C:\Program Files\Google\Google SketchUp\Resources\en-US\Templates in case of Windows and in the path ~/Library/Application Support/SketchUp/Templates (where ~ is the name of your home directory) in case of Mac.
If you are using the Save As method, type the name of your template file in the File Name field, click on Type, select SketchUp Model, and then click on Save. Using both these methods, your template file will appear in the list of templates that are available when you click on File > Preferences > Template. You can then create different template files and select them according to the type of project that you are working on.
Before you save, here are several options that you will need to set.
Choose Your Units
Do you want to work in a fluid and an efficient manner with the others taking part in your project? And, additionally, do you want to take advantage of the vast library of SketchUp components available through the Google 3D Warehouse without having to rescale them? In that case, start by setting the units of measurement of your model. To do this, click on the Window menu and choose Model Info. In the dialog box that appears, select Units from the left-hand column and choose the units that you will be working with in your model. You also have the option at this point of specifying the precision of the units of length and angle.
Info
SketchUp does not handle multiple decimal places very well. If you are working on an object at very small scale, you should choose a more appropriate smaller unit that will allow you to work with whole numbers.
Creating the Layers That You Will Use the Most
If, in your work, you regularly use the same layers, creating them in the template file means that you will not have to re-create them all over again for each new project. To add new layers, go to the Window menu and call up the Layers palette. Click on the Plus icon to add a new layer, making sure you put a meaningful name in the name field.
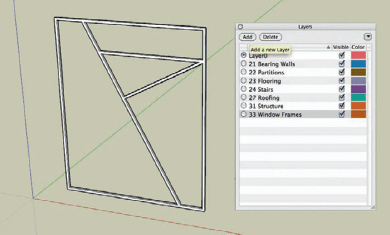
OVERVIEW FIG 1.1 Adding a layer.
Tip
Many practices have standard naming conventions for layers used in models across all the programs that are used in the office (31 Windows, 47 Door Furniture, etc.). Manually entering the name of a layer each time that you need it is tiresome and a potential source of errors. Furthermore, you do not want to overload your Layers palette by systematically adding all the types of layers used by your office in your template file. To automate the creation of layers, guaranteeing the correct name, follow these instructions:
Next page





![Robin de Jongh [Robin de Jongh] - Google SketchUp for Game Design](/uploads/posts/book/119411/thumbs/robin-de-jongh-robin-de-jongh-google-sketchup.jpg)
