Credits / Copyright Photo Editing Basics by Margaret Brown Photo Editing Basics is a section from Mastering Digital Photography guide (see details at www.photoeguides.com .) All content in Photo Editing Basics is protected under copyright and cannot be reproduced in any form without written consent from the publisher. Legal Notice click here . Published July 2011.
Media Publishing Pty Limited
ABN 86 099 172 577
Office 4, Clontarf Marina
Sandy Bay Road
Clontarf
NSW 2093
Australia Email:
Website: www.mediapublishing.com.au www.photoeguides.com www.photoreview.com.au
Introduction Editing is integral to successful digital photography. Being able to adjust your photos so they closely resemble the subjects you photographed, crop out unwanted intrusions and resize image files for easy and efficient sharing are vital skills for everyone who uses a digital camera. Fortunately, even the simplest image editors provide controls for cropping and resizing, brightness and contrast adjustments plus some basic colour adjustments. Most also include automated tools for correcting red eyes in flash shots and sharpening images. In this chapter well look at how to use these tools before proceeding to more sophisticated functions that can help you to produce better-looking prints.
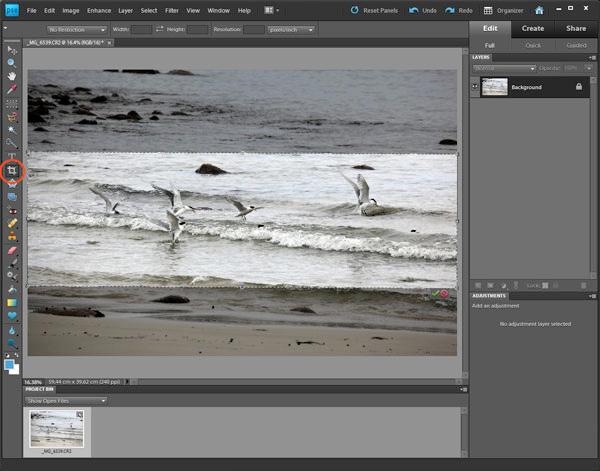
Cropping Cropping involves trimming away unwanted portions of a digital photo. The tool is usually shown by an icon looking like a pair of scissors. When you have image files printed at a photolab or on a snapshot printer, the image aspect ratio is different from the papers aspect ratio. Unless you allow for white borders around the image, the image must be cropped. Many photographers regard cropping as a technique that can make or break a photograph and devote considerable thought to deciding what looks right. Regardless of the reason for cropping, be clear in your mind about exactly why the image must be cropped. This will help you to decide what to trim away and what to keep. Cropping inevitably cuts away image data so you should start thinking about the key elements in a shot when you take the picture to reduce unnecessary data loss. Its better to move (or zoom) in closer to the subject, frame it tightly and keep your images at high resolution than to take the shot with the main subject surrounded by wasted space that must be cropped away. Consider the following when planning a crop: Crop for interest. Focus on the subject that really matters and discard irrelevant distractions.

Using the cropping tool (circled in red) to improve the composition of a shot containing a substantial amount of irrelevant detail. The areas of the picture that will be trimmed away are shaded in grey.

The end result after cropping. Crop for sharpness. Make sure the cropped area is really sharp before committing to the crop. Crop for drama and impact . Its OK to trim away large areas of detail-free sky and create a panorama that concentrates on the foreground and horizon. Crop to straighten . When cropping to straighten skewed horizons, use the arbitrary or free rotation tool to turn the image until the horizon is level. Then apply cropping.

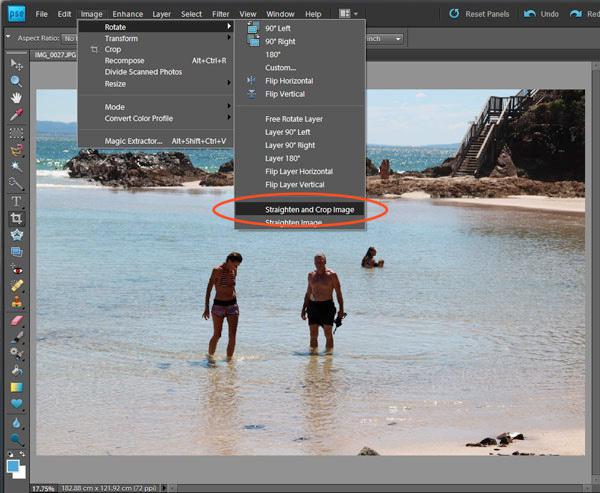
Some image editors include a special cropping tool for straightening horizons. Dont over-crop . Remember the more you trim away, the more pixels are discarded. Always be aware of the effect this can have on your ability to print the image.
Resizing The main reason for resizing digital images is to share them with family members and friends, either via emails or on social websites. Some digital cameras will do this for you and save the images as separate files. But its just as easy to do the job with editing software. Different viewing devices have different requirements for displaying images. Use them to decide how small a resized image should be. The most popular sizes are as follows:

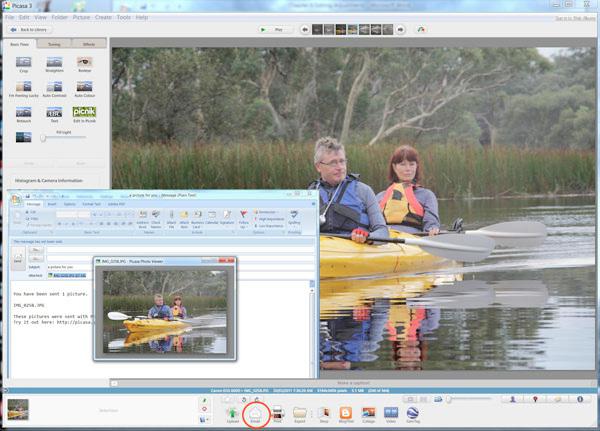
Picasa 3 makes resizing easy and will automatically set the correct pixel dimensions and image size for selected applications. Clicking on the Email icon (circled) below the image resizes the image and opens an email in your normal email program. Buttons are provided for uploading and printing as well. 320 x 240 pixels (QVGA) for handheld devices like camera-phones; 640 x 480 pixels (VGA) for small, standard TV sets and older 4:3 computer monitors; 1024 x 768 pixels, the maximum size for posting on social websites; Between 1280 x 720 pixels and 1920 x 1080 pixels for widescreen TV sets.

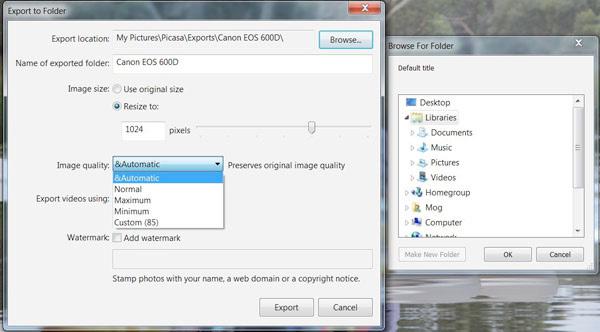
Selecting the Export button in Picasa 3 lets you controls the size and quality of resized images before they are exported to a folder you select.
Brightness, Contrast and Colour Adjustments Even the simplest image editors provide settings for fine-tuning brightness, contrast or colour. However, the range of adjustments is smaller in simpler applications and your ability to controlthem is less.

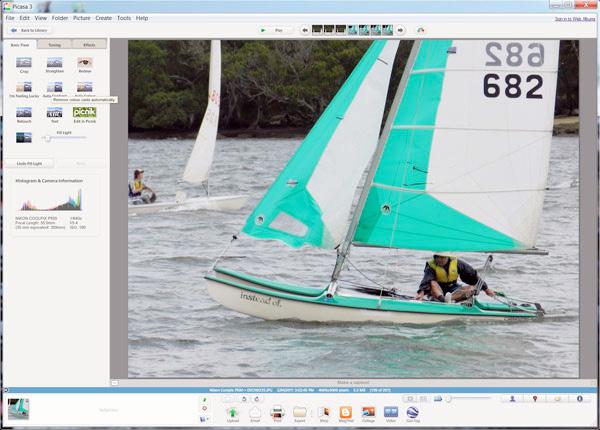
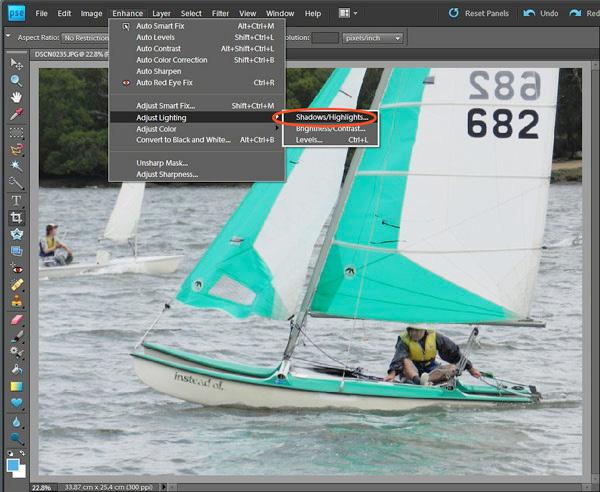
Although a simple program like Picasa 3 provides contrast and colour adjustments plus a Fill Light setting for brightening shadows, the adjustments are applied uniformly across the image. No facilities are provided for selectively brightening shadowed areas, such as the catamaran sailor in the picture shown above.

A more powerful image editor like Photoshop Elements supports a wider range of adjustments and includes tools (circled in red) for selectively brightening shadowed areas without changing the rest of the image.
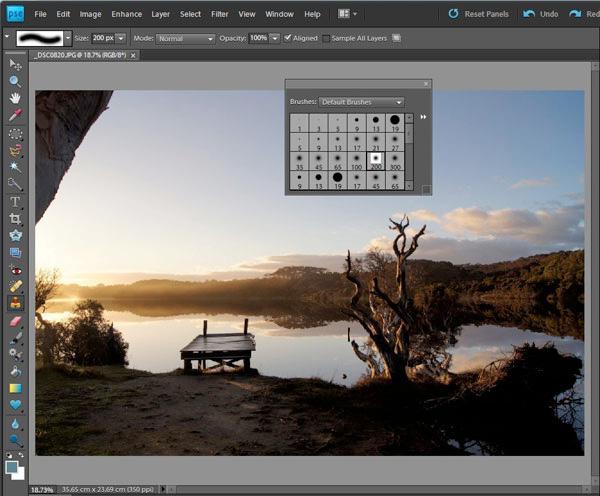
Cloning The cloning tool, which is indicated with a rubber stamp icon, provides an easy fix for images containing elements you would like to remove in areas that cant be removed by cropping. It works by copying a selected area and repeating it in a new section of the image. You can usually choose the size of the cloning brush and determine whether it has hard or soft edges. Most software will also let you adjust the strength of the copying so you can let the layer beneath the cloned area show through.

In this illustration, we want to remove the dark area in the upper left corner of the picture without cropping away the area below it. Overlaid on the image is the brush selection tool.

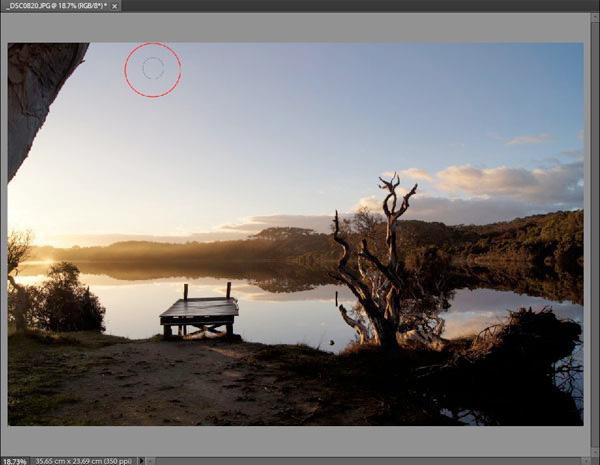
The selected area to be copied is circled in red.

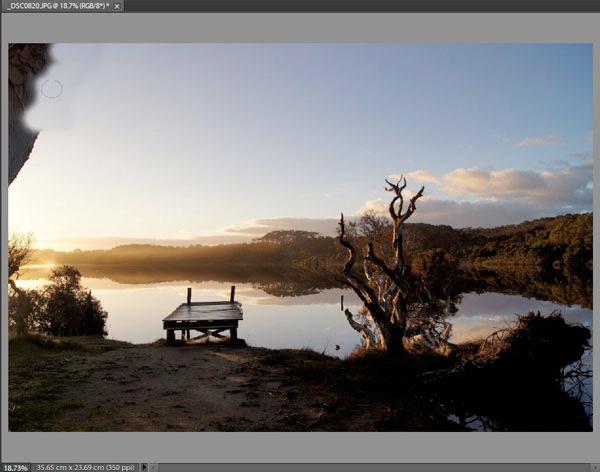
Using the cloned area to replace the unwanted area with sky.


