Creative Photography Ideas Using Adobe Photoshop
MONO EFFECTS AND RETRO PHOTOGRAPHY
TONY WOROBIEC
For David, Lucy, Owen and Morgan
ACKNOWLEDGMENTS
As ever, when attempting to produce a book of this nature, I am dependent on the help and expertise of a variety of people. I am particularly grateful to Freya Dangerfield who initially commissioned this book, and to the constant guidance I received from Verity Muir and Hannah Kelly. Jo Lystor has done a great job designing this book. It was always going to be a complicated task but she really has established a wonderful sense of clarity and order. I look forward to doing more books with her. Gratitude is also owed to Ame Verso whose remarkable editing skills once again appear to have changed a pigs ear into something resembling a silk purse.
I must also thank several close friends who helped in various ways: to Susan Brown for offering guidance with the several high-key techniques, to Ken Hawkins for arranging the lighting for the studio shots, and to Graham Dew who produced the images and text for the excellent workshop on Joiners. The day I spent with Greg Duncan proved particularly useful especially with regard to plug-in filter options, however I must reserve special thanks to my good friend Keith Smith who patiently read through the text and as a consequence made many very useful changes and corrections.
I would also like to thank the numerous individuals who kindly agreed to model, particularly Christina L. Green, Olivia Ames, Juliet Barry, Roberto Dominguez, Josh Prior, Louisa Riddington, Will Spackman, Rebecca Statham, Terry Wareham, Catrin Waugh Baker and finally Rhiannon Waugh Baker. I am sincerely grateful to you all.
Mono Effects
One of the best ways of changing an image is to convert it to monochrome. We live in a world of colour, so making that change to black and white immediately introduces a certain abstract quality. But more importantly, by producing monochromatic images, we are reconnecting with a rich tradition that goes back to the dawn of photography. Colour has been with us for a long time and yet the allure of black and white remains as strong as ever.
Converting a File to Monochrome
Ironically it is far better to convert a RGB file (ideally a Raw file) to black and white than it is to use the monochrome facility on your camera, as in this way you are retaining the full image quality. The simplest method for converting an RGB file to black and white is either to desaturate the image or to convert it to Grayscale. Neither of these produce satisfactory results; I would suggest that you opt for one of the following methods instead.
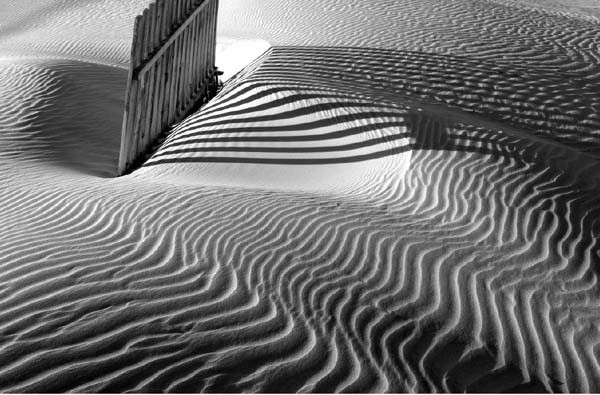
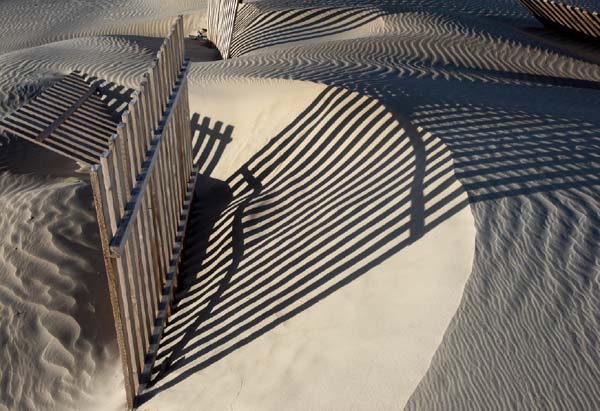
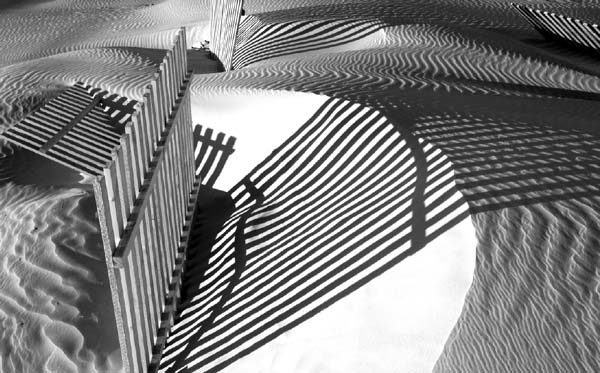
Start image 1. Often the most difficult task is identifying a file that will make a good monochrome. The strong tonal contrast, the obvious graphic qualities and a general lack of colour would suggest that this should translate well as a black-and-white image.
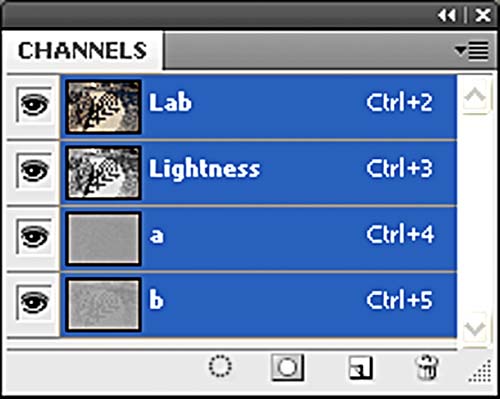
Method 1: Convert to Lab Color. An interesting, and quite a popular method that many Photoshop users prefer, is to use Lab Color; this should be available on most versions of Photoshop. Open the Channels palette for reference. To convert your file, go to Image > Mode > Lab Color. This has the effect of separating monochrome from colour, which should be visible in the Channels palette.
To remove the colour information, select the Lightness Channel, but then convert the image to Grayscale. This method offers advantages over simply converting the image to Grayscale as it retains good shadow detail and exceptionally smooth midtones.

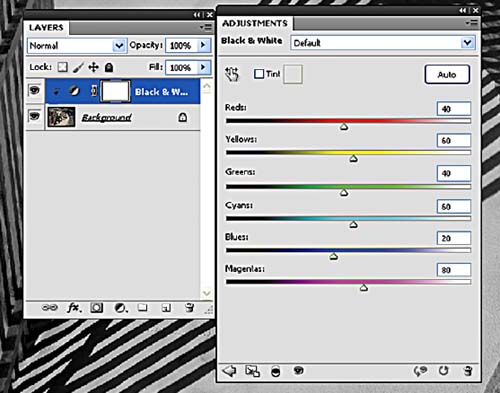
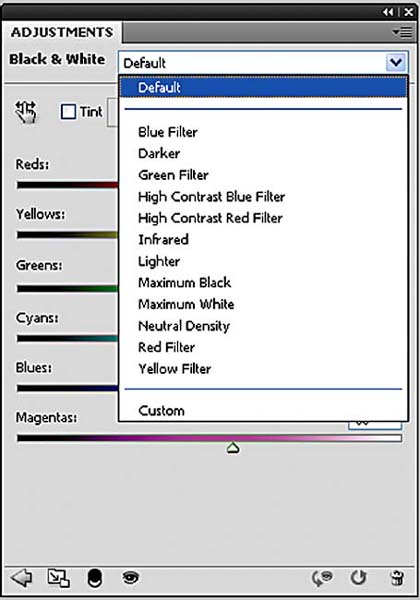
Method 2: use the Black and White command. All Photoshop versions from CS3 onwards feature the Black and White command. To access it, make an Adjustment Layer and select Black and White. This dialog offers six sliders; Reds, Yellows, Greens, Cyans, Blues and Magentas; these allow you to fine-tune the tonal values of your converted black-and-white image. So, for example, if you want to lighten or darken a blue sky, use the Cyans and Blues sliders. The principle is very similar to Channel Mixer except that the Black and White command adjusts the actual colours in the image. Put simply, when using the Red slider in Channel Mixer, all the colours are adjusted to a greater or lesser degree. However, when using the red slider in the Black and White command, Photoshop is able to identify only those parts that are red and responds accordingly. This command also has a useful range of Default settings that you may wish to experiment with; they replicate the effects of a red, yellow, green or blue filter, which can prove particularly useful.


Finished image 1. The high contrast, coupled with the strong interplay of light and dark, help to make this a successful black-and-white image.
TIP
If you randomly select and desaturate an image you might be disappointed; what works well in colour will not necessarily work as a monochrome. Use the cameras monochrome option, and if you like what you see, retake the image in RGB, but convert the image in Photoshop. If you are shooting Raw, setting the camera to Black and White allows you to see the image in mono but still retain it in RGB.
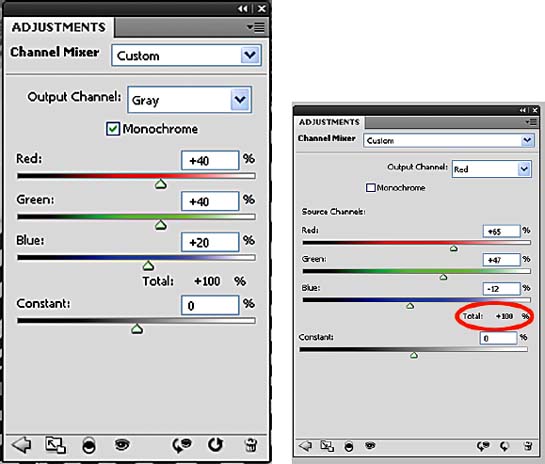
Method 3: Use the Channel Mixer. If your version of Photoshop does not include the Black and White command, a good alternative is to use the Channel Mixer. This also retains the image in RGB.
Step 1. Go to Image > Adjustments > Channel Mixer. If your version has Channel Mixer as an Adjustment Layer, it is preferable to use that instead as the changes can be made non-destructively. Select the Monochrome box and the image will immediately default to black and white. By moving the three colour sliders, you are able to adjust the tonal values of each of the colour channels. Rather than move the sliders randomly, think carefully how each of the channels can alter the tonal values of the image. The blue slider, for example, will greatly alter the tonal values in a sky picture.
Step 2. It is important that the total percentage of all three channels adds up to 100%. Less than that and you compromise shadow detail; more than that and highlights can appear burnt out.

