Microsoft PowerPoint 2022
For Beginners and Advanced Users
A Complete Step by Step Illustration User Guide for Mastering PowerPoint 2022 for All Users
MATT VIC
Copyright 2022 by Matt Vic
All rights reserved. No part of this publication may be reproduced, distributed, or transmitted in any form or by any means, including photocopying, recording, or other electronic or mechanical methods, without the prior written permission of the publisher, except in the case of brief quotations embodied in critical reviews and certain other noncommercial uses permitted by copyright law.
CONTENT
INTRODUCTION
PowerPoint 2022 software is designed to help you in creating and designing a presentation that will be a center of attraction to the viewer and superb performance to the audience. it wont just help you to create a presentation but will also allow you to display such a presentation.
That is why you will need a good illustration user guide that will give you the exact level of skills and experience for creating and designing matchless presentations. It will open your insight into the hidden secret you need to fabricate an amazing presentation that is capable of capturing the interest and attention of all levels of viewers.
This user guide caters to all levels of users starting from the newbies to experts in the field of presentation. You will get started by examining the interface of PowerPoint 2022 and then moving to add new slides and selecting a befitting slide layout.
It also addresses how to hide/show slides and note pane when it is necessary, you will as well be carried along on the manner of selecting, copying, moving, and deleting one or more slides. You will also understand different views that are available in PowerPoint and when you have to switch to any of them, you will also be taught how to insert multiple pictures and then convert them to a photo album presentation, and carry out editing on it to make it an awesome photo album presentation
Furthermore, you will be acquainted with all the techniques you should know for creating an exceptional presentation, for instance, playing and adjusting both audio and video clips on a slide, voice sound recording for slide narration, transition, and animation on a slide. You will also learn rehearsing and timing of a presentation, starting and ending a presentation.
The user guide will provide you with the experience you needed to make the slide background look awesome without distorting the appearance of the text while customizing the slide background.
CHAPTER ONE
LAUNCHING TO POWERPOIN T AND CREATING A NEW PRESENTATION
To begin any task on PowerPoint, you have to create a new presentation by launching the PowerPoint application either from scratch which is also known as a blank document, or from the preset template that comes with a specific model and formatting depending on the type template you select.
- Click on the start menu at the bottom left of the window or strike the window key on the keyboard.
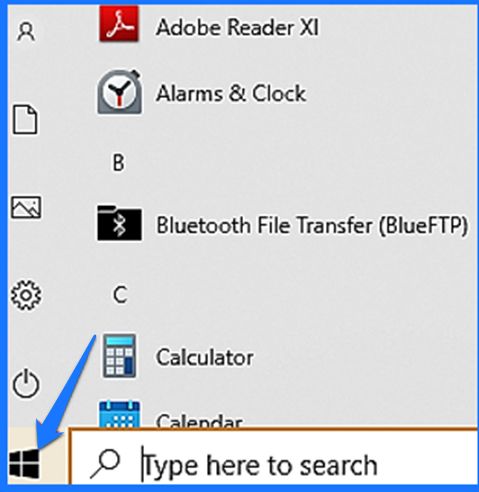
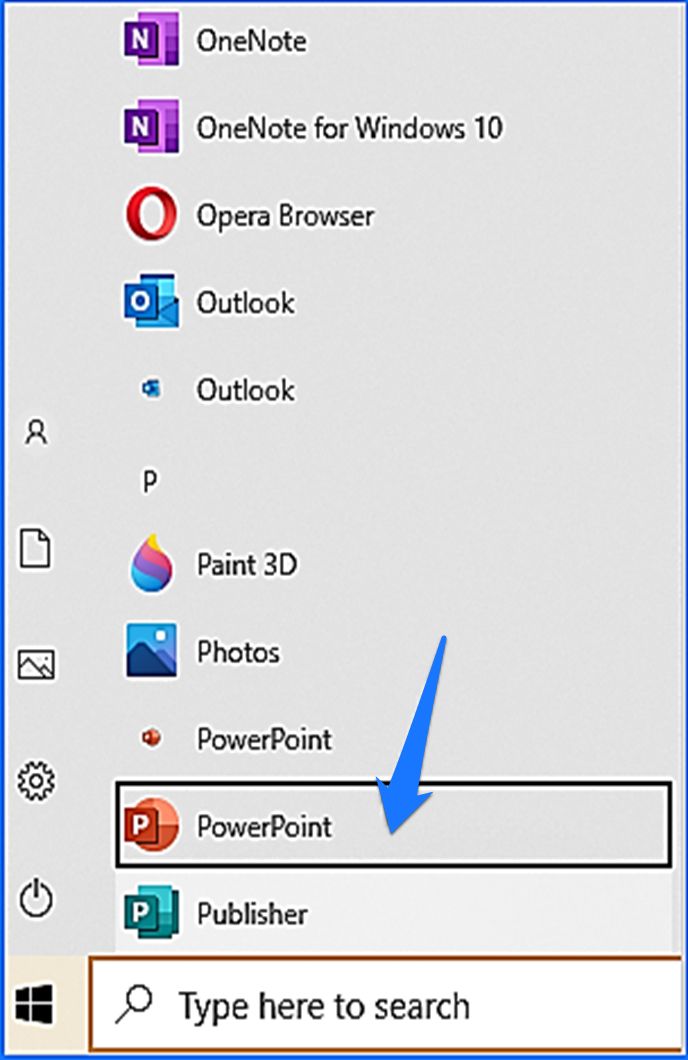
- Move to the application list and scroll through the available apps to search for the PowerPoint icon .
- Click on the PowerPoint icon to launch the application
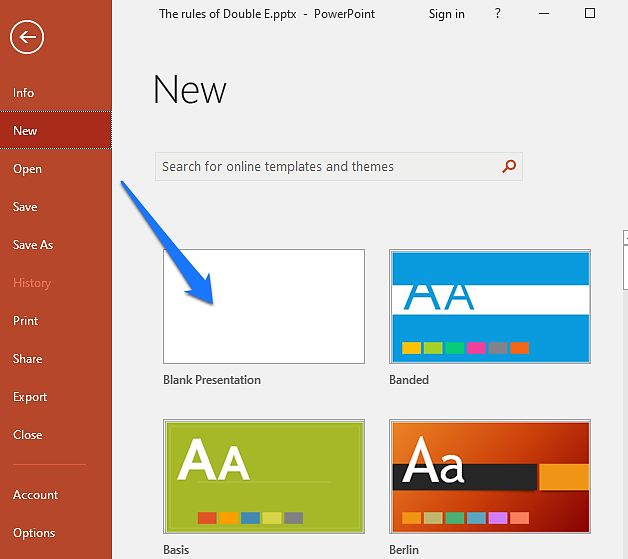
- Immediately you click on the PowerPoint on the Microsoft icon, you will see the opening screen of the PowerPoint, then tap on Blank Presentation to create a new presentation and begin structuring a presentation.
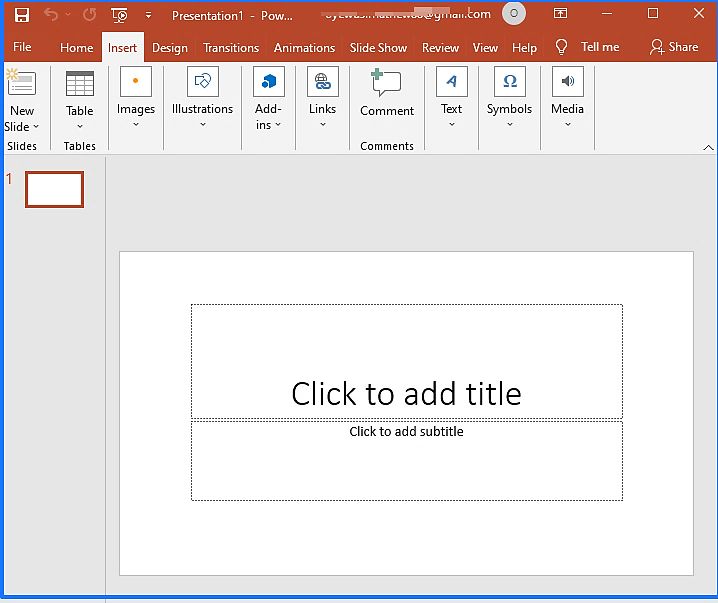
- The result of the above is the new blank presentation document on the main screen as it is shown below.
CREATING POWERPOINT FROM THE PRESET TEMPLATE
To create PowerPoint with a preset template that has a specific PowerPoint model and formatting, simply:
- Click on any available template of your choice from the start or Open screen.
- You can as well search for more templates by making use of the search box on the start screen .
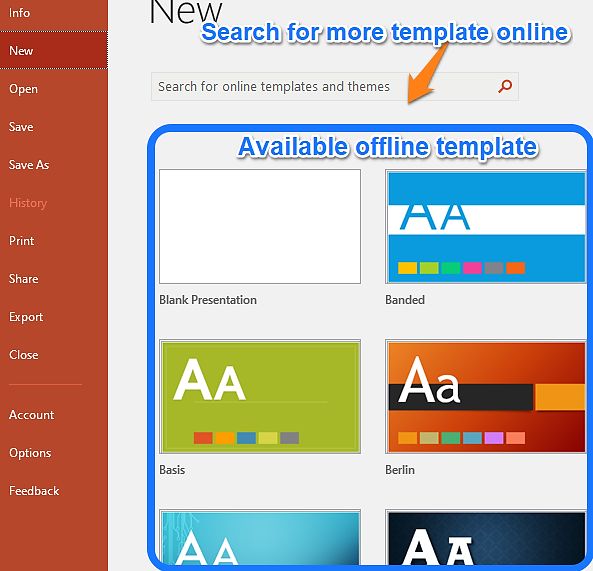
- As soon as you clicked on a particular template, you will be shifted to the next screen as it is shown below.
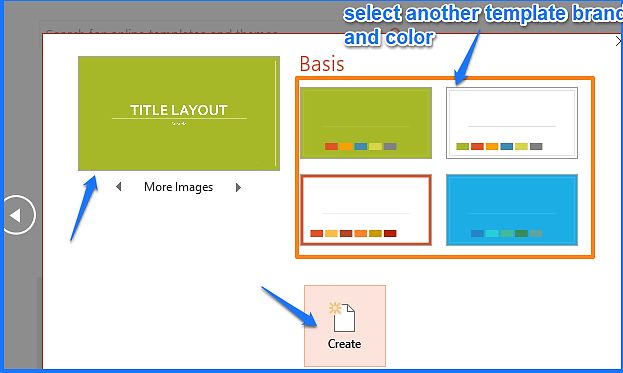
- If you are okay with that color, tap on create , but if not, you can click on other brands of color , then tap on Create .
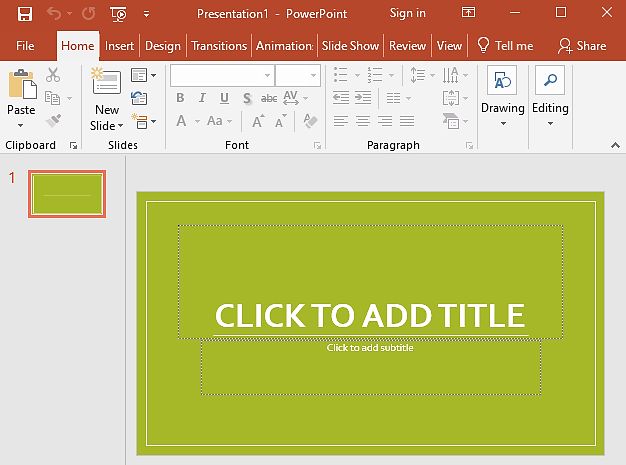
Note: You can create a personal template for yourself and save it, it will also be displayed on the start screen under the personal tab, the personal tab will not come forth on the main screen until you create at least a single template.
STUDYING POWERPOINT USER INTERFACE
Immediately you press Esc or Blank presentation from the start screen, you will be taken to the main screen which is also known as User Interface where all PowerPoint works will be executed.
- The Title bar: it shows details or title name of the PowerPoint presentation you are working with, it will be in form of presentations 1, 2, 3, and so on by default which means you have not saved it with any name but immediately you save it with a name such default name will change to the new name you save it with.
- Quick Access Toolbar (QAT): this is the toolbar that allows you to add some specific command that you always use into the (QAT) for quick access whenever the need to use it arises, some commands are inside QAT by default such as redo, open, save, and so on.
- Ribbon: it contains the major command of PowerPoint applications that are grouped into tabs according to a particular function that each tab is designed for, each tab also has various sub-grouping under them, those sub-grouping will appear as you click on the main tab such as Home tab, File and backstage tab, Animation tab and others.
- File menu and backstage tab: this is one of the Ribbon tabs but it is a special tab because it will switch the main screen view to a backstage view as soon as you click on it as it is seen below and it contains various commands such as Save, Open, print, Option and many more.
- Slide Area: this is the main working area, it is divided into title and subtitle place holder, it is the area that shows the active slide.
- Slide pane: it displays thumbnails of all slides in the active or open slide presentation.
Note: if your slide pane is hidden, click on the View tab and select the Normal view button to make it visible.
- Task pane: it usually comes up when you select some specific sub-ribbon tab, it will show the tools for the sub-ribbon selected, for instance, if you click on the animation pane from the Animation tab , the task pane will show the t ools that are available under animation pane as it is seen below.


