Chapter 1. Sci-Fi Pistol - Creating the Basic Shapes
In this section, we'll cover a few introductory topics, discuss our goals for the project, and then create the basic shape of a pistol. As we do this, we'll use a number of different tools and modifiers. At the end of this section, we'll be ready to move on and detail our pistol:
- A project overview
- Creating the barrel
- Modeling a handgrip and other pieces
Welcome to Blender 3D Incredible Machines .
In this book, we'll be working through a series of Blender projects aimed at increasing your modeling, texturing, and rendering skills.
Before we jump right into it, there are a few quick things that we need to cover.
First of all, I should mention that this book isn't meant for absolute beginners.
It would be great if a single volume could take you from knowing nothing about the software to cranking out sophisticated 3D models; unfortunately, this is not realistic. Blender's an incredible piece of software, but it's also complex. The sheer number of features means that learning to use it (or at least, learning to use it well ) is a long-term endeavor. The best Blender modelers in the world will tell you that they always discover something new.
So, who exactly is the target audience?
In terms of skill level, this book will be most useful to intermediate users. Among other things, an intermediate user can do the following:
- Navigate comfortably in 3D space
- Switch between different views
- Add objects to a scene
- Move, rotate, and scale objects
- Open, close, and save files
- Switch between the Object and Edit modes
- Switch between face, edge, and vertex selections
- Add modifiers
- Drink large quantities of coffee
This book is called Blender 3D Incredible Machines for a reason. We're going to focus on building sophisticated mechanical models here, which means that invariably, there are certain topics that we won't cover.
There's nothing in here about creating realistic fur or setting up materials to simulate human skin. While these are fascinating topics, they're beyond the scope of this book (and frankly, I don't feel qualified to teach you about them).
As you get started with our first project, you'll find that the instructions are detailed and specific. However, as we move further along, this will become less true. This avoids repetition and also allows us to pull back and see the big picture . We can start focusing on workflow and project management, which is critical when building complex models.
There's one last thing I'd like to mention before we jump into it. In a lot of Blender tutorials, you build models based on reference or background images. This is incredibly useful when you model a real object, but everything in this book is fictional. We want to focus on technique and workflow here and leave ourselves some flexibility on the designs. Therefore, we're going to build everything in a freehand manner. However, if you'd prefer to work from a reference image, blueprints for all the models are provided at the back of this book.
This pretty much wraps up our introductory topics...so, if you're ready, let's get to work!
A project overview
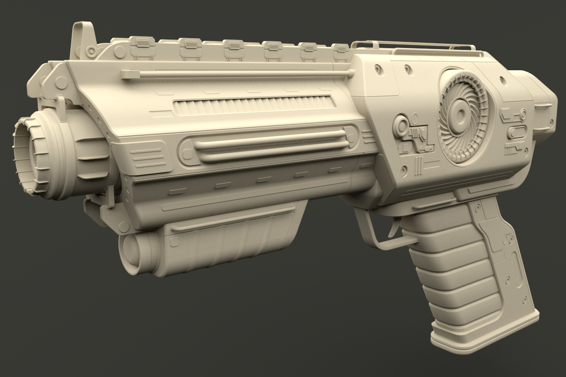
For our first project, we'll be modeling a high poly, sci-fi weapon. It's approximately the same shape as a modern day handgun, but it gives us the flexibility to be creative and explore different modeling techniques.
Here's an example of what the final model will look like (without materials and textures):
In this first chapter, we'll create the basic beveled shapes of our gun. We'll start by extruding some basic shapes. Next, we'll add the main body of the gun, then move on to the additional pieces. As we do this, we'll look at a number of modifiers and mesh tools. Specifically, we'll be discussing the following topics:
- Extrusion
- Face Normals
- Tris, Quads, and N-Gons
- Smooth versus flat shading
- The Mirror Modifier
- The Edge Split Modifier
- The knife tool
- The bevel tool
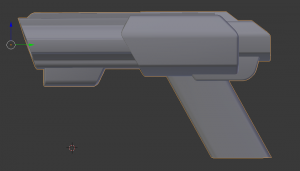
When we're finished with this section, our project will look like this:
If you're ready, let's open a new scene in Blender and get started!
Creating the barrel
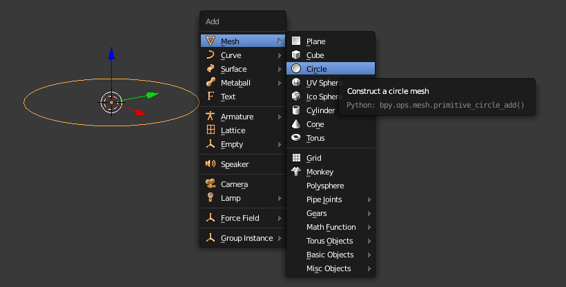
We'll start by adding a circle to our scene (press Shift + A to access the Add menu). By default, circles are added with 32 sides (and 32 vertices). This screenshot will work just fine for us:
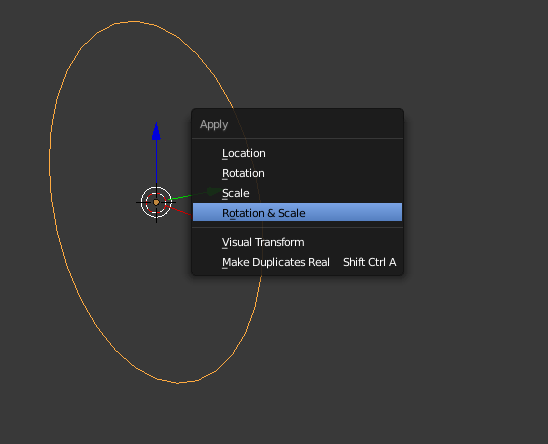
Next, we'll rotate the circle by 90 on the X axis ( R , 90, X , and Enter ). Then, we'll apply our rotation and scale by pressing Ctrl + A and selecting Rotation & Scale . We want to apply the rotation here for Blender to be aware of the object's default orientation. This is relevant to several tools and modifiers that we'll be using. We need to apply the scale for the same reason. For instance, the Bevel tool often doesn't work properly when objects do not have their scale values applied. We'll discuss this in detail in the later sections. For now, go ahead and apply your rotation and scale to the circle as shown here:
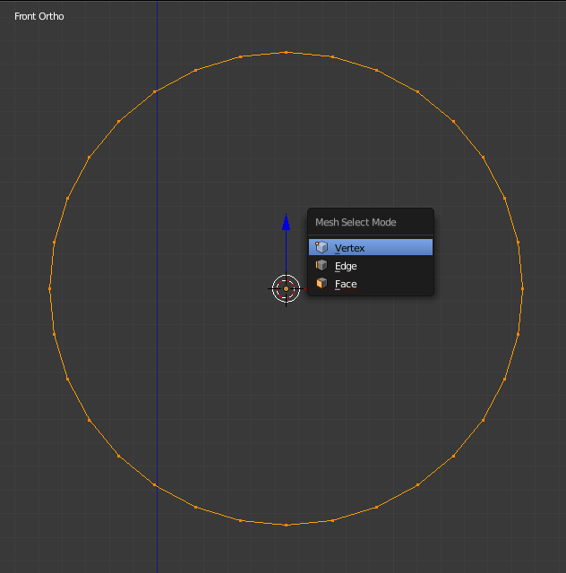
Now, we'll switch to the Front view with 1 on the numpad. We'll then go into Edit mode by hitting the Tab key. Switch to Vertex selection mode by using Ctrl + Tab :
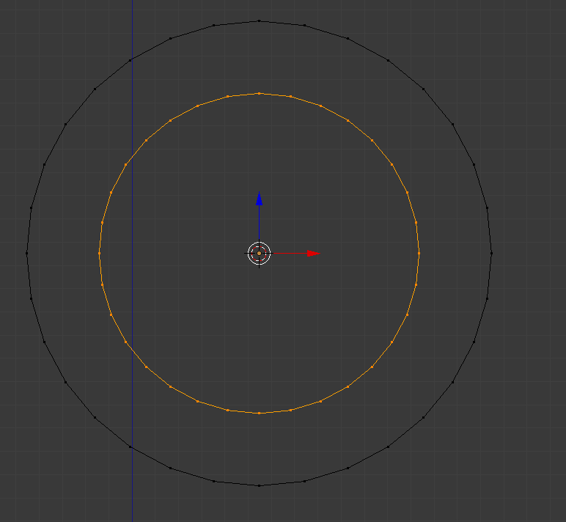
Next, we'll use Shift + D to duplicate them. We'll scale the new circle down using the S key and drag the cursor to the middle of the circle. This smaller circle will form the inside of the barrel and allow us to make changes to the outer circle without losing track of the center (and vertices) of the original one.
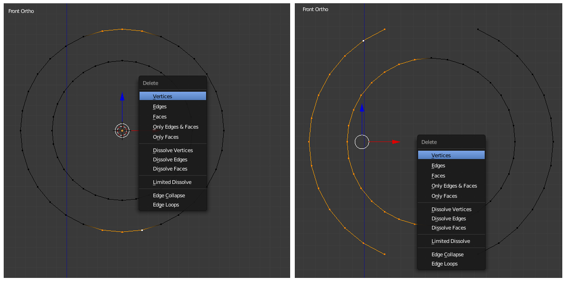
Next, we'll start deleting some vertices that we don't want. The outside of the barrel will not be a perfect circle, so we'll need to change it. First, we'll delete three vertices at both the top and bottom of the circle. To do this, we'll select the ones that we don't want any longer, and then hit X . From the pop-up menu, select Vertices . This will give you a good idea of how much of the original circle is remaining. You can select more or fewer vertices depending on the desired look.
Next, we'll delete half of both the circles:
This will allow us to add the Mirror modifier. This modifier will duplicate half of an object across its axis. Using it, we can model one side of the gun, and Blender will automatically fill in the other side to match it. Obviously, this will save us a lot of time. In order to do this, go to the








![Oliver Villar [Oliver Villar] - Learning Blender: A Hands-On Guide to Creating 3D Animated Character= s, Second Edition](/uploads/posts/book/124038/thumbs/oliver-villar-oliver-villar-learning-blender-a.jpg)
